5
2. Set the transmitter input level to the minimum setting.
3. Set the receiver volume control to about three quarters the volume level.
4. Adjust the transmitter input level to obtain the highest sound quality without distortion.
5. Adjust the receiver volume control to balance the rear sound with the rest of the speakers.
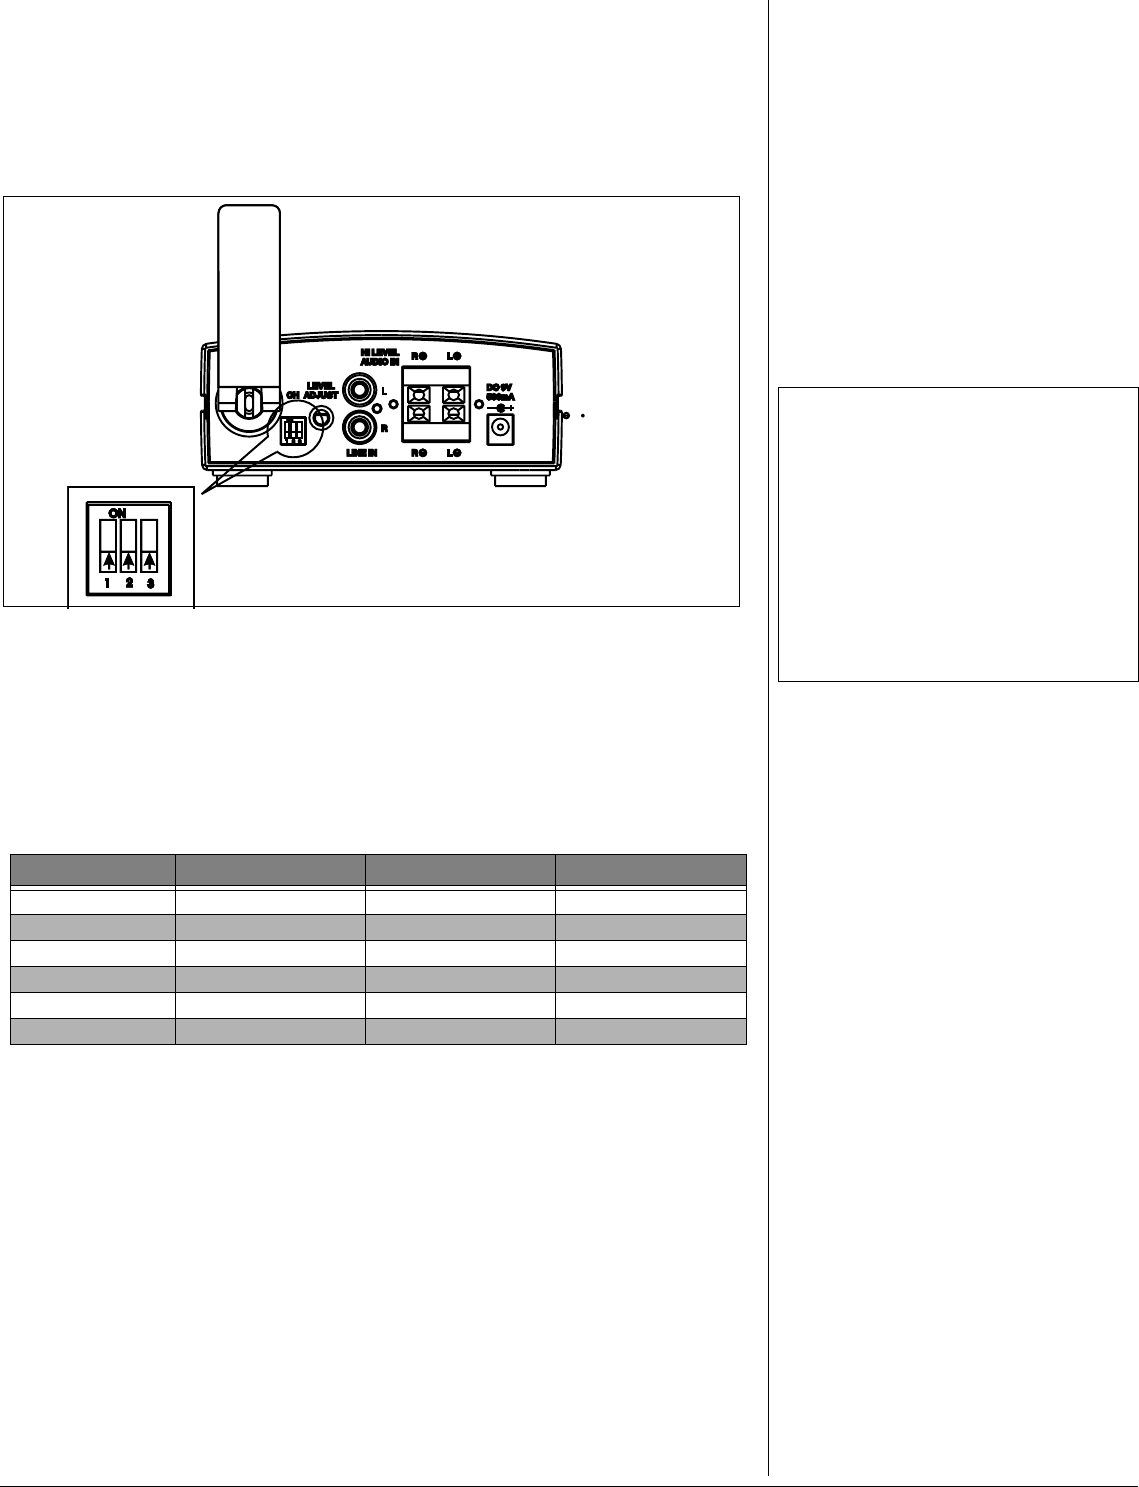
CHANGING THE CHANNEL FREQUENCY
To minimize interference from other 5.8GHz systems such as a 5.8 GHz cordless phone or a
wireless LAN in your environment, this system allows the user to select one of six preset
channels. If you should experience interference from another 5.8GHz system, select a different
transmission channel. The channel selector is located on the back panel of the transmitter.Ô
1. With both the receiver and transmitter plugged in and powered on, push the power button
to put the transmitter in standby mode.
2. Use a pointed object such as a pen or straightened paper clip to set the channel selector
on the transmitter to one of the six available channels.
3. Press the power button again to set the transmitter so that the unit will reset when it powers
back on.
4. The receiver will automatically search for the selected channel. The green LED on the front
panel of the receiver will flash to indicate the receiver is searching for the transmitter signal.
5. Keep switching channels on the transmitter until the receiver has a clear signal and the
green LED glows brightly.
SETTING A PERSONAL ID CODE
If you should have another unit or system operating in your home, this feature has been added
to ensure that the transmitted signal is only received by the receiver set to the same code as the
transmitter. In order to receive audio signal only from your transmitter, you have the option of
selecting from 256 possible combinations, to set a personal ID code for your wireless system. If
you have two transmitters setup near each other, you may also need to change the channel
frequency for better reception.
1. Make sure both the transmitter and the receiver are unplugged from the AC power source.
Channel # Position 1 Position 2 Position 3
1ON ON ON
2 OFF ON ON
3ONOFFON
4 OFF OFF ON
5ON ONOFF
6 OFF ON OFF
Ô NOTES Ô
• Be sure to turn the transmitter power back on
after you have changed each channel. The
green led on the receiver will also flash when
the transmitter is in standby mode.
• The receiver’s green LED will vary from a
very dim, flickering green when the signal
quality is poor to a bright, steady green when
the signal is strong.
• If the receiver fails to find any of the available
six channels, try cycling the receiver’s power
off and on, and repeating steps 1 through 4.
TRANSMITTER
REAR VIEW
