


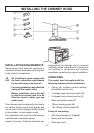


Note: If the hood is to be installed onto a
hollow construction or plaster or partition
board wall then special fixing screws will
be required (not supplied).
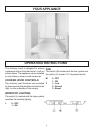
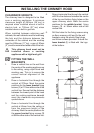
FITTING THE CANOPY
HOOD
1. Rotate the adjusting screws (R) on the
canopy (C) to about halfway.
2. Hook the canopy (C), onto the wall
fixing bracket (1) and push down until
the canopy adjusting screws (R) rest
on the lugs.
3. To align or adjust the height of the
canopy, use the two adjustment
screws (R).
4. Before fitting the chimney to the
canopy make the electrical connection
as described in the section titled
“ELECTRICAL CONNECTION”.
5. When the electrical connection has
been made, test the three speed fan
and worktop illumination.
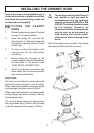
DUCTING
The hood is more effective when used in the
extraction mode (ducted to the outside).
When used in the extraction mode ensure the
ducting spigot has been correctly fitted.
When used in the extraction mode ensure the
ducting spigot has been correctly fitted as
illustrated opposite.
The ducting flange should be sleeved over
the spigot when using 125mm (5ins) ducting
as the European ducting spigot is 120mm.
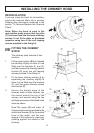
INSTALLING THE CHIMNEY HOOD
The ducting used must be125mm (5
ins), flexible or rigid and must be
manufactured from fire retardant
material, produced to BS.476 or DIN
4102-B1. The choice should be made
by the installer. However, we
recommend flexible ducting should
only be used as an accessory as
rigid ducting will provide better
performance while reducing noise
levels.
When the cooker hood is ducted to the outside
the charcoal filters must be removed.
12