


Downdraft Ventilators
Page 7
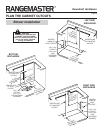
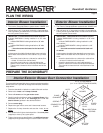
1. Cut hole in cabinet as well as holes in wall or floor as
necessary.
2. Mount the roof or wall cap and work back towards the cabinet,
attaching all ductwork, elbows and transitions as previ-
ously planned. Tape all ductwork connections to make them
secure and air tight.
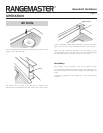
3. Connect ductwork (and transition, if required) to downdraft. If
necessary, LOOSEN nuts and screws that hold the blower in
place, and slide blower left or right to meet ductwork. Re-
tighten screws and nuts.
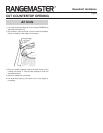
Note: A 3¼" x 10" collar (3¼" x 14" collar for exterior blower)
is provided for installers who prefer to rivet the ductwork to the unit.
This will allow blower to be removed and replaced easily in service
situations without disturbing ductwork.
8" RD. ELBOW
& DUCTWORK
3¼" X 10"
TO 6" RD.
TRANSITION
(3¼" X 14" TO 8"
RD. TRANSITION
FOR EXTERIOR
BLOWER
ç BLOWER è
COLLAR
SCREWS
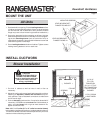
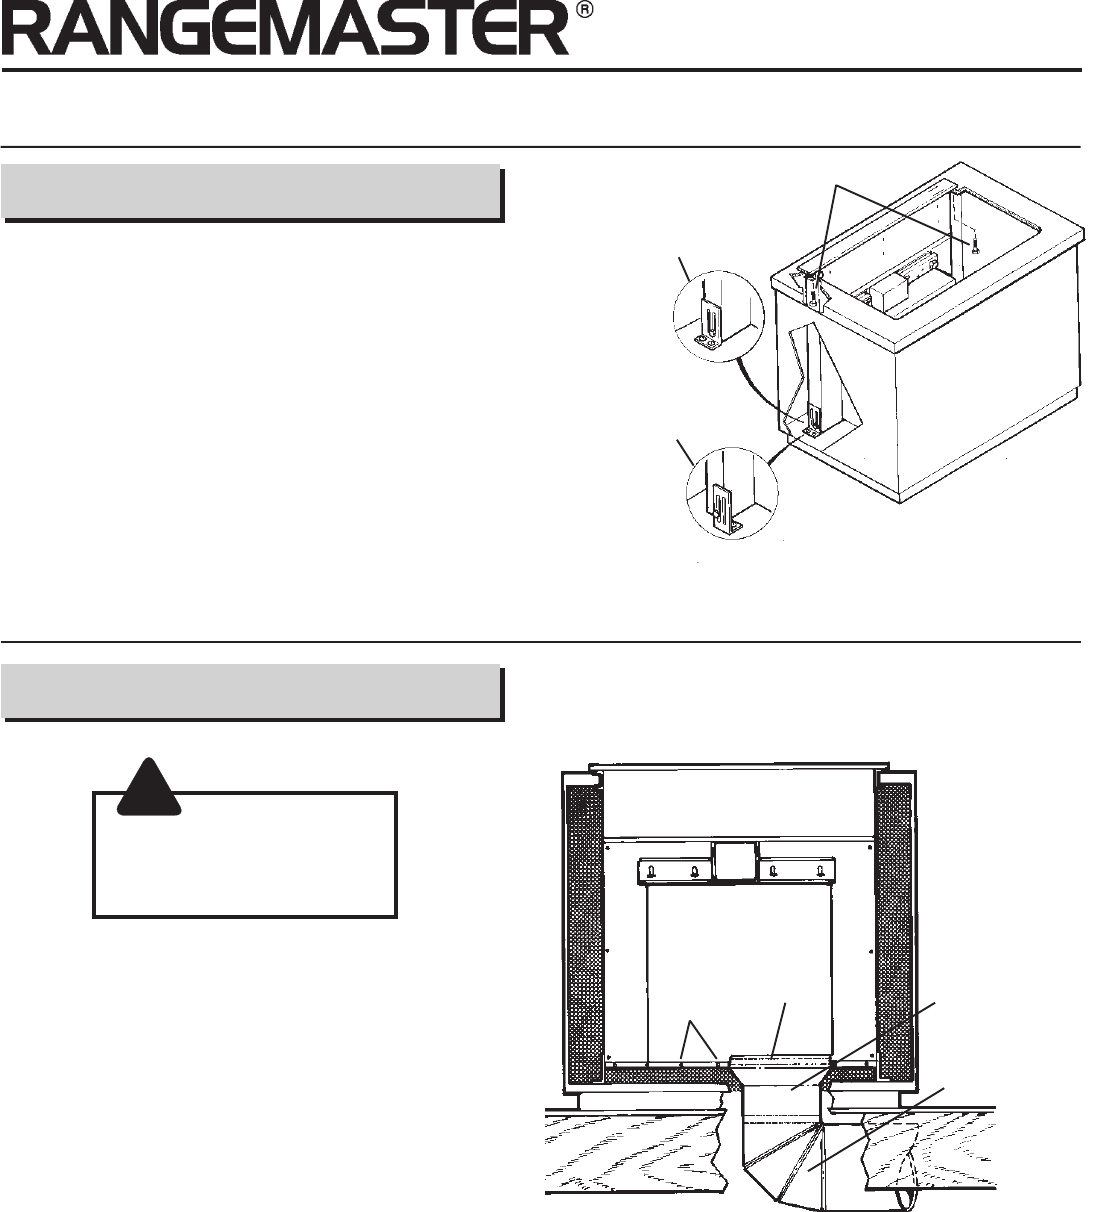
LEVELING BRACKET -
FLANGE FACING IN
LEVELING BRACKET -
FLANGE FACING OUT
MOUNTING SCREWS
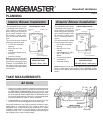
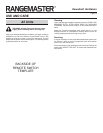
MOUNT THE UNIT
All Units
!
CAUTION:
BEFORE CUTTING HOLE IN
CABINET FOR DUCTWORK,
check for interference with floor
joists, wall studs, electrical
wiring, or plumbing.
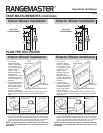
1. Set downdraft into opening. Extend leveling brackets to floor
of cabinet so downdraft sits straight. (Note: Leveling brackets
can be removed and re-attached in other positions. Bottom
flange may have to face inward in tight cabinet installations.)
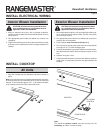
2. Secure the downdraft to the countertop as follows: Hold the
downdraft against the back of countertop cut-out and tighten-
ing the two mounting screws (one on each end of unit) on
underside of countertop. Use a wood shim between screw and
underside of granite countertops.
3. Screw leveling brackets to bottom of cabinet. Tighten screws
holding leveling bracket to unit on each side.
INSTALL DUCTWORK
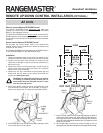
Blower Installation