


4
Mobile use
The Stellar Mobility bag allows the Stellar to be used in mobile situations, eg, in a
wheelchair. For setup and correct use, see the Stellar Mobility Bag User Guide. For
extended mobile use, the ResMed Power Station II external power supply unit can be used
as an additional power source. Limitations apply to the use of oxygen with the Stellar
Mobility Bag. For more information, contact your local ResMed representative.
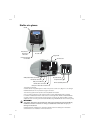
Remote Alarm
The Remote Alarm may be used to transfer audible and visual alarms by a direct cable
connection. For more information on using the Remote Alarm, see the Remote Alarm user
guide.
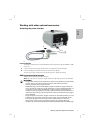
Setting up for noninvasive use
WARNING
• The air filter cover protects the device in the event of accidental liquid spillage
onto the device. Ensure that the air filter and air filter cover are fitted at all times.
• Make sure that all the air inlets at the rear of th
e device and under the device and
vents at the mask are unobstructed. If you put the device on the floor, make sure
the area is free from dust and clear of bedding, clothes or other objects that could
block the air inlets.
• Ho
ses or tubes must be non-conductive and antistatic.
• Do
not leave long lengths of the air tubing or the cable for the finger pulse sensor
around the top of your bed. It could twist around your head or neck while you are
sleeping.
CAUTION
• Be careful not to place the device where it can be bumped or where someone is
likely to trip over the power cord.
• Make sure the area around the device is dry and clean.
Notes:
• ResMed recommends using the AC power cord supplied with
the unit. If a replacement
power cord is required, contact your ResMed Service Centre.
• Place the device on a flat surface near th
e head of the bed.
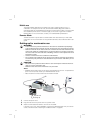
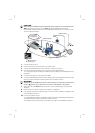
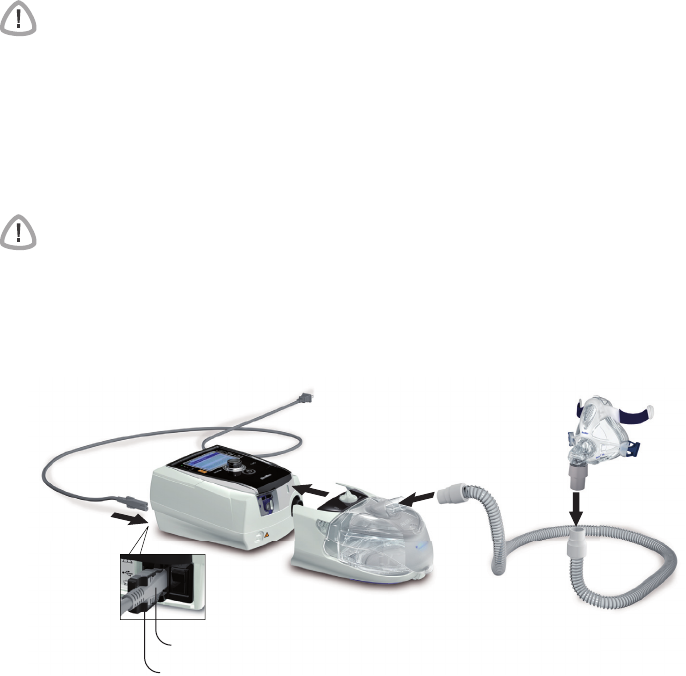
1 Connect the power cord.
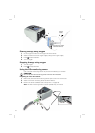
2 Plug the free end of the power cord into a power outlet.
3 Attach the H4i heated humidifier to the front of the Stellar.
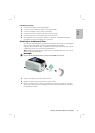
If the H4i is not in use, and if applicable,
connect the antibacterial filter firmly onto the air
outlet of the device (see “Attaching an antibacterial filter” on page 9).
1
2
3
4
AC locking clip
AC power cord
5