23
Mix crust ingredients together and press into a 9-inch greased
cheesecake pan. Attach the Beaters and mix together cream cheese,
brown sugar, cornstarch and corn syrup on Speed 5 for 2-3 minutes.
Continue beating and add the eggs and yolk, one at a time, beating after
each addition on Speed 7. Add the sour cream, vanilla extract and butter
flavoring and mix on Speed 2 for 1 minute. Add the remaining ingredients
and stir on Speed 1 for 1-2 minutes. Pour into the crust. Bake as directed.
Chill overnight.
For topping, stir ingredients together and spread on top of cake while the
topping is still warm. Decorate with pecans. Stir the melted caramels and
the sour cream together; drizzle over the cheesecake. Store in refrigerator.
PIE CRUST
1-1/4 cups all-purpose flour
1/2 teaspoon salt
1/3 cup plus 2 tablespoons shortening
1/4 cup cold water
Yield: 9-10 inch pie crust
Temperature: 400°F/205°C
Time: 17-20 minutes
Attach Cookie Dough Hooks and place flour, salt, and shortening in
Mixing Bowl. Mix on Speed 2 for 2-3 minutes. Add water and continue to
mix for 2-3 minutes on Speed 3 or until dough clings to Cookie Dough
Hook. If dough is too crumbly or dry, add water, 1 teaspoon at a time. If
dough is too wet or sticky, add 1 tablespoon of flour at a time. Roll crust
to fit 9 or 10-inch pie pan. Flute edges of crust by pressing crust to pan.
Prick bottom with a fork several times. Bake as directed and allow to cool
NOTE: Always start mixing with a slow speed setting. Then,
increase the speed setting to match consistency of the
ingredients.
8. Press START/STOP Button once to begin mixing. The LED will
stop flashing and show the speed setting in a constant green.
Upon start-up, the Mixer Motor starts slowly and gently
increases its speed to the selected speed setting. This prevents
ingredients from splattering.
Additional ingredients can be added slowly to the Mixing Bowl
during operation.
NOTE: Never fill the Mixing Bowl(s) more than half full.
CAUTION: Keep hands, hair, clothing, as well as utensils out of
Mixing Bowl and away from Attachment during operation to
reduce the risk of sever injury to persons or damage to the
Stand Mixer.
9. Press either Speed Setting Button to increase speed setting (+) or
decrease speed setting (-) as desired.
10. Press START/STOP Button once. The Speed Setting will flash
and the Mixer will change to Standby Mode. The Mixer will
stop mixing and stay in Standby Mode (speed setting will flash).
Use a rubber or plastic spatula to scrape sides and bottom of
Mixing Bowl, as desired. Press START/STOP Button once to
continue mixing until ingredients reach the desired consistency.
CAUTION: DO NOT scrape sides or bottom of Mixing Bowl while
Mixer is in operation.
11. Once all ingredients have reached the desired consistency,
press START/STOP Button to stop mixing. The green LED will
flash to indicate the Mixer is in Standby Mode.
12. Press ON/OFF Button to
turn the Mixer OFF.
13. Remove plug from
electrical outlet. Gently tug
the cord to fully retract the
cord into the Mixer Stand.
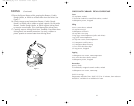
14. Press the Head Release
Button and carefully raise
the Mixer Head.
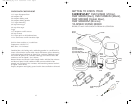
See Figure 6.
MIXING (Continued)
START
STOP
ON/OFF
TILT RELEASE
4
8
12
16
2
6
10
14
LOW HIGH
Figure 6
8
FBW_FSM126M_IB_2-8-04 08/02/2004 14:16 Page 17


