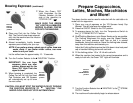
7. Turn the Function Selector from “NEUTRAL” to the “STEAM/
FROTH” Position.
8. The machine will automatically begin to release steam.
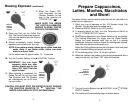
Prepare Cappuccinos,
Lattés, Mochas, Macchiatos
and More!
The steam function can be used to make hot milk for cafe latté or to
make froth for cappuccino.
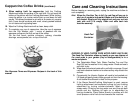
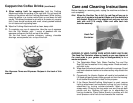
1. Place your cup of espresso on the 123 Spresso handy Cup
Warmer. This will help keep the coffee warm.
2. Press the ON/OFF Switch to the “ON” position.
3. To prepare steam for froth, turn the Temperature Switch to
the “STEAM/FROTH” Position.
4. Slide Frothing Attachment onto Steam Nozzle as far as possible.
The Frothing Attachment fits snugly over the Steam Nozzle.
Always turn small pressure relief hole so that it is pointed
backwards, facing the machine. Swivel the frothing tube outward,
away from the machine and towards you.
Adjust the Frothing Attachment so that it fits down into a heat proof
cup or handled frothing pitcher with cold milk.
5. Fill the frothing pitcher 1/3 to 1/2 full with cold milk.
6. When the machine has heated to the correct temperature and is
ready to froth milk, the Green “GO” Light will illuminate.
9
Function
Selector
STEAM/FROTH
position
•
8
8. Place one Pod into the Coffee Pod
Slot. The Pod will drop down automati-
cally into the machine and the infusion
process begins.
9. Almost immediately, freshly brewed
espresso pours directly into your cup.
Brewing Espresso (continued)
Function
Selector
NEUTRAL
position
Function
Selector
COFFEE
position
IMPORTANT! You can brew
espresso shots one after
another. Always wait for the
Green “GO” Light. That’s the
signal to brew.
11. When brewing is completed, the
Coffee Pod will fall into the Used
Pod Container and 123 Spresso
will automatically set up to brew
the next coffee.
CAUTION: YOU MUST STOP THE WATER FLOW BY TURNING
THE FUNCTION SELECTOR TO “NEUTRAL.” THE
WATER FLOW DOES NOT STOP AUTOMATICALLY.
•
•
NOTE: If you prefer a strong, robust cup of coffee, brew one
ounce shots. If you prefer milder coffee, use more
water to suit your taste.
Let the coffee brew for approximately 10 - 15 seconds.
10. Turn the Function Selector to the “NEUTRAL” Position.
7. When the Green “GO”
Light illuminates, flip the
Function Selector (on the
side of the machine) to
“COFFEE CUP”.
MAKE SURE THE GREEN
“GO” LIGHT IS ILLUMINATED
BEFORE PLACING COFFEE
POD INTO THE MACHINE.


