37_ operating the oven
USING THE OVEN RACKS
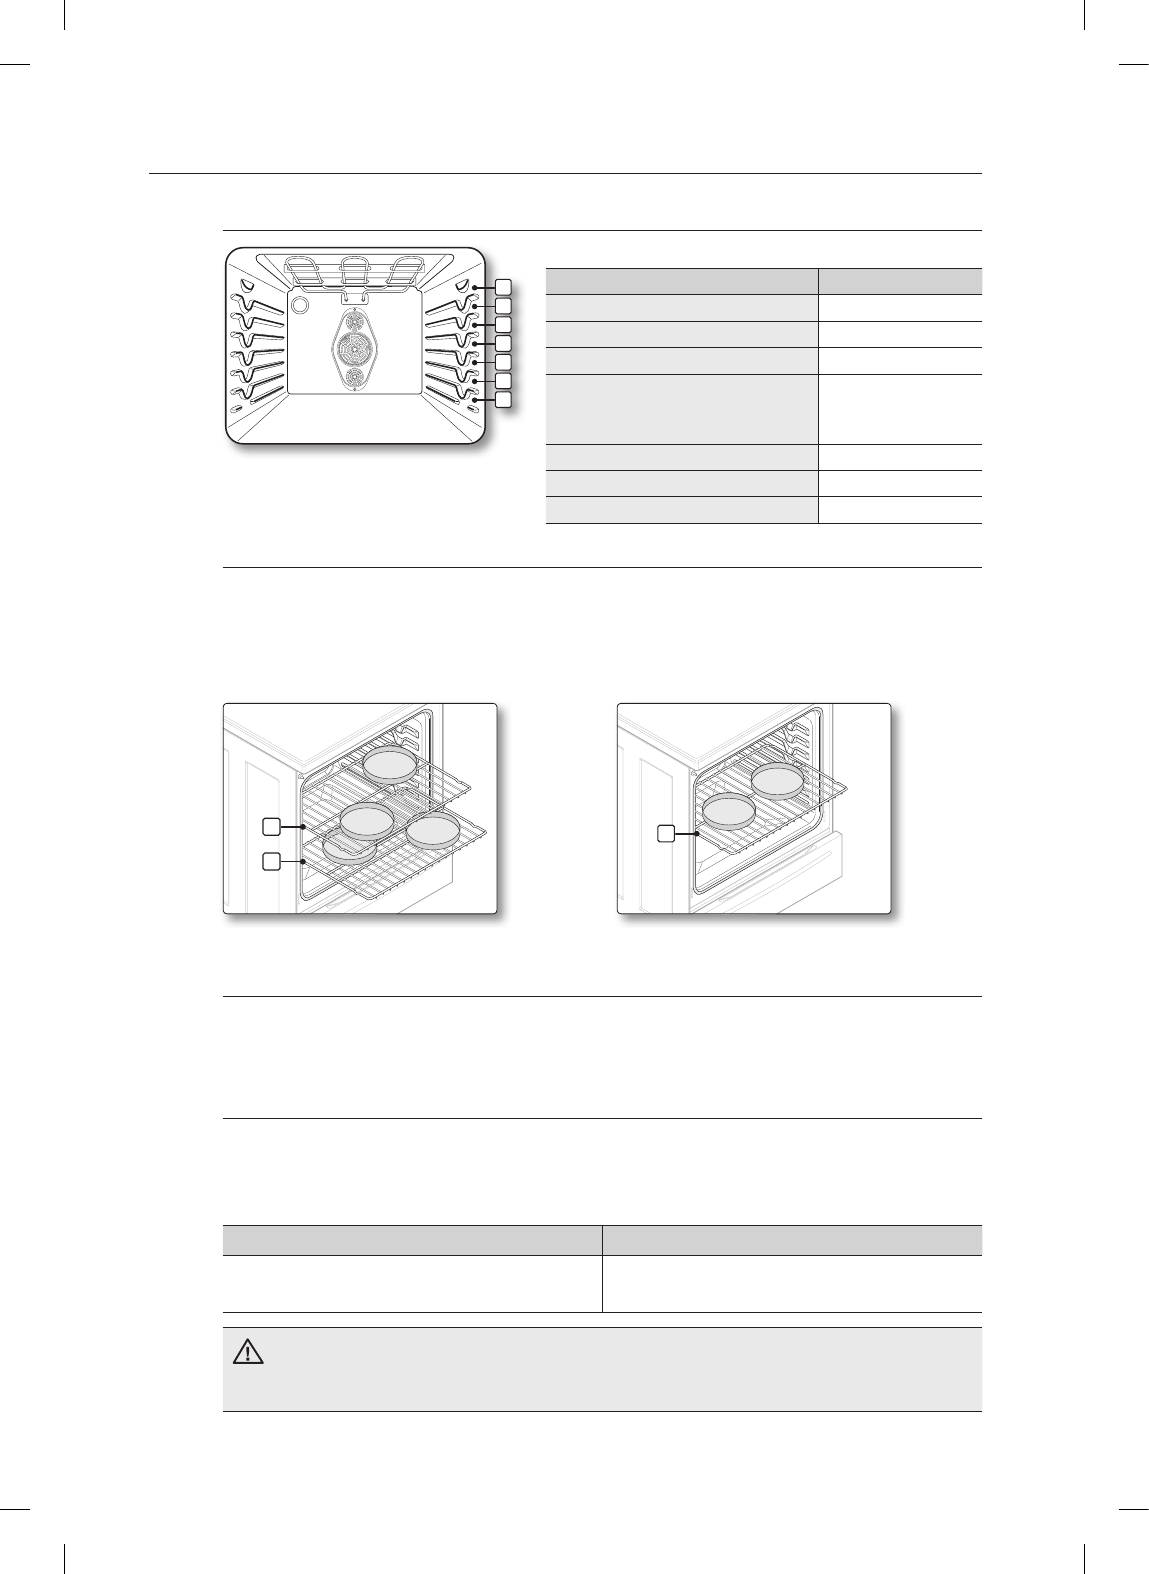
Oven rack positions
1
2
3
4
5
6
7
The oven has 7 rack positions (1~7).
TYPE OF FOOD RACK POSITION
Frozen pies 4
Angel food cake 2
Bundt or pound cakes 3
Biscuits, muns, brownies,
cookies, cupcakes, layer cakes,
pies
4
Casseroles 4
Small roast, ham 2
Turkey, large roast 1
Baking layer cakes
Centering the baking pans in the oven as much as possible will produce better results. If baking with
more than one pan, place the pans so each has at least 1" to 1½" of air space around it.
If baking four cake layers at the same time, place the oven racks in positions 2 and 5.
If baking two cake layers at the same time, place one oven rack in position 4. Place the pans or
cookware as show in Fig. 1 and Fig 2.
5
2
4
Fig. 1 Fig. 2
Before using the racks
The oven has three racks.
Each rack has stops that need to be placed correctly on the supports. These stops will keep the
rack from coming completely out.
Split rack
The right side of the split rack can be removed to accommodate a large roaster on the lower rack.
- The removable section of the Split Rack can be used as a roasting rack in the broiling pan.
- Be careful when removing cooked food from the split rack to avoid burns.
REMOVING THE RACKS REPLACING THE RACKS
1. Pull the rack straight out until it stops.
2. Lift up the front of the rack and pull it out.
1. Place the end of the rack on the support.
2. Tilt the front end up and push the rack in.
CAUTION
• Do not cover a rack with aluminum foil or place on the oven bottom. This will disturb
the heat circulation, resulting in poor baking, and may damage the oven bottom.
• Arrange the oven racks only when the oven is cool.
(IB_Best)NE597N0PBSR_AA_DG68-00429A-03_EN.indd 37 2013-05-23 �� 3:17:34


