


3
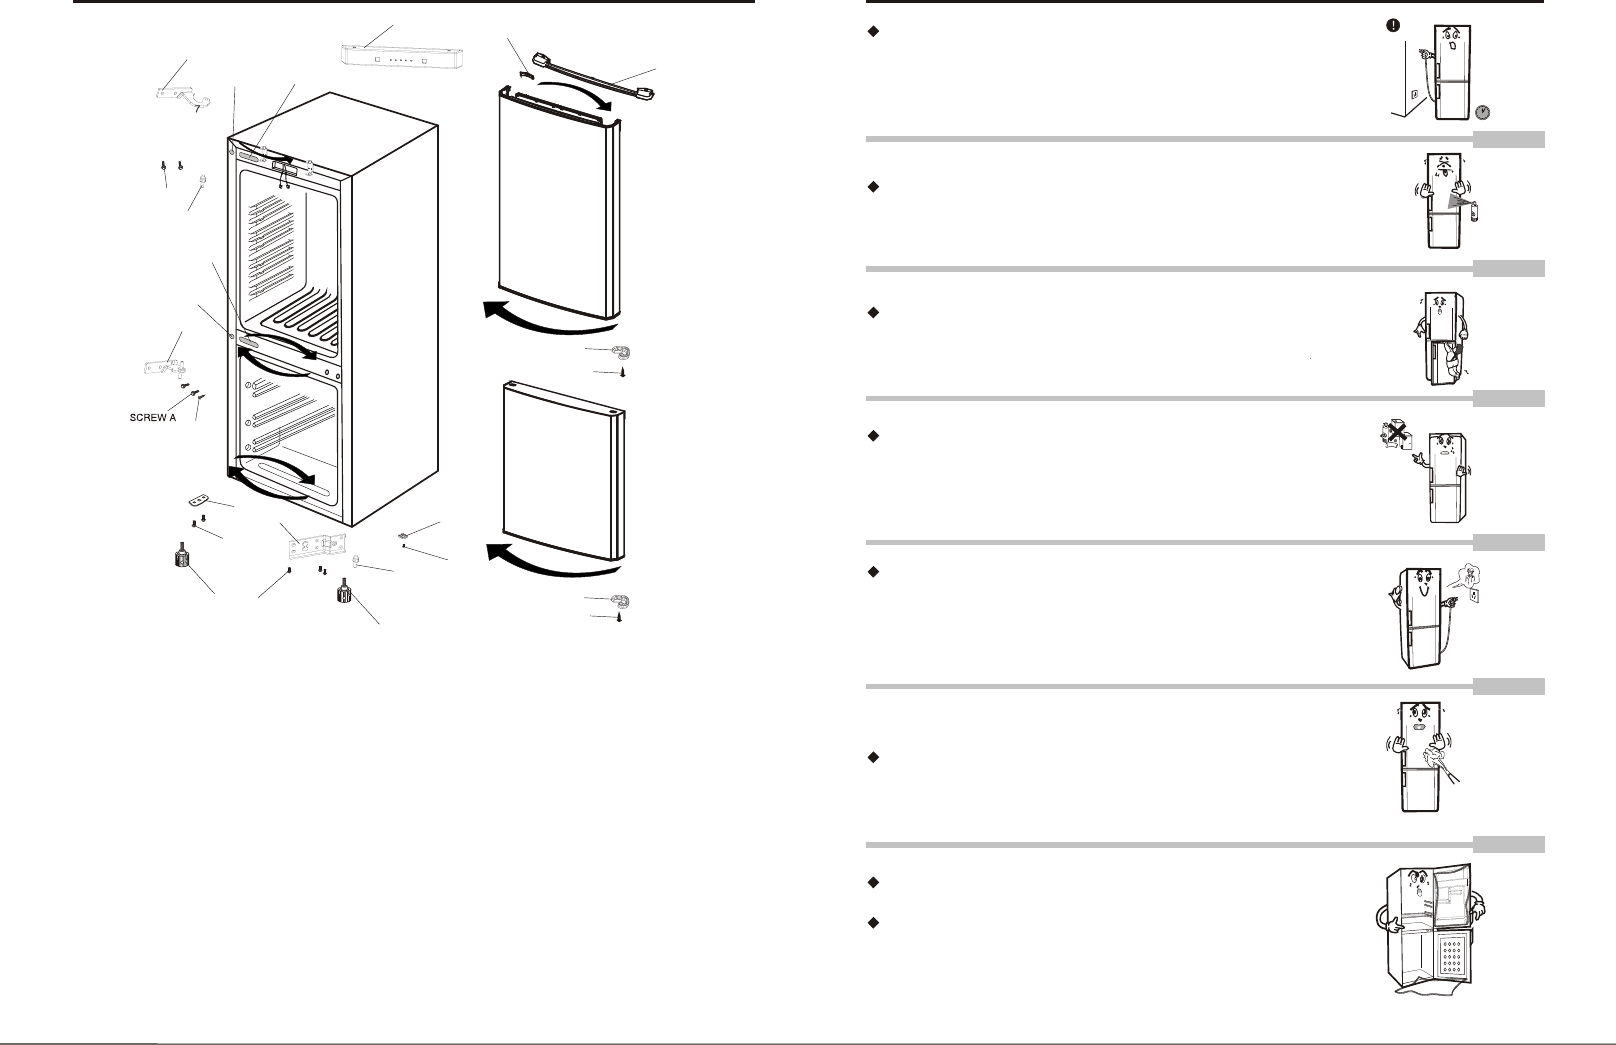
Safety Precautions
Do not use inflammable aerosols such as spray paint and
dope near the freezer/refrigerator. Otherwise, there will be
A risk of explosion.
Do not let children hang on the doors or climb the refrige-
rator to avoid damaging the refrigerator and injuring the
Children.
Do not store corrosive, inflammable and explosive, strong
acid or alkali substances such as butane, ether, vitriol,
benzene, and alcohol. Bottles containing liquid foods also
shall not be stored in the freezer; otherwise the bottles may
Be broken.
If the appliance is disconnected from the power supply, you
should wait for at least five minutes before reconnecting the
power to avoid damaging the compressor.
: If the flexible power cord is damaged, it must be
repaired by special tools. Thus, it must be replaced
by the repair store appointed by the manufacturer.
If the refrigerator can not work normally or is damaged, do
not continue using it. Pull out the power plug and contact the
local service center immediately. If the power cord is
damaged, to avoid any accident, it must be replaced by
Service agent of the manufacturer or a qualified staff.
Do not splash water on the top or back of the refrigerator to
avoid reducing the insulation effects of the appliance.
If you wish to dispose of the freezer/refrigerator, please first
remove the door seals.
When the appliance is disposed of, it shall be handled by
professional staff instead of being discarded casually;
otherwise it may cause hazards or other dangers to the
Environment.
CAUTION
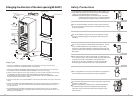
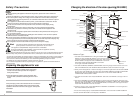
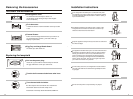
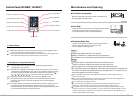
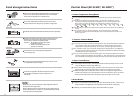
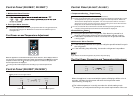
Changing the direction of the door opening(RL34SC*)
14
Simply Type:
1. Take down HIGNE UPP and SHAFT-HINGE and install them at the opposite side of the
HING-UPP. Take down COVER DOOR UPP and fridge door.
2. Take down SCREW A, SCREW E and MID HINGE, and then the refrigerator door. Take down
CAP HINGE HOLE, CAP SCREW CABI and SCREW F. Then fix them at right.
3. Gently incline the appliance in less than 45 degree, remove the right side FOOT, and unfasten
the SCREW D. Take down HINGE LOW, FIXER HINGE LOW , and
STOPPER HINGE LOW. Reverse and fix STOPPER HINGE LOW with FIXER HINGE LOW to
the left of HINGE LOW and .
4. Take down left FOOT and unfasten SCREW D. Take down and fix REINF to the right. Then install
FOOT.
5. Take down SCREW G and STOPPER DOOR in the fridge and freezer doors and install them at
the left of the doors. Take down CAP HOLE DOOR and CAP SPACER DOOR and fix them at
the left of the doors,
6. Fix MID HINGE with SCREW A and SCREW E, and install the freezer door. Fix left HINGE-
LOW and install FOOT. Put the refrigerator stable and install the fridge and freezer doors. Fix
HINGE UPP with SCREW A.
SHIFT HINGE
SHIFT HINGE
SCREW A
HAFT HINGE
MID HINGE
SCREW E
REINF
SCREW HEX
(SCREW D)
FOOT
SCREW HEX
SCREW D
HINGE LOW
SHAFT HINGE
STOPPER HINGE LOW
CAP SCREW CABI
SCREW F
CAP HINGE HOLE
CAP SCREW CABI
SCREW F
CAP HINGE HOLE
CAP SPACER DOOR
COVER DOOR UPP
STOPPER DOOR
SCREW G
COVER TOP FRONT
HINGE UPP
FIXER HINGE LOW
FOOT
STOPPER DOOR
SCREW G