


3
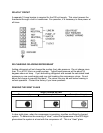
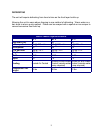
EVAPORATOR PLATE INSTALLATION
Mount the plates on opposite walls as high as possible to take advantage of thermal
convection. Install the plates with the Wellnut, spacers and screws provided.
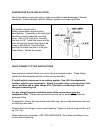
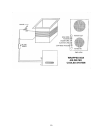
The plate(s) mounts with a
Wellnut expandable neoprene blind
hole fastener. A template or the plate itself
should be used to locate the mounting
holes. Drill a 3/16" pilot hole. Increase
this hole to 3/8". Install the screw into the
plate through the spacer then tighten the
screw in the Wellnut. Install the plate
pushing the rubber mounts in to the pre-
drilled holes. Tighten the screws.
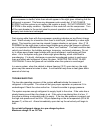
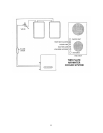
QUICK CONNECT FITTING INSTRUCTIONS
Aeroquip quick connect fittings are used in this pre-charged system. These fittings
reseal upon disconnecting and do not leak during assembly.
If installing this compressor in an existing system. Use LSA line adapters to
interface with the new compressor. Attach, evacuate using a vacuum pump, leak
check, and then add a vapor charge of R-134a before connecting to the pre-
charged condensing unit.
In a pre charged system installation make all the connections up to the
compressor first. The last two connections should be the suction fitting then the
discharge fitting.
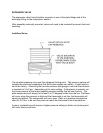
To assemble, remove the heat shrink and plastic cap. Be sure the threads and the end
of the fittings are clean.
Finger tighten the fittings to avoid cross threading. Tighten to wrench snug and then pull
up 1/16 turn.
When making all connections, USE TWO WRENCHES. Don’t allow the fittings to turn
or twist when tightening.