


-7-
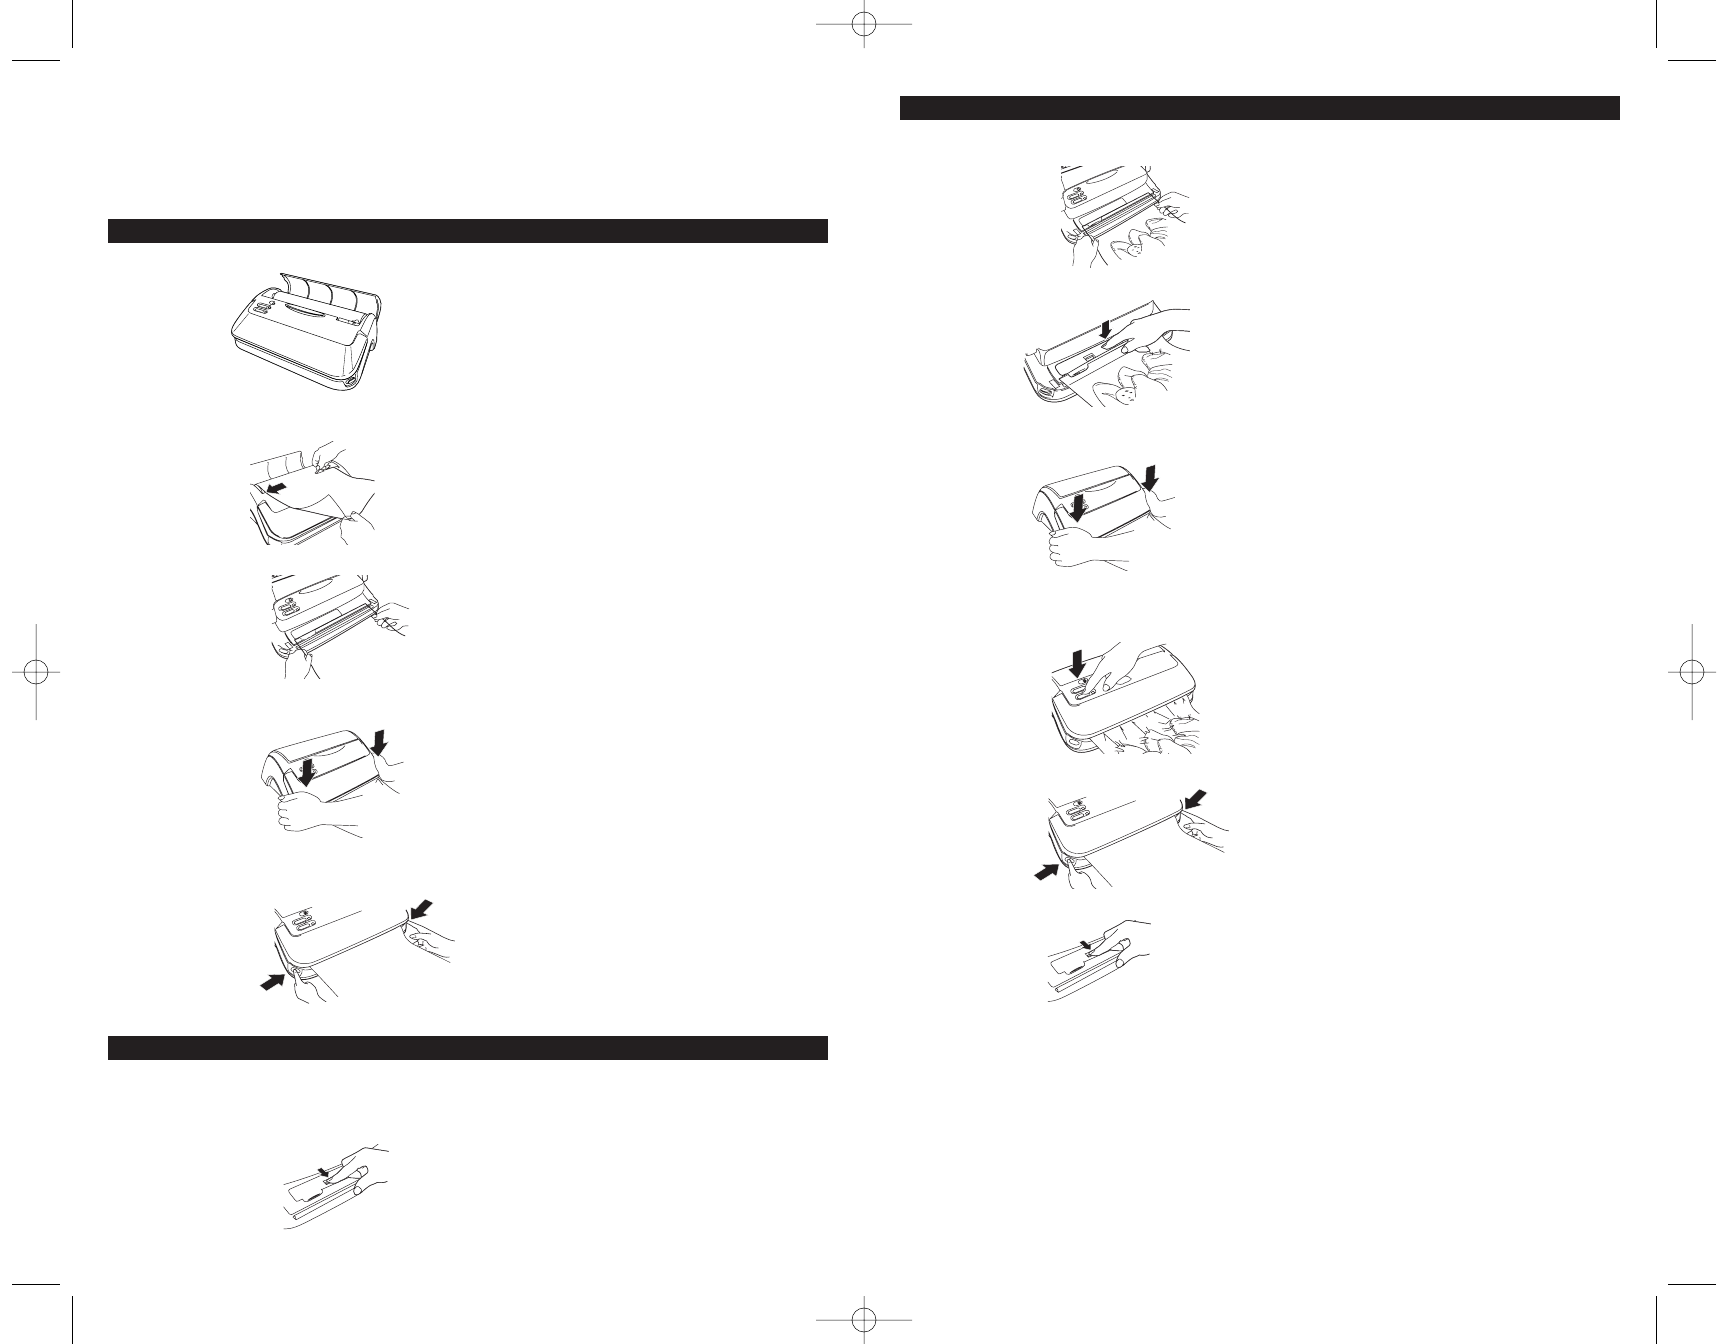
HOW TO VACUUM SEAL WITH SEAL-A-MEAL
®
BAGS (CONT.)
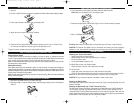
3. Insert Nozzle into bag. Align left edge of bag with Nozzle edge.
4. Push down Nozzle to secure bag. Make sure bag is straight (with no wrinkles).
5. Firmly press down on both sides of lid making sure both sides are locked.
Note: Sealer will not operate if Lid is not properly closed.
6. Press and hold Vacuum Button. Red Vacuum Indicator Light will turn on. Once all of the air is
removed, the unit will automatically switch to the seal mode. When both the Vacuum and Seal
Indicator Lights turn off, the bag is vacuum sealed.
7. Push in Lid Release Buttons to open Lid.
8. Pull Lock ‘n Seal™ Nozzle Lever forward to release sealed bag.
To stop the vacuum process at any time, press the Vacuum Button. To instantly seal and avoid
crushing delicate foods or drawing liquid from the bag, press the Vacuum Button immediately
followed by the Seal Button. This will stop air from being drawn from the bag and seal the bag.
Warning: Even though the Sealing Strip is not powered when Lid is open, it may still be hot.
Note: The unit has a 30 second cool down period between vacuuming cycles. Unit will not operate
during this time.
CAUTION: This Vacuum Food Sealer is not for commercial use. If sealing more than 30 bags
or canisters in a row, wait at least 25 minutes before continuing to use your Vacuum Food Sealer.
Seal
V
acuu
m
Seal
V
acuu
m
Seal
Vacuum
Seal
-6-
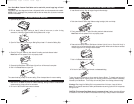
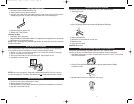
1. Open the Bag Roll Cover.
2. Pull out desired bag length (leaving at least 3 inches of extra room, to allow for bag
contraction). Hold bag in place and slide Cutting Blade to left or right.
3. Open Lid. Place one end of cut bag on Sealing Strip at least 1/2” above the Sealing Strip.
4. Close Lid. Firmly press down on both sides of lid making sure both sides are locked.
Note: Sealer will not operate if Lid is not properly closed.
5. Press and hold Seal Button. Red indicator light will turn off when seal is complete.
6. Push in Lid Release Buttons to open Lid.
The custom sized bag is ready for vacuum sealing. Follow the steps below for vacuum sealing.
HOW TO MAKE A CUSTOM SIZED BAG
Sea
l
Vacuum
Vacuum
Seal
V
acuu
m
Seal
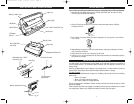
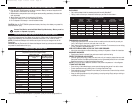
Your Seal-a-Meal
®
Vacuum Food Sealer can be used with pre-cut bags, bag rolls and
accessories.
Seal-a-Meal
®
multi-layer bags can be frozen, refrigerated, boiled, are microwave safe and reusable.
NOTE: DO NOT reuse bags if they have been used to store raw meats, fish, oily foods or have been
boiled or microwaved.
HOW TO VACUUM SEAL WITH SEAL-A-MEAL
®
BAGS
1. Place item to be sealed in pre-cut or custom sized bag, leaving at least 3 inches between
contents and top of bag to allow for contraction.
2. Pull Lock ‘n Seal™ Nozzle Lever forward to elevate.
VS125(428-1250) V.qxd 1/10/05 16:25 Page 7