Changing Door Hinge Location
The doors of the refrigerator can be hinged on either
side so that the direction they open in can be chosen
to suit the installation place.
Screwdrivers (O and e )
Use a large-size (!_) screwdriver.
Socket wrench (3/8")
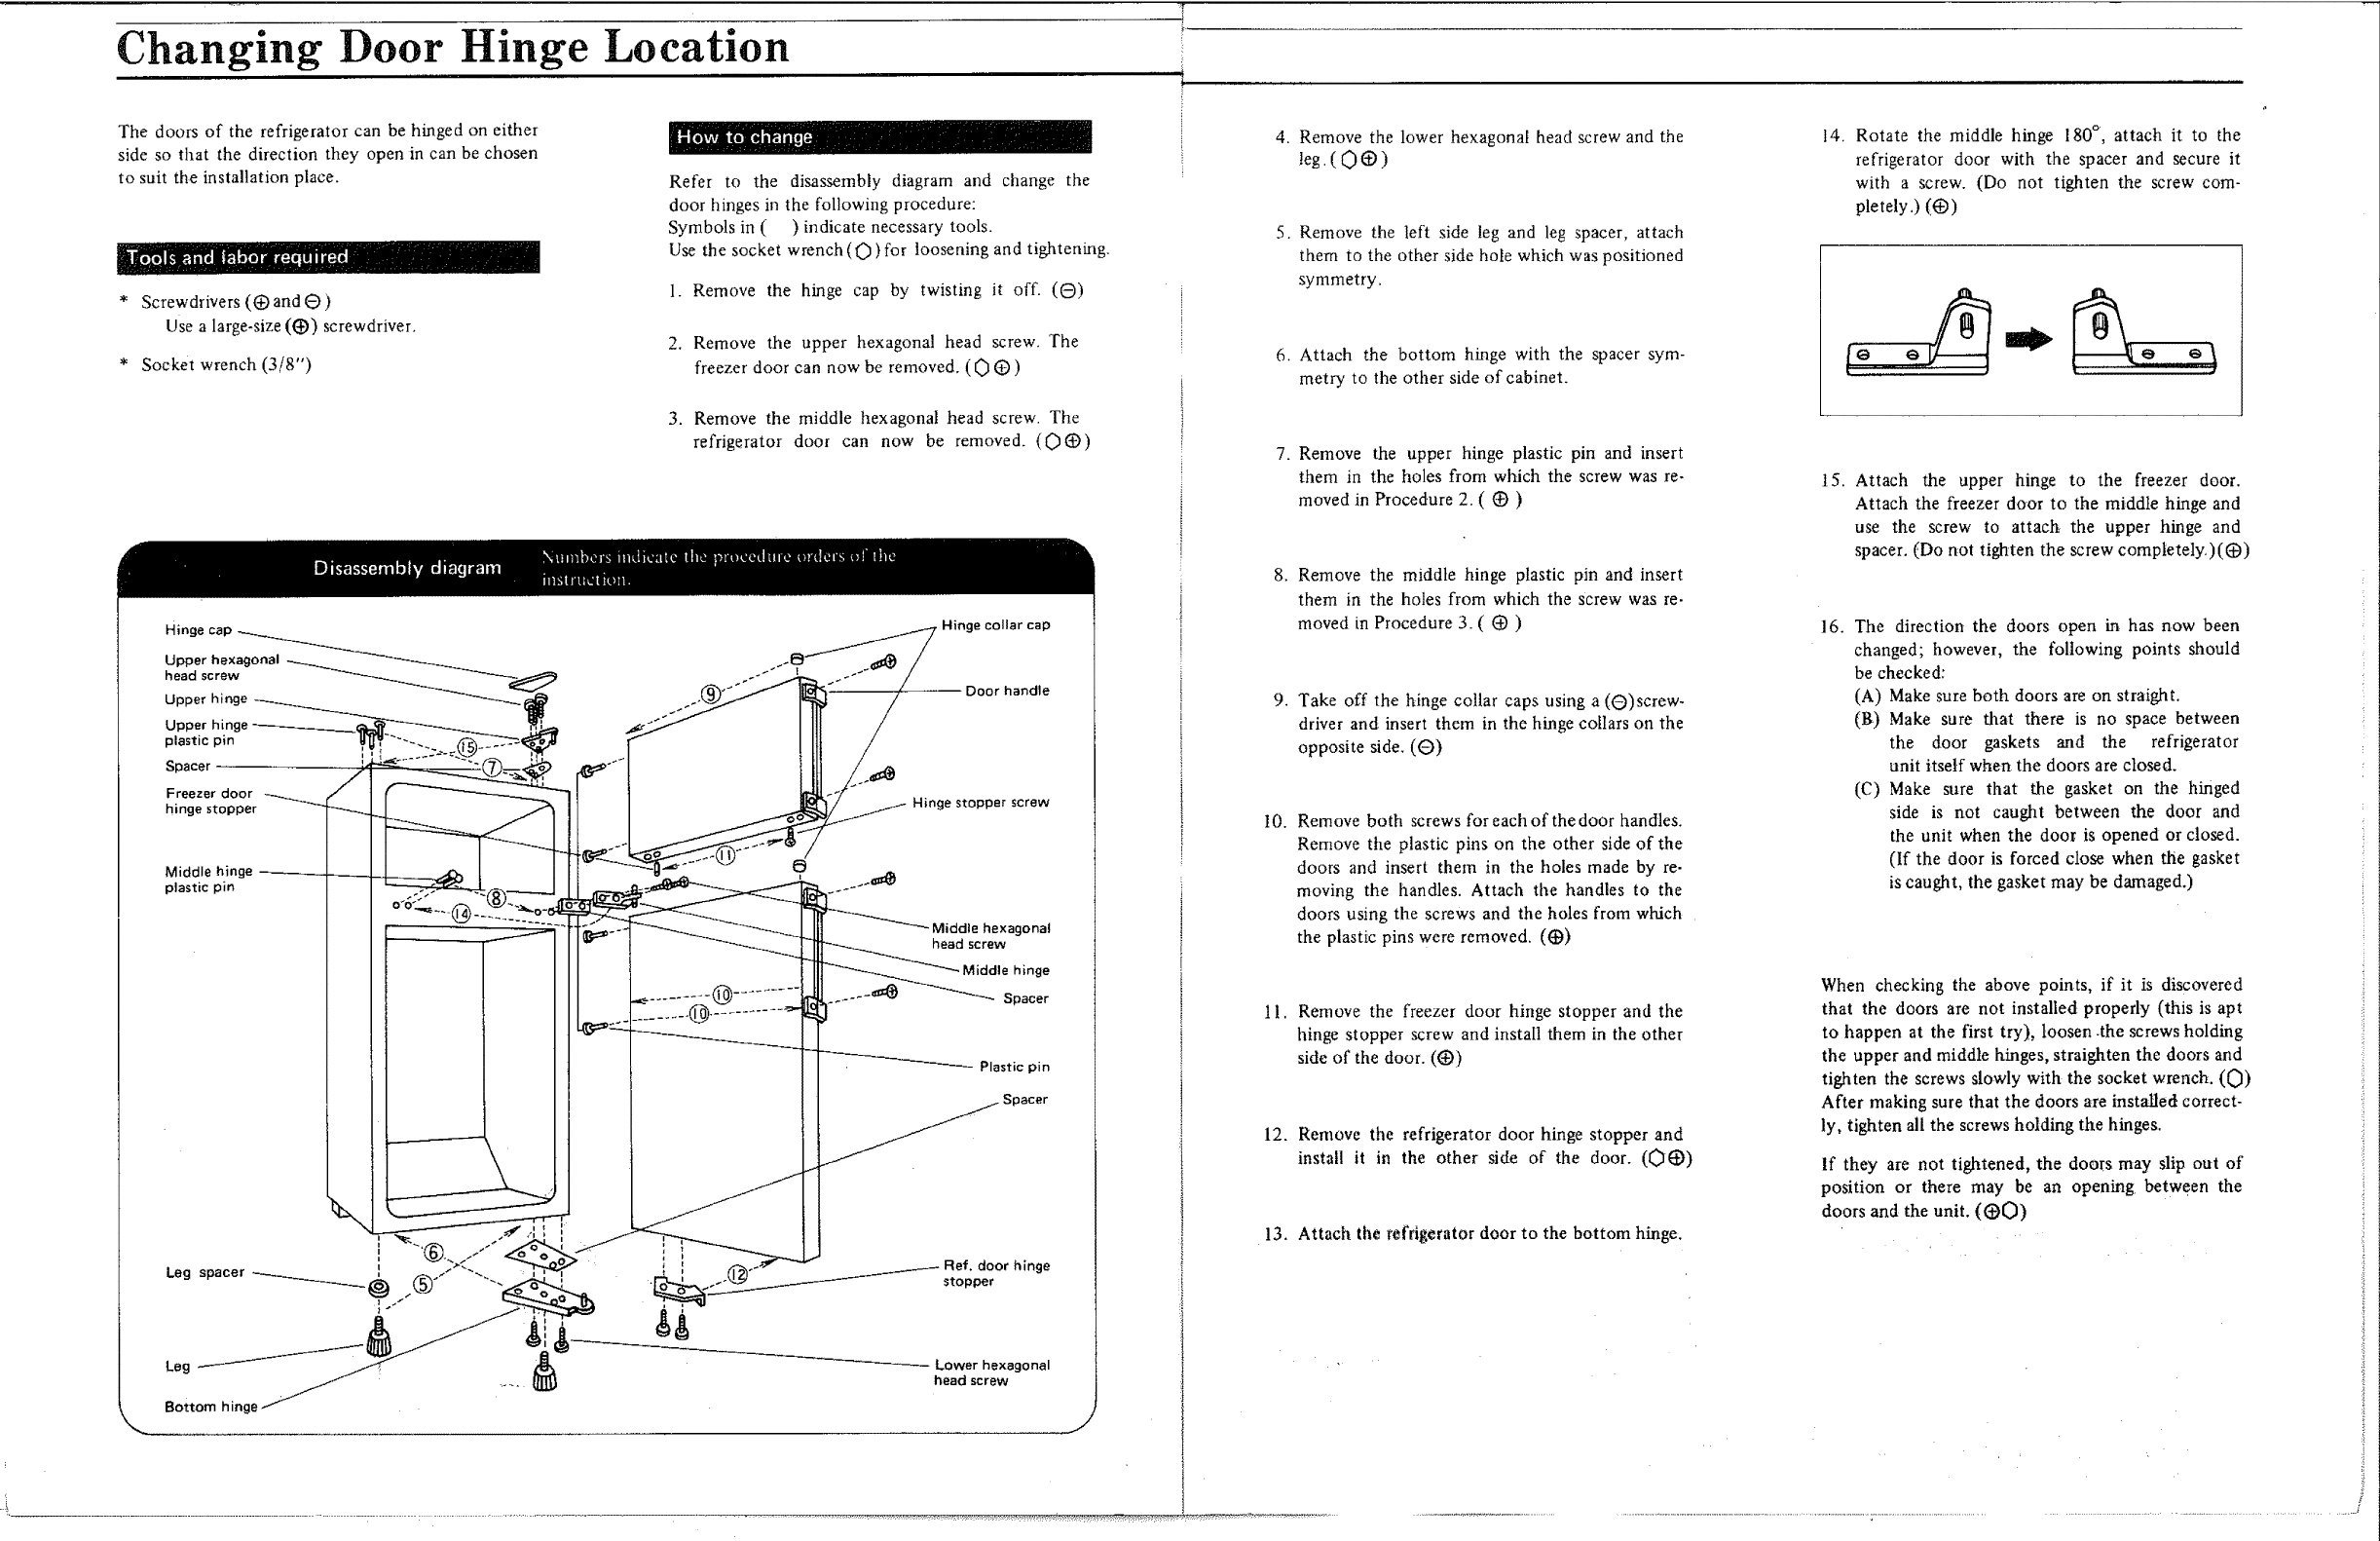
Refer to the disassembly diagram and change the
door hinges in the following procedure:
Symbols in ( ) indicate necessary tools.
Use the socket wrench (O) for loosening and tightening.
1. Remove the hinge cap by twisting it off. (8)
2. Remove the upper hexagonal head screw. The
freezer door can now be removed. (0 @ )
3. Remove the middle hexagonal head screw. The
refrigerator door can now be removed. (O@)
Bottom hing
o 11_i _7_ / Hinge collar cap
__ Door handle
Plastic pin
_ Spacer
.---- Ref. door hinge
stopper
Lower hexagonal
head screw
4. Remove the lower hexagonal head screw and the
teg.(O_)
5. Remove the left side leg and leg spacer, attach
them to the other side hole which was positioned
symmetry.
6. Attach the bottom hinge with the spacer sym-
metry to the other side of cabinet.
7. Remove the upper hinge plastic pin and insert
them in the holes from which the screw was re-
moved in Procedure 2. ( 1_ )
8. Remove the middle hinge plastic pin and insert
them in the holes from which the screw was re-
moved in Procedure 3. ( @ )
9. Take off the hinge collar caps using a (Q)screw-
driver and: insert them in the hinge collars on the
opposite side. (G)
I0. Remove both screws for each of the door handles.
Remove the plastic pins on the other side of the
doors and insert them in the holes made by re-
moving the handles. Attach the handles to the
doors using the screws and the holes from which
the plastic pins were removed. (_)
11. Remove the freezer door hinge stopper and the
hinge stopper screw and install them in the other
side of the door. (O)
12. Remove the refrigerator door hinge stopper and
install it in the other side of the door. (0_))
14. Rotate the middle hinge 180 ° , attach it to the
refrigerator door with the spacer and secure it
with a screw. (Do not tighten the screw com-
pletely.) (O)
15. Attach the upper hinge to the freezer door.
Attach the freezer door to the middle hinge and
use the screw to attach the upper hinge and
spacer. (Do not tighten the screw completely.)(@)
16. The direction the doors open in has now been
changed; however, the following points should
be checked:
(A) Make sure both doors are on straight.
(B) Make sure that there is no space between
the door gaskets and the refrigerator
unit itself when the doors are closed.
(C) Make sure that the gasket on the hinged
side is not caught between the door and
the unit when the door is opened or closed.
(If the door is forced close when the gasket
is caught, the gasket may be damaged.)
When checking the above points, if it is discovered
that the doors are not installed properly (this is apt
to happen at the first try), loosen-the screws holding
the upper and middle hinges, straighten the doors and
tighten the screws slowly with the socket wrench. (0)
After making sure that the doors are installed correct-
ly, tighten all the screws holding the hinges.
If they are not tightened, the doors may slip out of
position or there may be an opening between the
doors and the unit. ((_O)
13. Attach the refrigerator door to the bottom hinge.


