


GB-11
BEFORE OPERATION
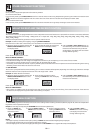
SETTING THE CLOCK
Plug in the oven. The oven display will display: “0:00”, an audible signal will sound once.
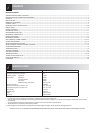
This model has a clock function and the oven uses less than 1.0 W in stand by mode. To set the clock, see below.
Your oven has a 24 hour clock feature.
1. Press the CLOCK/KITCHEN TIMER button once. The hour gure will ash and the clock indicator will illuminate.
2. Rotate the ENTRY dial until the correct hour is displayed, the input time should be within 0-23.
3. Press the CLOCK/KITCHEN TIMER button, the minute gure will ash.
4. Set the minutes. Rotate the ENTRY dial until the correct minutes are displayed, the input time should be within 0-59.
5. Press the CLOCK/KITCHEN TIMER button to start the clock. The icon “:” of the digital time will be ashing on the display and the clock
indicator will disappear.
NOTES:
• If the clock is set, when cooking is complete, the display will show the correct time of day. If the clock has not been set, the display will
show "0:00".
• To check the time of day during a cooking process, press CLOCK/KITCHEN TIMER button and the LED will display the time of day for 2-3
seconds. This does not a ect the cooking process.
• If in the process of setting the clock, the STOP/CLEAR button is pressed, the oven will revert back to the former setting.
•
If the electrical power supply to your microwave oven is interrupted, the display will intermittently show "0:00" after the power is reinstated. If
this occurs during cooking, the programme will be erased. As will the time of day.
KITCHEN TIMER FUNCTION
You can use the kitchen timer function, for timing in instances where microwave cooking is not involved for example to time boiled eggs
cooked on conventional hob or to monitor the standing time for cooked/defrosted food.
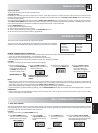
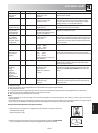
Example:
To set the timer for 5 minutes.
1. Press CLOCK/KITCHEN
TIMER once.
2. Rotate ENTRY dial
to select time .
3. Press the START/+30sec/
ENTER key to start the timer.
4. Check the display.
(The display will count down through the
programmed time.)
When the timer arrives at 0:00, an audible signal will sound 5 times and the LED will then display the time of day.
You can enter any time up to 95 minutes. To cancel the KITCHEN TIMER whilst counting down, simply press the STOP/CLEAR button.
NOTE: The KITCHEN TIMER function cannot be used whilst cooking.
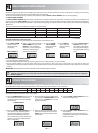
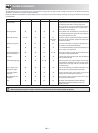
MICROWAVE POWER LEVELS
Power Level Press the MICRO.POWER
button
Display
(Percentage)
• Your oven has 5 power levels, as shown.
• To change the power level for cooking, press the MICRO.POWER
button or rotate the ENTRY dial key until the display indicates the
desired level. Press the START/+30sec./ENTER button to con rm,
enter the cooking time and then press the START/+30sec./ENTER
button to start the oven.
• To check the power level during cooking, press the MICRO.
POWER button, the current power level will be displayed for 2-3
seconds. The oven continues to count down although the display
will show the power level.
HIGH x1 P100
(100%)
MEDIUM HIGH x2 P80
(80%)
MEDIUM x3 P50
(50%)
MEDIUM LOW
(DEFROST)
x4 P30
(30%)
LOW x5 P10
(10%)
Generally the following recommendations apply:
P100 - (HIGH output = 1000W) used for fast cooking or reheating e.g.
for casseroles, hot beverages, vegetables etc.
P80 - (MEDIUM HIGH output = 800W) used for longer cooking of
dense foods such as roast joints, meat loaf and plated meals, also for
sensitive dishes such as sponge cakes. At this reduced setting, the
food will cook evenly without over cooking at the sides.
P50 - (MEDIUM output = 500W) for dense foods which require a long
cooking time when cooked conventionally, e.g. beef casserole, it is
advisable to use this power setting to ensure the meat will be tender.
P30 - (MEDIUM LOW output = 300W) Defrost setting to defrost,
select this power setting, to ensure that the dish defrosts evenly. This
setting is also ideal for simmering rice, pasta, dumplings and cooking
egg custard.
P10 - (LOW output = 100W) for gentle defrosting, e.g. cream gateaux
or pastry.