


4
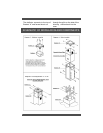
Attaching the Range Hood to
the Ceiling
The entire structure that has been
pre assembled above, must now be
hoisted up to the ceiling. A few
things have to happen at once here:
the slots (as discussed below) need
to be engaged and the ductwork
must make connection with the
length of ductwork on the structure.
This will require two strong people –
do not attempt this step on your
own. Bracket “B” has slots, position
C per Diagram “A” (refer to page 5),
at the top that will receive the spring
clips located on Bracket “A” –
THIS
IS A TEMPORARY HOLD ONLY –
DO NOT RELY SOLELY ON
THESE CLIPS TO HOLD THE
HOOD UP – THEY WON’T. Once
“hooked” by the spring clips immedi-
ately secure the structure with the
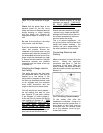
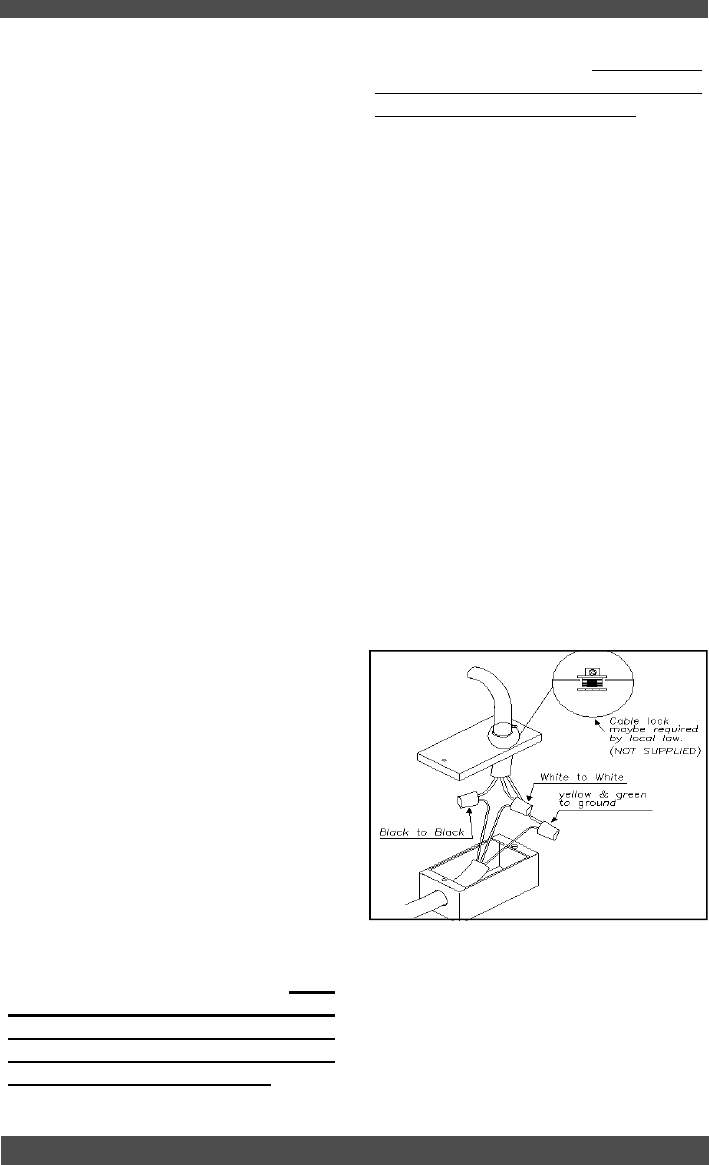
Figure 1
Re-Circulating Requirements
items “B” on the schematic on page.
5.
Check that the plastic flaps at the
exhaust outlet for the fan move
freely and have not become jammed
during shipping or whilst working
with the power unit. Connect an
appropriate length of ducting to the
unit.
Do not fix the ducting to the outlet
with screws - use duct tape.
Stand the assembled structure on a
clean soft surface. Ensure the
underside of the hood does not get
scratched and slide the chimneys of
the assembled structure from the top
down as per the schematic on page
5. Ensure that the holes for fixing the
decorative chimney are correctly
orientated with the holes at the top
of bracket “A”.
machine screws at point “E” on the
schematic on page 5 – THIS MUST
BE DONE IMMEDIATELY AND
SHOULD NOT BE SKIPPED.
Ensure the entire structure is sturdy
- serious injury, death and MAJOR
damage could result should the unit
not be well connected to the frame
structure within the ceiling.
This is of utmost importance – do
not go any further until this has been
tested and double checked – the
installer has sole responsibility for
the safe installation of this product.
Connecting Electricity and
Ducting
Make sure power is turned off at the
source. Make the electrical
connection (see figure 1). Test the
functioning of the hood. Slide the
upper chimney into place and attach
with the machine screws provided to
Bracket “A”.
Fit the carbon filter after the
installation is complete – these fit in
behind the aluminum grease filter. A
short length of duct work must be
connected from the exhaust outlet
up to the deflector (must be pur-
chased with hood).