Instructions for the user
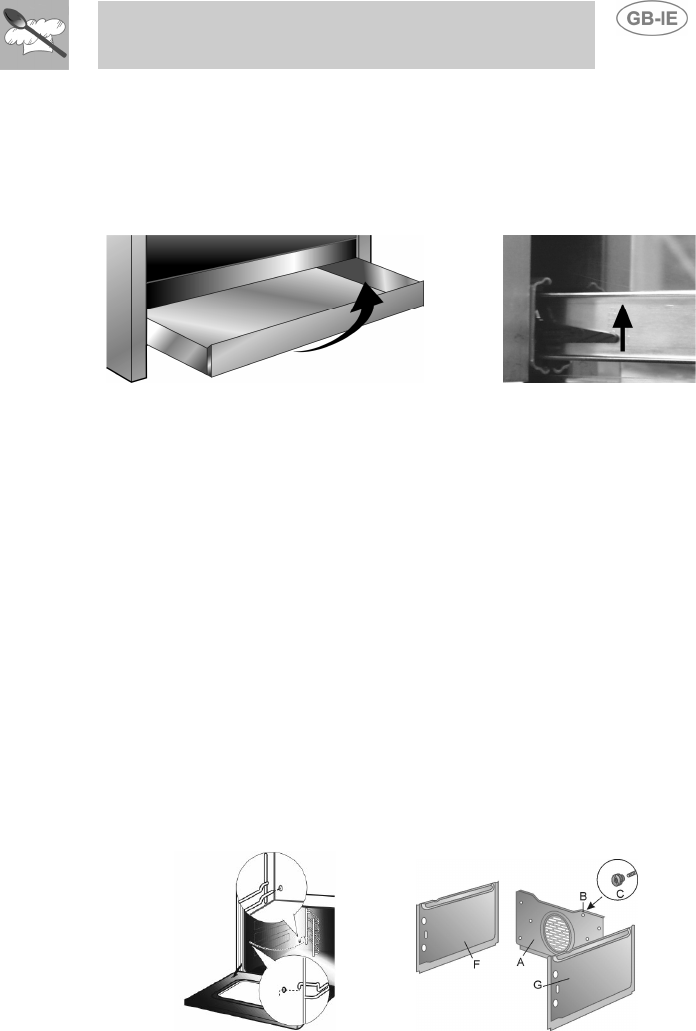
For easier cleaning, the storage drawer underneath the oven can be
completely removed.
Pull it right out and raise the front (as for an ordinary drawer).
On some models, once the drawer has been pulled completely out the two
tabs have to be pushed up as shown in the diagram, after which the
drawer can be removed from the appliance.
10.3.1 Self-cleaning liners
The main oven is equipped with continuous self-cleaning enamelled liners.
These liners make the oven easier to clean and ensure its efficiency over
time.
10.3.2 Using the self-cleaning liners
Periodically, to prevent food residues and unpleasant smells from
accumulating inside the oven, the appliance should be operated empty at
temperatures of not less than 200°C for a time varying from 30 to 60
minutes, in order to allow the self-cleaning liners to oxidise the residues
present; when the oven has cooled, these will then be removed with a
damp sponge
10.3.3 Looking after the self-cleaning liners
The liners should not be cleaned with abrasive creams or ordinary
detergents. Use a damp sponge only, so as not to damage the special
characteristics of the enamel which coats the liners.
10.3.4 Assembling the self-cleaning liners
1. Remove all accessories from the oven;
2. Remove the side grilles (fig.1);
3. Extract the side liners “F” and “G”(fig. 2);
4. Remove the back panel “A” after undoing the threaded ring-nut “C”
(fig. 2).
5. Reassemble the panels, restoring them to their original position.
1)
2)
63


