Instructions for the installer
11
4. FINAL OPERATIONS
After replacing the nozzles, reposition the flame-spreader crowns, the
burner caps and the grids.
After adjustment to a different kind of gas from the one for which the
cooker has been tested, replace the plate inside the storage
compartment with one corresponding to the new kind of gas. This plate
can be obtained from your nearest Authorised Assistance Centre.
4.1 Adjustment of minimum for natural gas
Light the burner and take it to the minimum .
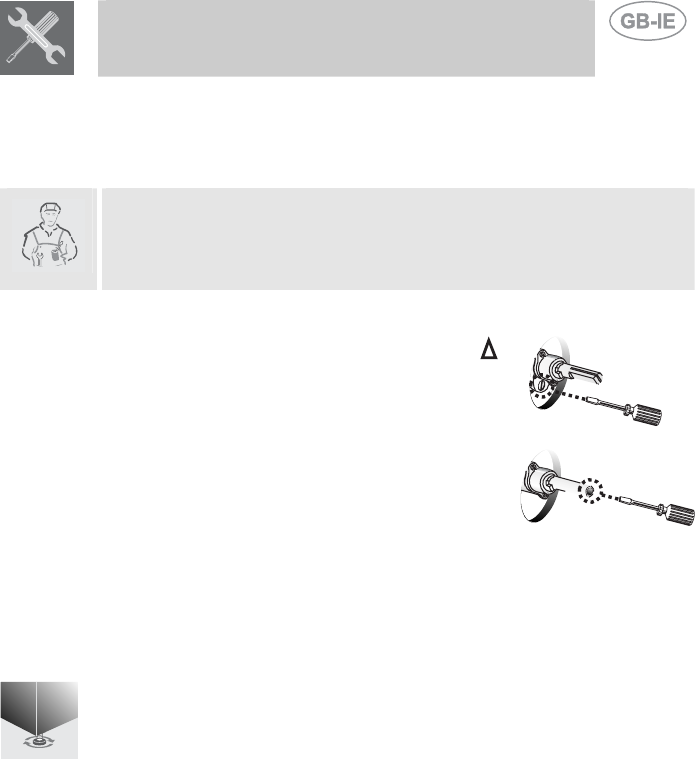
Remove the gas tap knob and turn the
adjustment screw inside or at the side of the tap
shaft (depending on the model) until there is a
regular minimum flame. Replace the knob and
check burner flame stability: (rapidly turning the
knob from maximum to minimum position, the
flame should not go out). Repeat the operation on
all the gas taps.
4.2 Regulation of minimum for LPG
To regulate the minimum for LPG, completely tighten (clockwise) the
screw inside or next to the gas tap pin (depending on the model).
The diameters of the by-passes for each burner are given in table “3.2
Burner and nozzle characteristics table”.
4.3 Positioning and levelling of the appliance
Having carried out the electricity and gas hook-up, level the appliance
using the four adjustable legs.


