


Instructions for the User
52
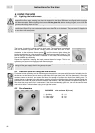
8. USING THE HOB
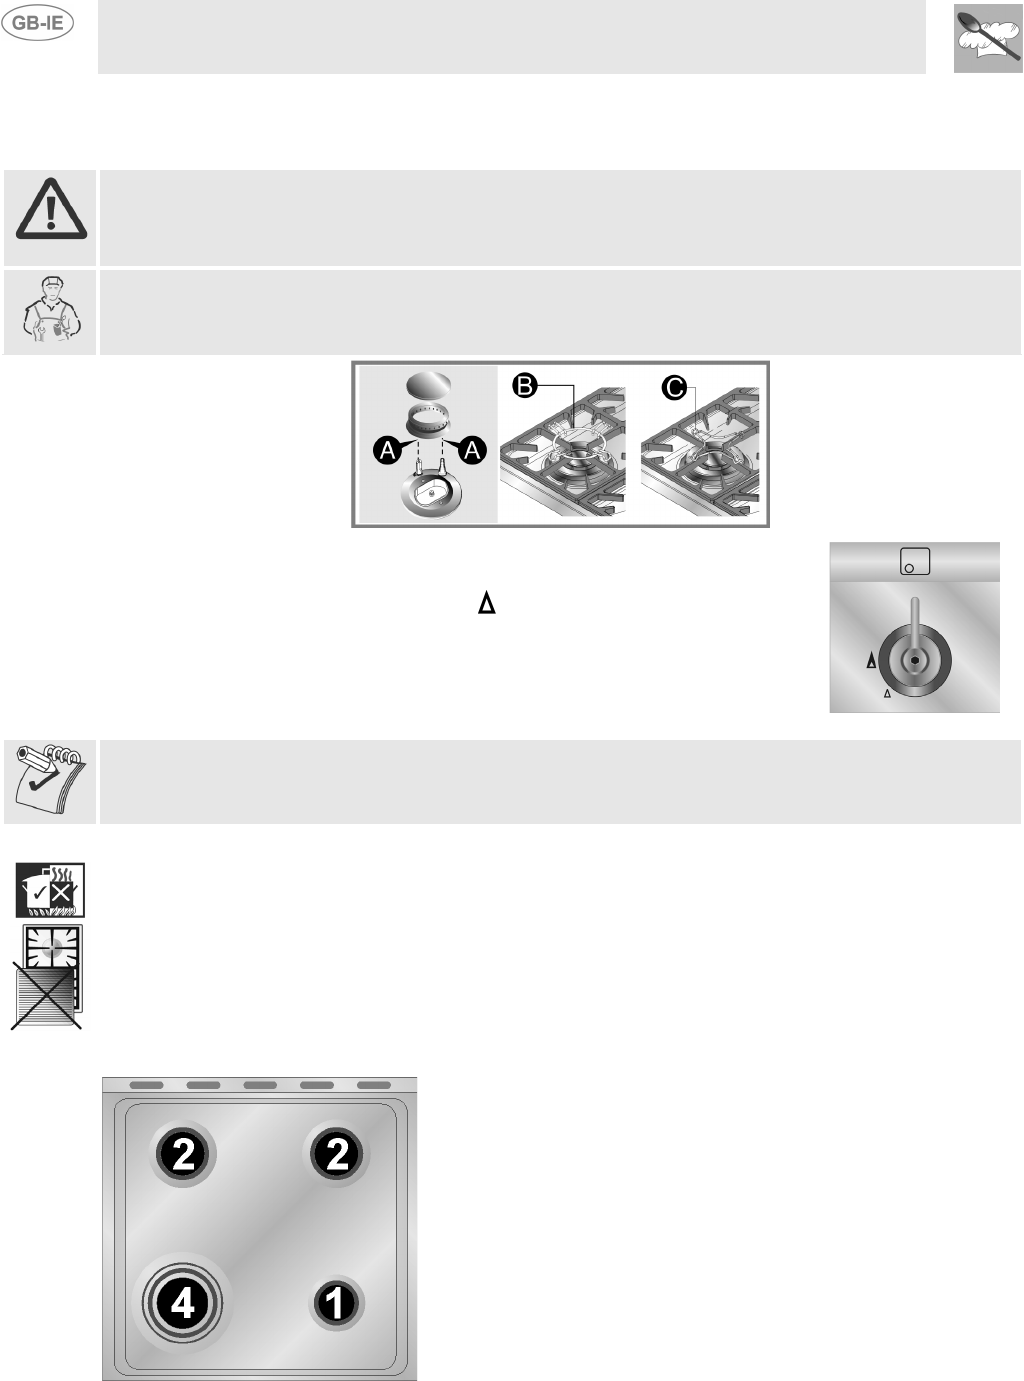
8.1 Lighting the hob burners
Before lighting the hob burners, check that the flame diffuser rings are correctly in place with their
respective burner caps, making sure that the holes A in the flame diffusers are aligned with the plugs
and thermocouples. Before lighting the burners lift the glass lid; before closing it again, turn off all the
burners and wait for them to cool.
The optional grid B is for use with woks. To prevent damage to the hob, the cooker comes complete with
a raised pan stand C for use underneath pans more than 26 cm in diameter. The pan stand C supplied is
for use even with small pans.
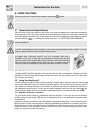
The burner it controls is shown next to each knob. The appliance is equipped
with an electronic ignition device. Simply press the knob and turn it anti-
clockwise to the minimum flame symbol , until the burner lights. Keep the
knob pressed down for a few seconds to allow the thermocouple to heat up. The
burner may go out when the knob is released: in this case, the thermocouple
has not heated up sufficiently.
Repeat the operation, keeping the knob pressed down for longer. This is not
necessary on burners not equipped with thermocouple.
On models with thermocouple, if the burners should go out accidentally a safety device will be tripped,
cutting off the gas supply even if the gas tap is open.
8.2 Practical hints for using the hob burners
For better burner efficiency and to minimise gas consumption, use pans with lids and of suitable size for
the burner, so that flames do not reach up the sides of the pan (see point “8.3 Pan diameters“). Once the
contents come to the boil, turn down the flame far enough to prevent the liquid from boiling over. To
prevent burns or damage to the hob during cooking, all pans or griddle plates must be placed inside the
perimeter of the hob. All pans must have smooth, flat bottoms. Take the greatest care when using fats or
oils since they may catch fire if overheated. If the flame accidentally goes out, turn off the control knob
and wait at least 1 minute before trying to re-light the burner.
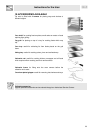
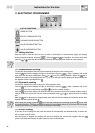
8.3 Pan diameters
BURNERS
1. Auxiliary
2. Semi-rapid
4. Ultra rapid
min. and max. Ø (in cm)
12 - 14
16 - 24
18 - 26