Instructions for the user
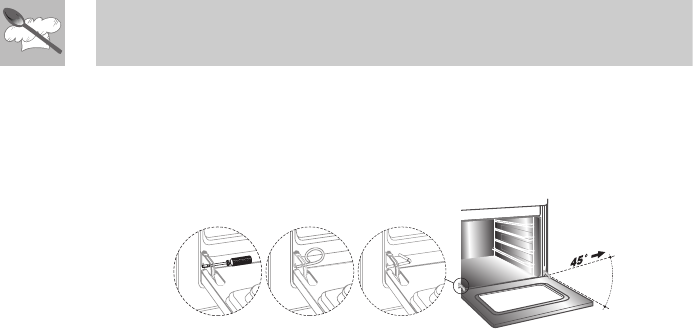
8.2.2 With pins
Open the door completely and insert the pins (supplied) into the holes
from the inside. Close the door to an angle of about 45° and lift it off. To
reassemble, fit the hinges into their grooves, then lower the door into
place and extract the pins.
8.3 Removing the door glazing
The glass in the door should always be kept thoroughly clean. For
easier cleaning, the door glazing can be fully removed by proceeding as
described below. After blocking the door in position as described in point
“
8.2 Removing the door”, remove the inner glass using leverage as
shown in figure 1, and release the 4 pins which fix the glass to the door.
If your oven also has the middle glass (figure 2) this can simply be lifted
out. After cleaning, first fit the middle glass (if featured on your oven)
and then replace the inner glass, using the oven door supports as a
fulcrum as shown in figure 3 (see detail A in figure 3. Once the glass has
been fitted on the door, apply a little pressure against the 4 fixing pins.
If the door should close during these operations, simply relock one of
the hinges as described in point “
8.2 Removing the door”. The panes of
glass can now be washed separately.
29


