Instructions for the user
10. CLEANING AND MAINTENANCE
10.1 Cleaning stainless steel and enamelled versions
To maintain stainless steel in good condition clean it regularly after each use, once it has
cooled down.
10.1.1 Ordinary daily cleaning
To clean and preserve the stainless steel surfaces, always use only specific products that do
not contain abrasives or chlorine-based acids.
How to use: pour the product on a damp cloth and wipe the surface, rinse thoroughly and dry
with a soft cloth or deerskin.
10.1.2 Food stains or residues
Do not use metallic sponges or sharp scrapers: they will damage the surface.
Use normal non-abrasive products for steel, and a wooden or plastic tool if
necessary.
Rinse thoroughly and dry with a soft cloth or deerskin.
Do not allow residues of sugary foods (such as jam) to set inside the oven. If left to
set for too long, they might damage the enamel lining of the oven.
10.2 Cleaning of the hob components
10.2.1 Grids
Remove the grids and clean them in warm water with a non-abrasive detergent, taking care to
remove any encrustations. Replace them on the hob.
Continuous contact of the grids with the flame can cause the enamel near the hot areas to be
altered. This is completely natural and does not compromise the functionality of the
component.
10.2.2 Burner caps and flame cap crowns
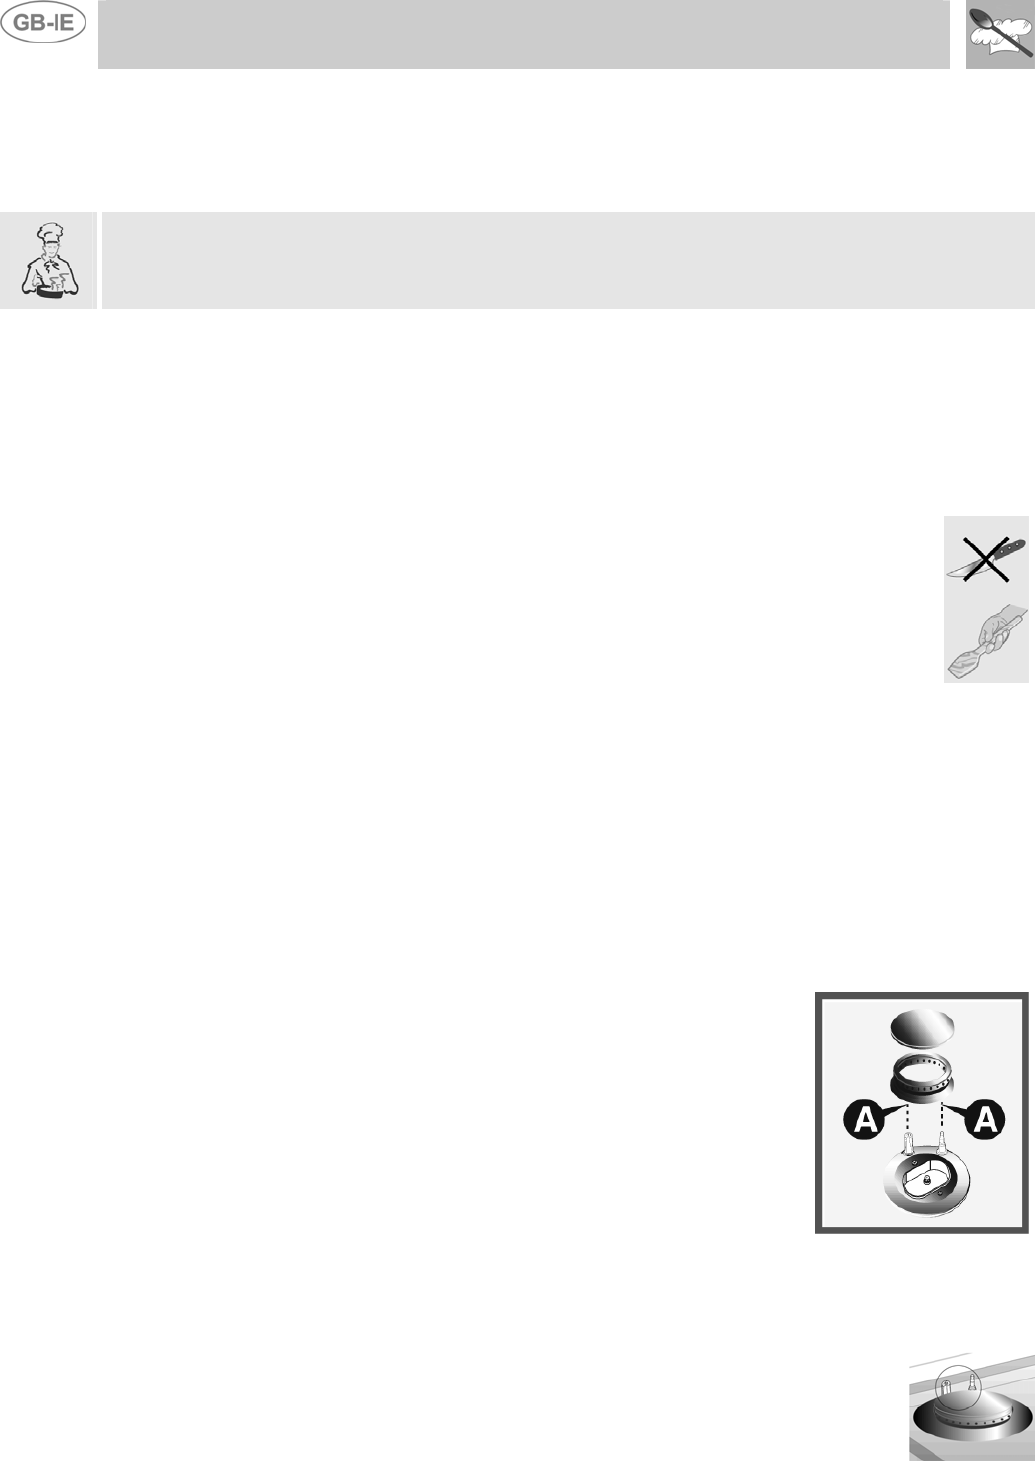
The caps and flame-spreader crowns are extractable to facilitate
cleaning. Wash them in hot water with non-abrasive detergent, taking
care to remove any encrustations, and wait until they are perfectly
dry.
WARNING: do not wash these components in the dishwasher.
Replace the flame-spreader crowns, checking that they are positioned
in their housing with their respective caps, taking care that flame-
spreader holes A correspond to the spark plugs and the
thermocouples.
10.2.3 The spark plugs and thermocouples
To function properly the spark plugs and thermocouples must always be clean
(on the models which are equipped with them). Check them regularly and clean
with a damp cloth if necessary. Any dry residues can be removed with a
toothpick or a needle.
2
2


