


HEAVY DUTY COUNTERLINE INSTALLATION
OWNER’S MANUAL 1182845 REV 8PAGE 15
INSTALLATION
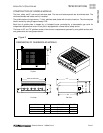
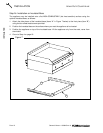
Step 2e: Installation on Floor Stand (60" and 72" Models)
A 60" or 72" griddle may be installed on top of an optional floor stand (for 24", 36", and 48" griddles, go to
Step 2d on page 13). The floor stand is shipped in a separate crate and must be assembled, as follows:
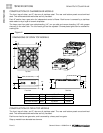
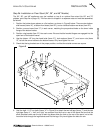
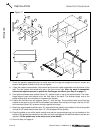
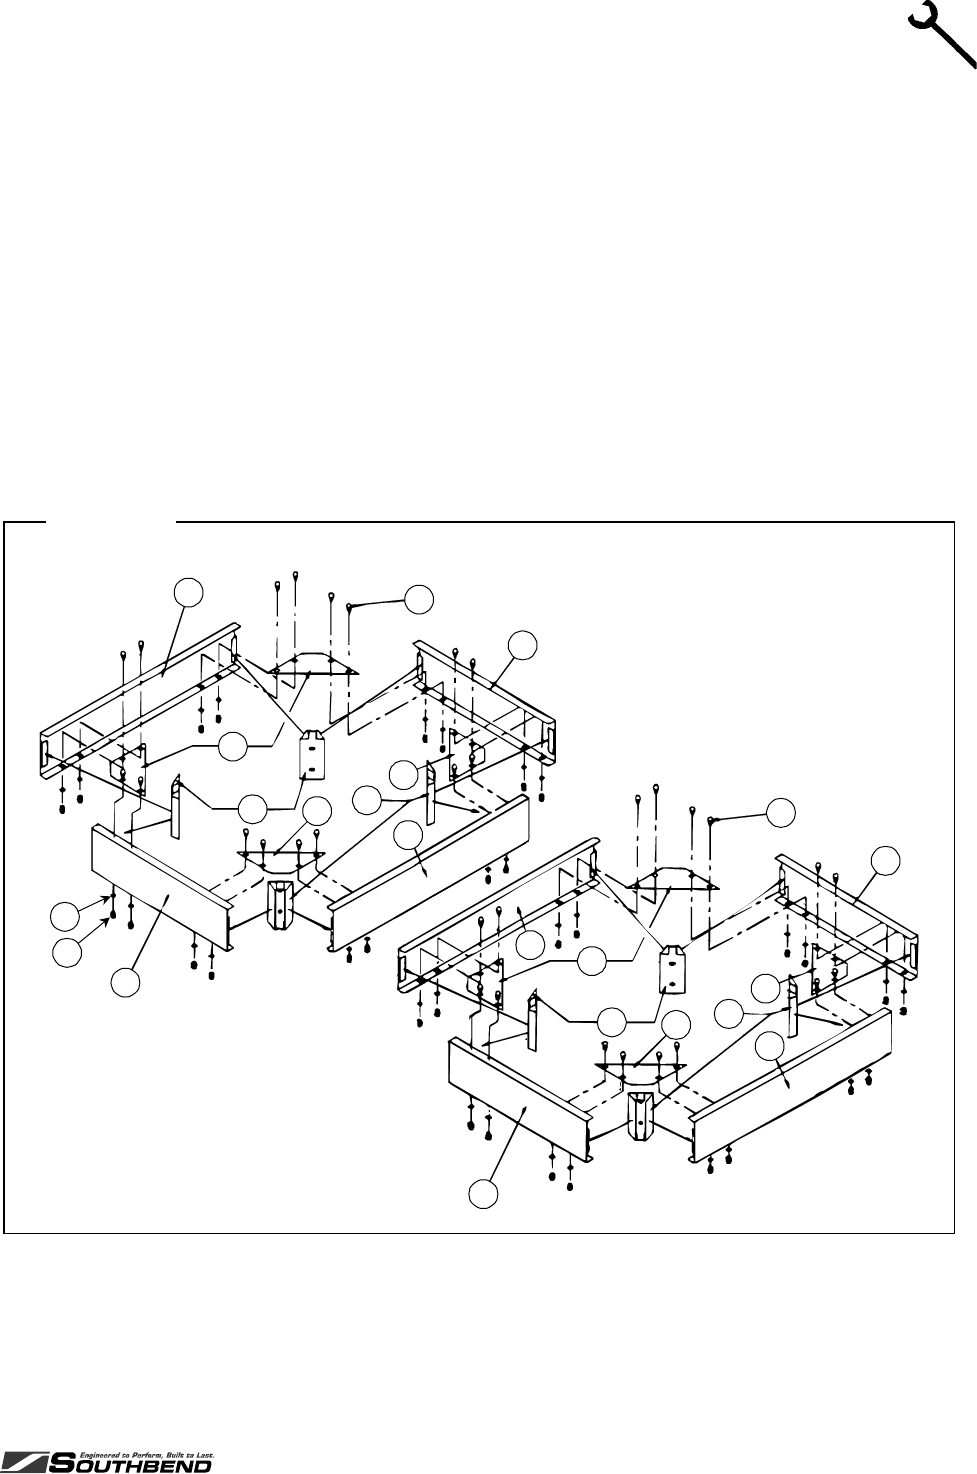
1. Position the bottom-brace pieces on a flat surface, as shown in Figure 10 below. There are four
bottom-side braces (items “A”), and four front/rear bottom-braces (items “B”).
2. Position a corner brace (item “C”) in each interior corner, matching the pre-punched holes on the lower
inside flange of the bottom braces.
3. Position the six leg brackets (item “D”); one in each corner of the stand, one front-center, and one rear-
center, as shown in Figure 10. Be sure that the bracket flanges are engaged into the open hem of the
bottom braces.
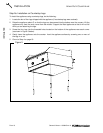
4. Use the thirty-two 1/2"-long hex head bolts (items “E”), lock washers (items “F”), and acorn nuts (items
“G”) to bolt the corner braces to the bottom braces. Only hand-tighten for now.
5. Check that the leg brackets are in the proper position, and that the outside corners are square.
Figure 10
A
B
D
C
A
A
B
B
D
D
D
C
C
C
C
E
C
A
E
G
F
B
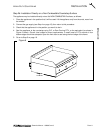
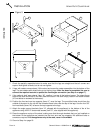
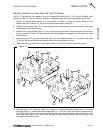
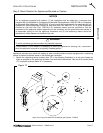
6. Use the twelve 1-1/2" hex bolts (items “H” in Figure 11) to attach the two left-legs (items “I”), the two
right-legs (items “J”), and the two center-legs (items “P”). “Left” and “right” are as seen from the front or
rear of the stand. Be sure that the small threaded-insert near the top of each leg faces either the front
or the rear of the stand, not a side. Insert the bolts through the leg brackets and into the legs. Only
hand-tighten the bolts for now.