


INSTALLATION COUNTER GRIDDLE
PAGE 12 OPERATOR’S MANUAL 1182629 REV 2
INSTALLATION
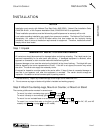
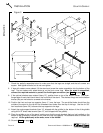
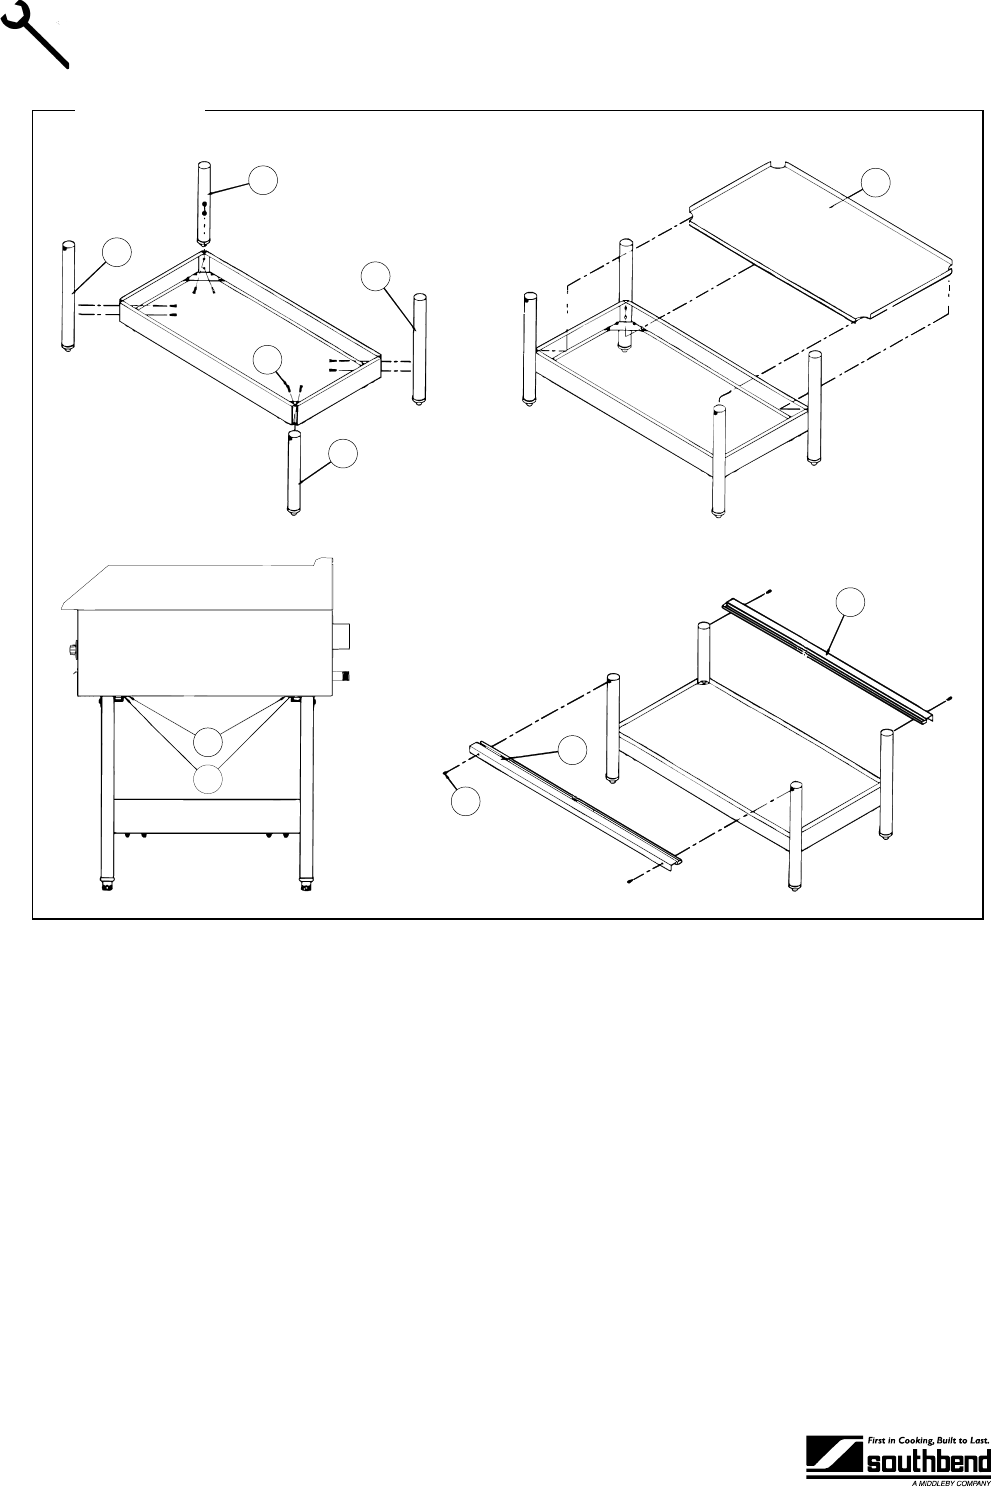
Figure 7
N
O
I
J
H
J
I
L
M
L
K
7. Check the partially assembled stand to make sure that the legs are straight and that all corners are
square. Now tighten all bolts, but do not over tighten.
8. If legs with casters were ordered, lift the stand and screw the caster assemblies into the bottom of the
legs. The two casters with wheel-locks go on the front legs. After the stand is assembled, be sure to
connect the required restraint to protect the flexible gas connection (see Step 3 on page 15).
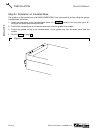
9. If the optional shelf was ordered (item “K”), position it on top of the bottom braces. The down-flange
edge of the shelf should be on the front side of the stand. The shelf simply rests on the bottom braces (it
is not bolted or screwed to the braces).
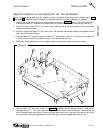
10. Position the front and rear top supports (items “L”) over the legs. The pre-drilled holes should face the
outside of the stand to line up with the threaded-insert holes near the top of the legs. Use the four 5/8"
hex-head bolts (items “M”) to secure the top supports to the legs.
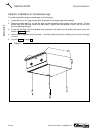
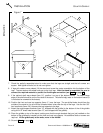
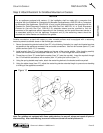
11. Attach the angle support brackets (item “N”, shipped with the griddle) to the bottom of the of the griddle
using #10x1/2" sheet metal screws (item “O”, also shipped with the griddle).
12. Place the griddle on top of the stand, making sure that the angle brackets that you just installed on the
bottom of the griddle are inserted into the front and rear top supports. No additional bolts or screws are
required. Lift the griddle only at the ends, never in the middle!
13. Go on to Step 4 on page 16.