12
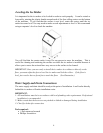
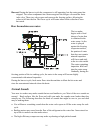
Nut of water draining hole
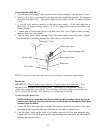
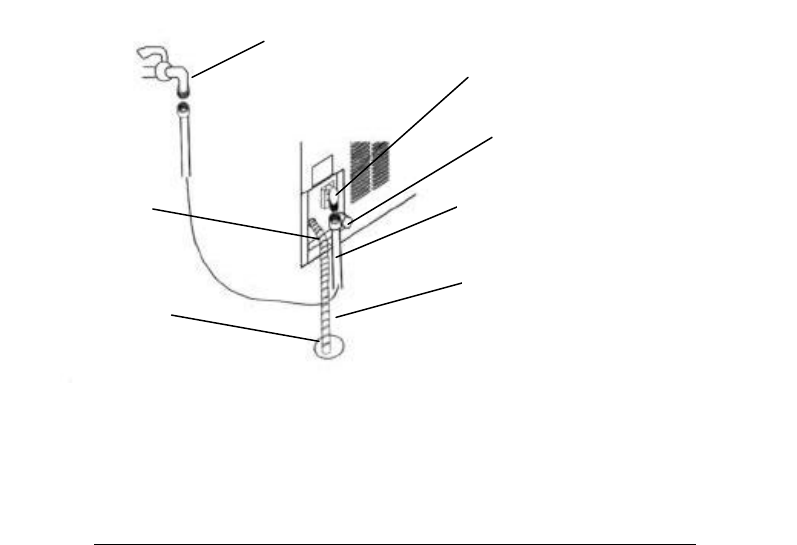
Connecting the water line:
1. Turn off main water supply. Turn on nearest faucet long enough to clear the line of water.
2. Find a ½ in. to ¾ in. vertical cold water pipe near the installation location. The distance
should be less than 9 feet. The water supply hose provided with the ice maker is about
9 feet.
3. A shut-off valve must be installed to the main water supply. If the water pipe has a
plain piece of copper tubing, attach a ¼” O.D. compression union to the tubing and
remove the nut.
4. Connect nuts of water supply hose to tap and water inlet valve. Tighten firmly by hand,
then one-half turn with wrench.
5. Turn on main water supply and tap. Check for water supply connection leaks. Tighten
any connections (including connections at the valve) or nuts that leak.
NOTE: Connection to the water line may vary according to installation requirements.
Drain Line:
IMPORTANT: This ice maker is not a freezer. It must connect to a drain line. Your
machine comes equipped with a gravity drain. Depending on your plumbing setup, a
condensation pump may be required. Poor drainage will cause a high rate of melting in
the ice storage bin and may cause flooding or your machine to shut off.
Connecting the drain line:
NOTE: If there is a drain line near the ice maker or the ice maker will be used as an
outdoor unit, the best choice is to drain water to the drain line through the drain hose
provided with ice maker.
1. Locate the floor drain near the ice maker. The distance should be less than 5 feet since
the length of the long drain hose provided with the ice maker is about 5 feet.
2. Find the drain outlet on the back of ice maker, then take off the rear drainage plug.
Connect the nut of the drain outlet to the water draining hose, and insert the other side of
the hose into the drain line.
Drain line
Water supply line
Floor drain
Water inlet valve
Water tap (¼"o.d.)
Drain outlet


