5
Before using your Sunbeam AutoGrinder,
wipe the stainless steel grinding bowl and
blades clean with a damp cloth and wash
the transparent cover in warm soapy water.
Dry thoroughly.
Note: Allow to dry completely before using.
1.Place the AutoGrinder on a dry, level
surface.
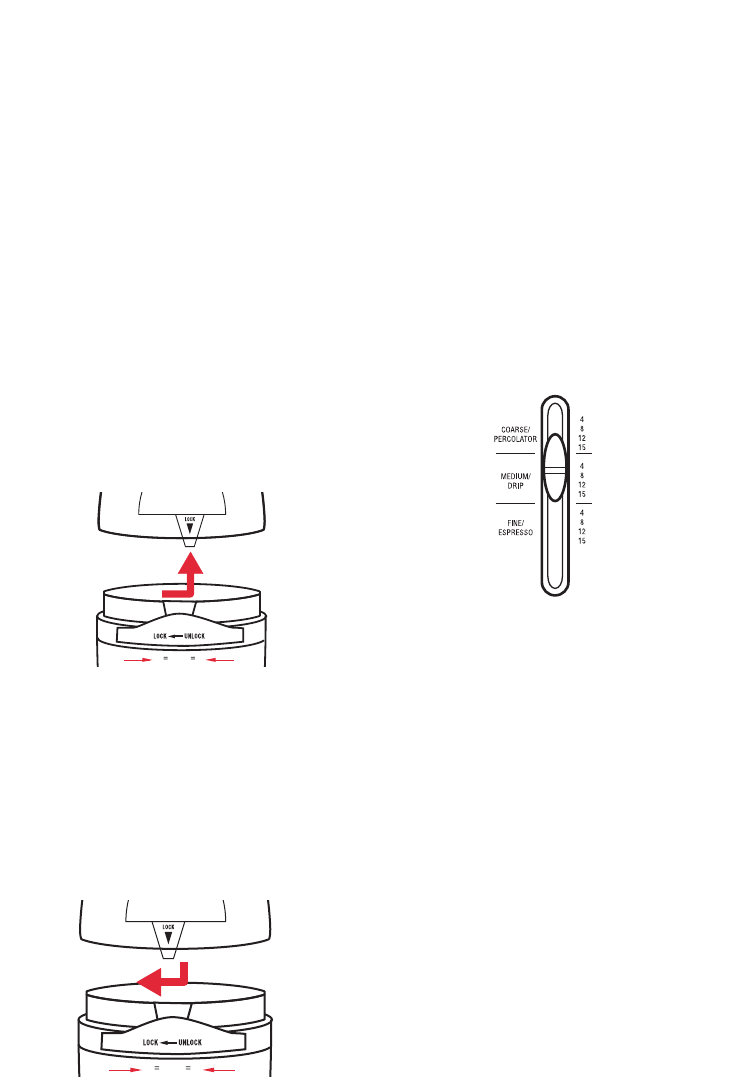
2. Remove the cover of the AutoGrinder by
turning it to the right/unlock position, then
lift straight up.
3. Using the measurements on the cover/lid,
fill with the desired amount of coffee
beans and pour into the grinding bowl.
Alternatively scoop the beans directly into
grinding bowl.
4. Replace and lock the cover onto the
AutoGrinder. Align the arrow on the lid/
cover with the ‘unlock’ graphic, on the rear
of the grinder, and turn the cover to the
left/lock position.
5. Hold the plug and pull slowly to release
the stored cord. Plug the power cord into
a 230-240V AC power outlet and turn the
power ‘ON’.
6. Select the style of coffee (Percolator, Auto
Drip, Espresso) and slide the grind selector
to the quantity of ground coffee desired.
7. Press the ‘Power’ button to commence
grinding and then remove finger.
The Sunbeam AutoGrinder will stop
automatically when the selected grind
is achieved. To stop the grind cycle at
anytime, push the ‘Power’ button. When
the ‘Power’ button is pressed again, the
grinder will start from the beginning of the
timed cycle.
Important: Do not remove the cover before
the blades have stopped moving.
8. Once the blades have stopped rotating
unplug the cord from the power outlet
and remove the cover. Gently tap the base
of the AutoGrinder to loosen the freshly
ground coffee from the stainless steel
grinding bowl.
Note: The AutoGrinder will only operate
when the cover is in the locked position.
Using your Sunbeam AutoGrinder


