11
Note: All attachments must be firmly
attached to the spindle. Always adjust the
attachments until you are sure that they are
correctly fitted.
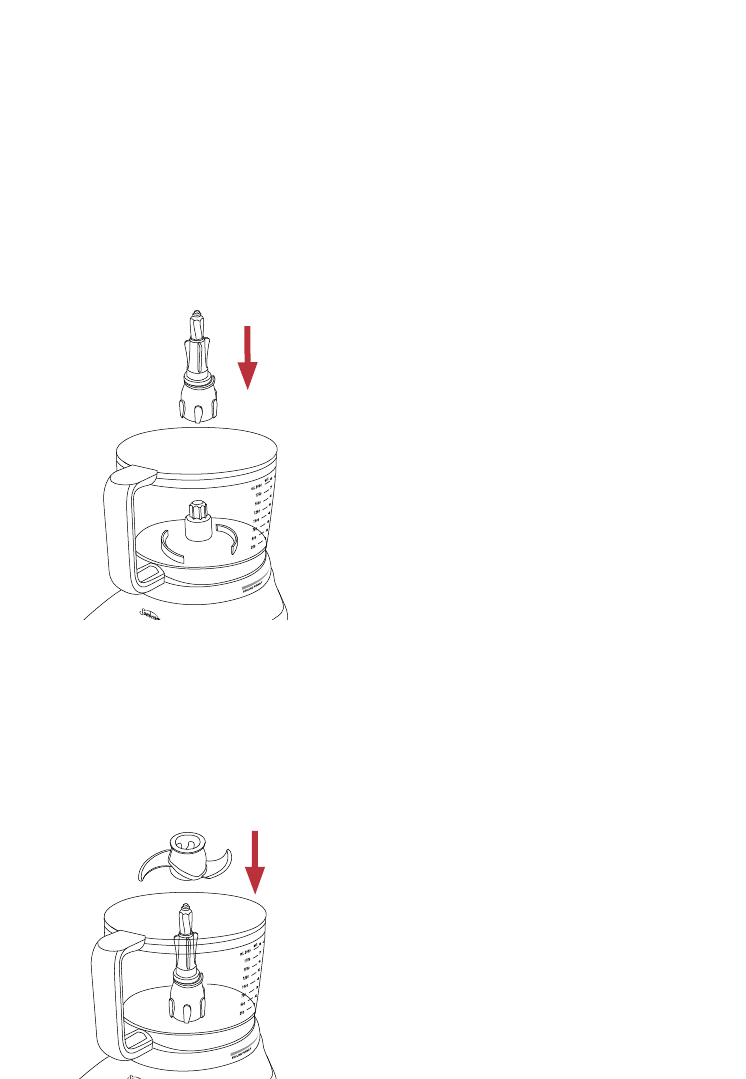
Placing the spindle
1. Fit the spindle onto the drive shaft,
see figure 4.
Processing Blade
1. Fit the processor bowl and spindle as
detailed previously in figures 1, 2 & 4.
2. Remove the processing blade from the
storage drawer.
3. Fit the processing blade over the spindle
and press firmly into place, see figure 5.
Warning: Use caution, as blades are sharp.
Always handle the processing blade by its
central plastic section.
4. Place food into the processing bowl.
5. Fit the processing cover to the processing
bowl, see figure 3 and place the food
pusher in the feed tube.
6. Plug the power cord into a 230-240V AC
power outlet and turn the power ‘ON’.
7. Start processing using the On/Off or Pulse
buttons.
8. When processing is complete, remove the
spindle and blade from the processing bowl
before removing the processed food.
Fitting/using the tools on your
Oskar
™
Professional
Fig 4
Fig 5


