Before using the coffee grinder, wipe the
base exterior with a damp cloth. Wash the
bean hopper, hopper lid and ground coffee
container in warm soapy water, then rinse
and dry.
Note: Do not immerse the burrs in water or
any other liquid.
Note: Do not place any parts of the coffee
grinder in the dishwasher.
1. Place the coffee grinder on a dry, level
surface.
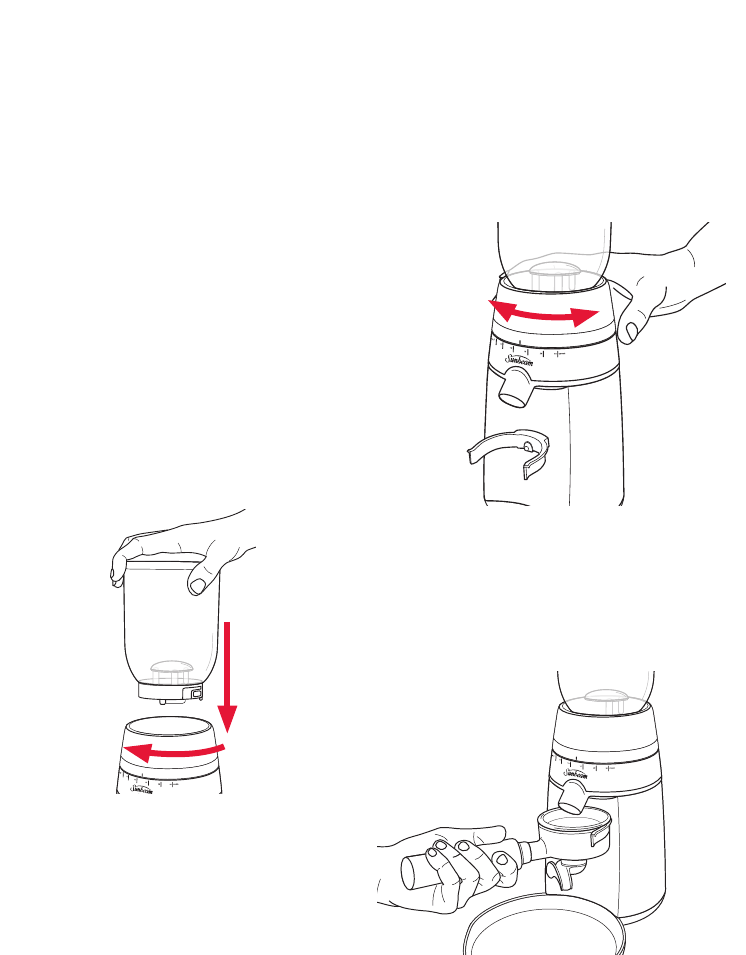
2. To attach the bean hopper, position bean
hopper onto the top of the motor base,
push down and turn clockwise.
See figure 1.
3. Fill the bean hopper with coffee beans.
Tip: Remember to keep the hopper full at
all times. Having an even weight bearing
down on the burrs is important to ensure a
consistent grind.
Note: This coffee grinder is intended to grind
whole coffee beans only.
4. Place the hopper lid onto the bean hopper.
5. Plug the power cord into a 230-240V AC
power outlet and switch the power on.
6. Select the grind by turning the grind
adjustment collar to the desired setting,
see figure 2.
Refer to the grind setting table on page 6 to
assist you in selecting the correct grind level
for the desired brewing method.
7. Position the group handle into the group
handle locator, see figure 3.
Note: There are two group handle locators
provided a smaller size to fit domestic
handles and a larger size for commercial
handles.
Figure 1
Figure
2
Figure
3


