


17
The temperature in the oven has been set at the factory. When first using the oven,
be sure to follow recipe times and temperatures. If you think the oven is too hot
or too cool, the temperature in the oven can be adjusted. Before adjusting, test a
recipe by using a higher or lower temperature than the recommended temperature.
The baking results should help you to decide how much of an adjustment is needed.
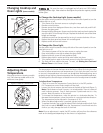
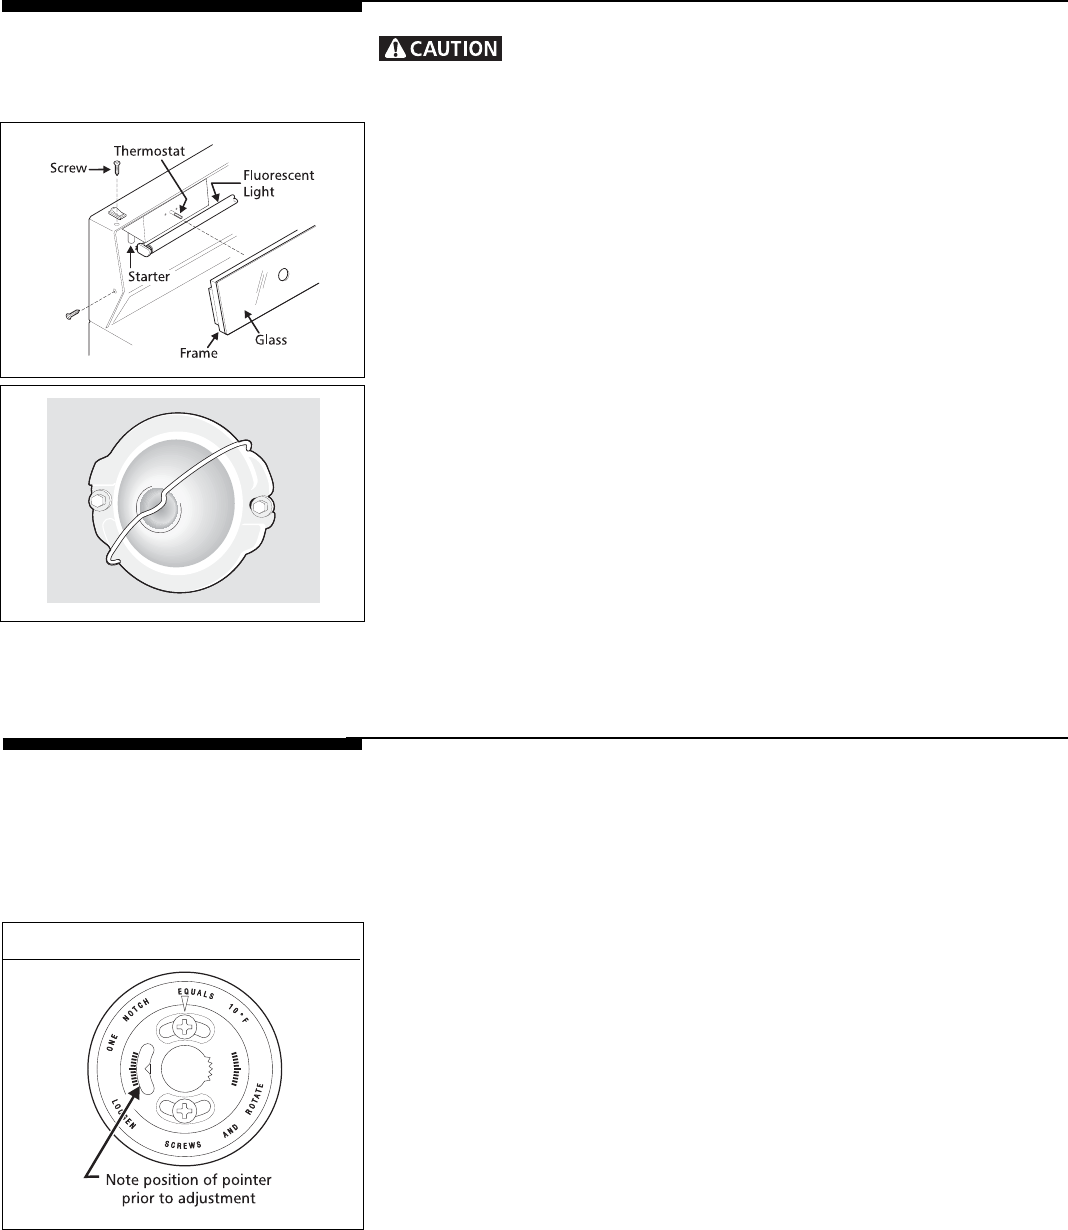
To Adjust Oven Temperature:
1. Check to be sure the Temperature Control knob is in the OFF position.
2. Pull Temperature control knob straight off the shaft.
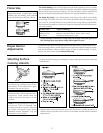
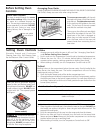
3. Loosen, but do not remove, the two screws at the back of the knob (Figure 1).
Note: If knob does not have 2 screws, it is not adjustable. There is a series of
small indicator grooves. One of these grooves is positioned next to a tiny
pointer. Note the position of the pointer.
4. To increase the temperature, move the pointer in a clockwise direction. To
decrease the temperature, move the pointer in a counterclockwise direction.
The temperature can be adjusted in increments of 10°F.
5. When the desired adjustment is reached, tighten both screws.
6. To replace the knob, line up the flat sides of both the knob and the shaft. Push
the knob into place. DO NOT force the Temperature Control knob onto the
shaft or you may damage the back of the knob.
Note: Once an adjustment is made, the OFF position will vary from the reference
mark on the backguard depending on the amount of adjustment.
Adjusting Oven
Temperature
(Easy and continuous cleaning models
only, Self-cleaning model refer to the
electronic timer guide)
Figure 1: Back of Control Knob
Changing Cooktop and
Oven Lights (some models)
Be sure the oven is unplugged and all parts are COOL before
replacing the oven light. Wear a leather-faced glove for protection against possible
broken glass.
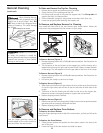
To Change the Cooktop Light (some models)
Use the rocker switch located on the top left side of the control panel to turn the
cooktop light on or off.
1. Turn power off at the main source or unplug the range.
2. Remove control buttons.
3. Remove screws from backguard frame trim, two from each side, and lift off.
Remove the glass panel.
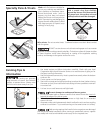
4. Remove bulb by sliding your fingers over the bulb at each end and rotating the
top of the bulb 1/4 turn away from you. Replace the bulb with one of the same
length and wattage.
5. A defective starter can be removed by turning it counter-clockwise 1/4 turn.
6. Replace the glass panel and frame trim on backguard.
7. Replace screws and control buttons.
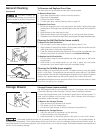
To Change the Oven Light
Use the rocker switch located on the top left side of the control panel to turn the
oven light on or off.
1. Turn electrical power off at the main source or unplug the oven.
2. Press wire holder to one side to release the glass shield.
3. Replace bulb with a new 40 watt appliance bulb.
4. Replace glass shield in socket and snap wire holder into place.
5. Turn power back on again at the main source (or plug the oven back in).
6. The clock will then need to be reset. To reset, see Setting the Clock and
Minute Timer in this Owner's Guide.