11
Step 4: Installing Anti-Tip Device
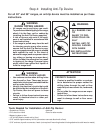
30" and 36" Dual Fuel Ranges (Figures 6 and 7)
Thermador Service Part No. Qty Description
415078 4 Screw, Phillips, #10 x 1-1/2"
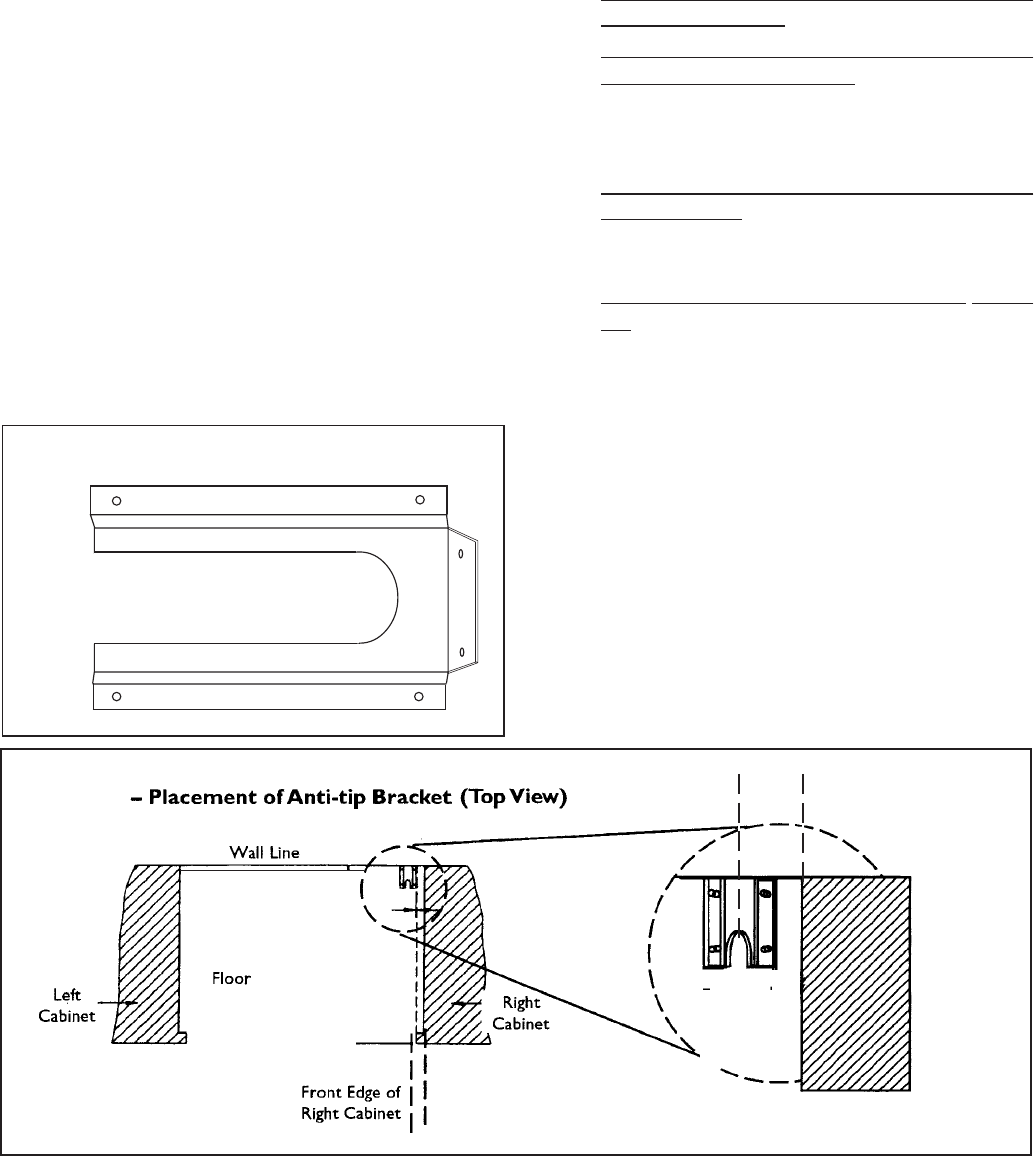
600413 1 Anti-Tip Bracket, Floor-Mounted
IMPORTANT INSTALLATION INFORMATION:
- For walls, wall studs, or floors composed of
solid wood or metal, drill 1/8" pilot holes.
-
For walls or floors composed of drywall, sheet-
rock or other soft materials, drill 3/16" holes to
a minimum depth of 1-3/4", then tap plastic
anchors into each of the holes using a ham-
mer.
-
For walls or floors composed of concrete or
concrete block, drill 3/16" holes to a minimum
depth of 1-3/4", then tap concrete anchors into
each of the holes using a hammer.
-
For walls or floors having ceramic tile cover-
ing, drill 3/16" holes through the tile only, then
drill into the material behind the tile as indi-
cated immediately above.
• If the range is moved to a new location, the Anti-Tip
Device must be removed and reinstalled.
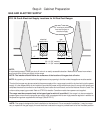
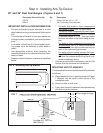
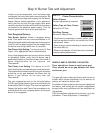
MOUNTING ANTI-TIP BRACKET
The alternative floor mounted bracket shall be installed
as follows:
a) Place bracket on floor in position shown in Figure
7 (Bracket may be used in either corner of the
installation area)
.
b) Secure to floor or wall stud.
c) Later, when the unit is installed, the adjustable leg
will slide under the bracket.
FIG. 7
4-7/8"
➤
➤
from edge of range
4-7/8"
➤
➤
typical -
either side)
FIG. 6 - Mounting Anti-tip Bracket
• The anti-tip bracket may be attached to a solid
wood cabinet having a minimum wall thickness of
3/4".
• The thickness of the wall or floor may require use
of longer screws, available at your local hardware
store.
• In all cases, at least two (2) of the bracket mount-
ing screws must be fastened to solid wood or
metal.
• Use appropriate anchors when fastening the
mounting bracket to any material other than hard-
wood or metal.
• Prepare holes at fastener locations as identified
below:


