


9
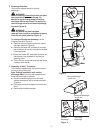
2. Discharge Direction:
The hood is shipped ready for vertical
discharge.
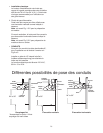
WARNING!
Before installing
remove the knock-out plate
that close the air outlet on the top if is
desired to use the range hood for vertical
discharge OR the rear outlet if is desired to
use the range hood for horizontal discharge.
(see also Figure 5).
WARNING!
Once the Knock out plate has been
removed, this cannot be reinstalled anymore
close the air outlet (see also Figure 5).
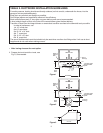
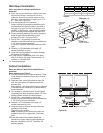
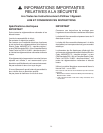
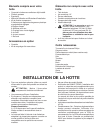
To change to horizontal discharge, do the
following (see also Figure 4):
a. Remove knock-out plate on the rear side of
the hood (see also Figure 5)
b. Remove and keep the 4 screws (2 per side)
that fix blower on top of the hood and release
it from keyholes.
c. Rotate the blower 90° and check that pins on
side blower fixing brackets fit into the pre-
installing holes .
d. Fix the blower on the rear side with the same
4 screws (see step b).
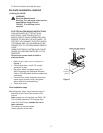
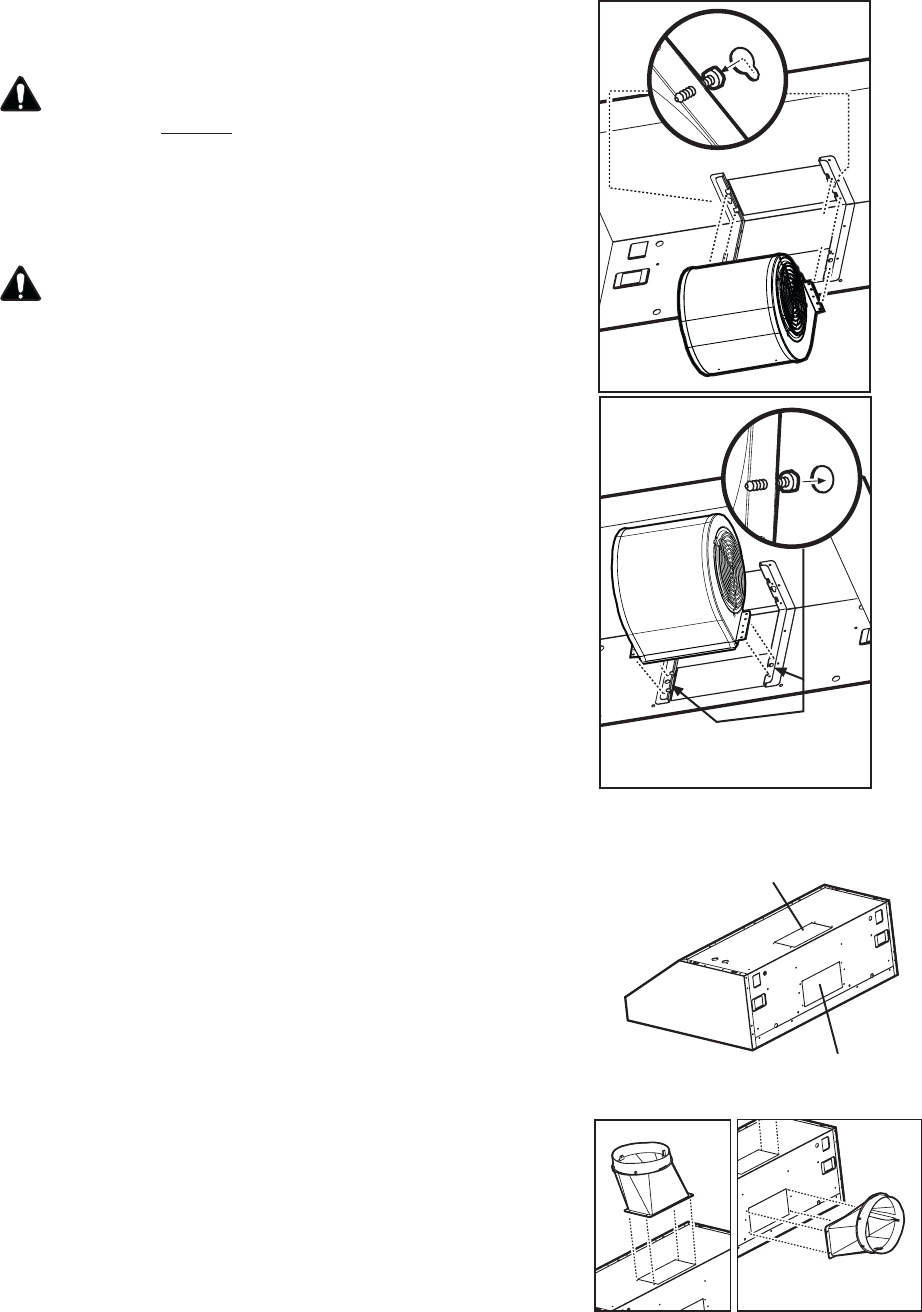
3. Assembly of the 8” Transition:
The transition supplied with the hood mounts to
the top or rear of the hood.
Note- Cabinet installation with vertical
discharge ONLY: do not install transition until
hood has been fixed on cabinet.
a. Place the transition piece over the hood
exhaust and secure with 4 screws provided
(Figure 5).
b. Duct tape connection between transition and
hood.
c. Remove tape holding damper.
Figure 4
Pin
Pin
Keyhole
Horizontal discharge
- knock-out
Vertical discharge
- knock-out
Vertical
discharge
Horizontal
discharge
Transition
Transition
Figure 5