


PRG Professional Ranges Care and Use
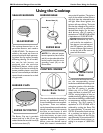
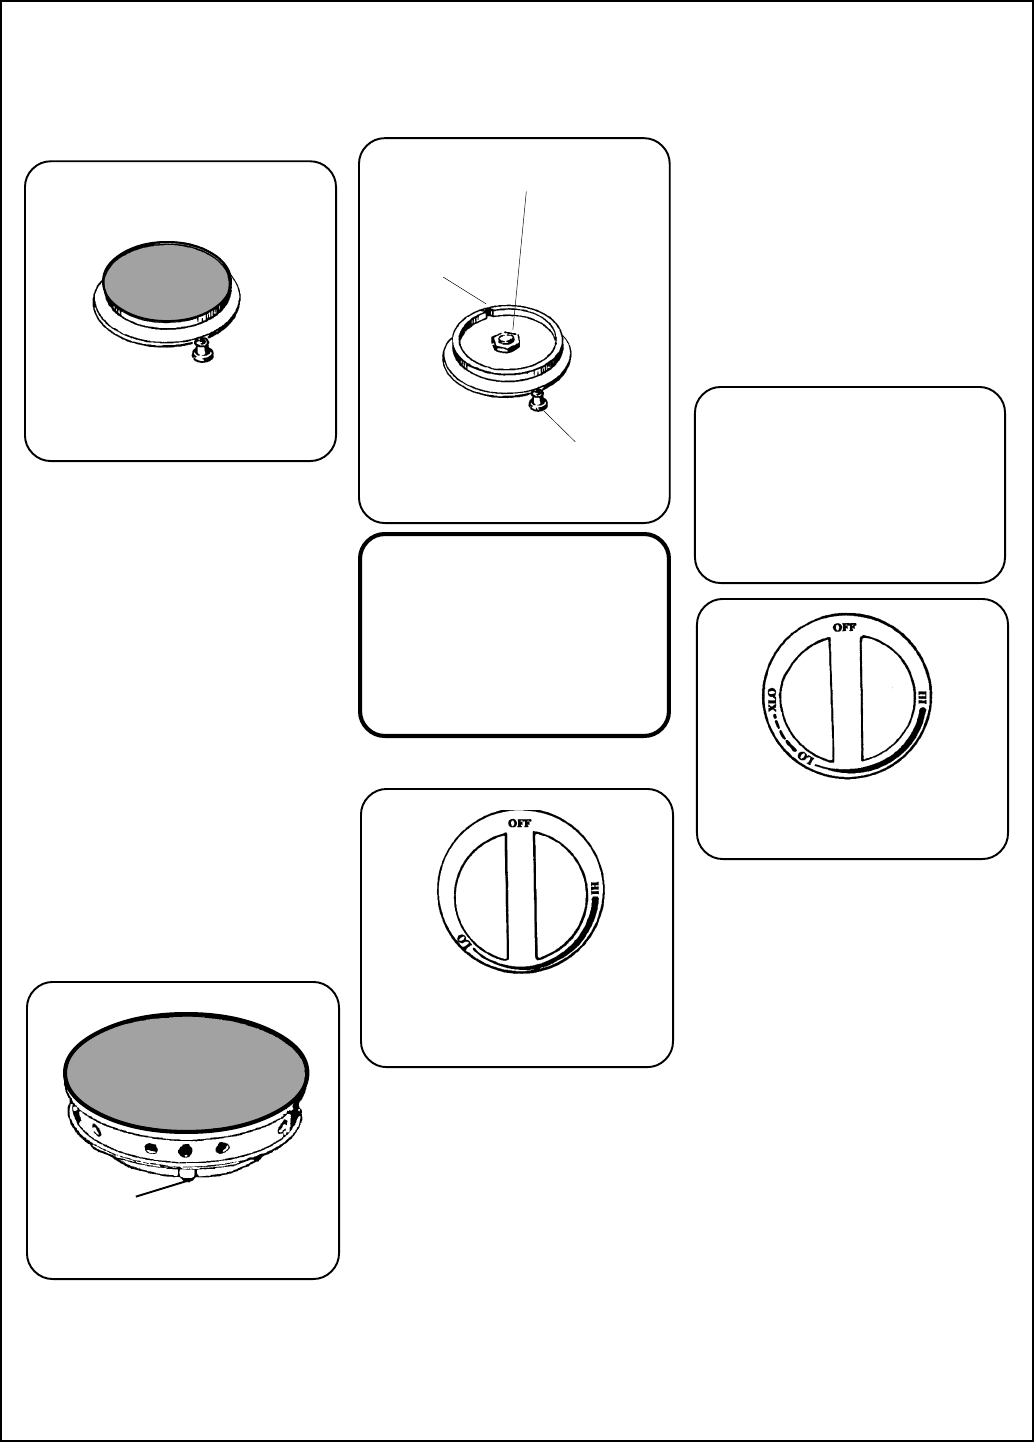
SEALED BURNERS
SEALED BURNER
Section Four: Using the Cooktop
Standard Burner Control
Knob
Using the Cooktop
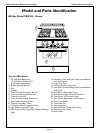
The control knobs for the sealed gas
burners are positioned directly in
front of and below the correspond-
ing burners. There are indicator
marks located above each knob that
identify whether the knob controls
the front or rear burner. A solid
circle indicates that the knob con-
trols that burner; an open circle
indicates that the knob controls the
opposite burner. To operate a
burner, press the desired control
knob, then rotate it counterclock-
wise to the HI position. The igniters
at all of the sealed surface burners
will click, then the selected burner
will light. After flame ignition, the
ignitors will stop clicking. The knob
can then be rotated to any position
between HI and LO to achieve the
desired flame height. For the stan-
dard burners, the LO setting is
equivalent to 2,200 BTU/HR and HI
is equivalent to 15,000 BTU/HR.
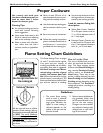
CONTROL KNOBS
BURNER BASE
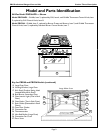
The Burner Cap top is porcelain
enamel and has a tab (A) on the
underside that fits into the notch (B)
on the burner base (C).
BURNER CAPS
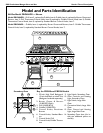
The cooktop features four or six
gas surface burners, each rated at
15,000 BTU/HR. The burners are
sealed to the metal top frame to
prevent liquid spills from penetrat-
ing below the top surface, thereby
facilitating cleaning. On all models,
the two far left burners are
equipped with the exclusive
ExtraLow® feature, which cycles
the flame off and on to achieve the
lowest possible simmer rate. Each
burner is controlled by an individual
control knob connected to a shaft
of a gas valve.
Page 11
For the two far left ExtraLow
®
burn-
ers, the corresponding control
knobs have additional markings indi-
cating that rotation of the knob be-
low the LO setting is possible.
Within this LO to XLO control
range, the flame is pulsed OFF and
ON for varying lengths of time to
enable simmering, poaching, melting
chocolate and holding cooked foods
at temperature without scorching
or burning. The XLO setting is
equivalent to 375 BTU/HR and is
achieved by cycling the flame ON
for approximately 10 seconds and
OFF for 50 seconds of each minute.
At a position just below the LO
setting, the flame will be ON for
approximately 50 seconds and OFF
for 10 seconds of each minute, re-
sulting in an output of 1,850 BTU/
HR.
NOTE: For safe and proper
burner operation, be sure that
tab (A) on the underside of the
burner cap fits into the corre-
sponding notch (B) on the
burner base.
BURNER BASE
Burner Base (C)
Notch (B)
Igniter (D)
NOTE: Whenever any con-
trol knob for the sealed sur-
face burner is turned beyond
the OFF position, the surface
burner indicator light located
on the far left of the control
panel will illuminate.
ExtraLow
®
Burner Control
Knob
BURNER CAP POSITION
Tab (A)