


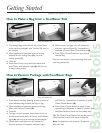
Bags & Rolls
1. Place item(s) into bag, allowing at least 3 inches of
space between bag contents and top of bag.
2. Open appliance lid and place open end of bag
down into Vacuum Channel
(E).
3. Close lid.
4. To begin vacuum process, press down firmly on
lid with both hands and hold. Motor and Indicator
Light
(A) will turn on as vacuum process begins.
5. When motor and light turn off, release lid.
Vacuum process is complete. Indicator Light
will blink for 5 seconds as a reminder to press
Open/Cancel Button
(B).
6. Press Open/Cancel Button to open lid and
remove bag. Refrigerate or freeze if needed. (See
FoodSaver Reference Guide for food safety tips.)
Tip: The Open/Cancel Button can also be used to
cancel vacuum process mid-way and open lid.
Note: Let appliance cool down for 20 seconds
after each use.
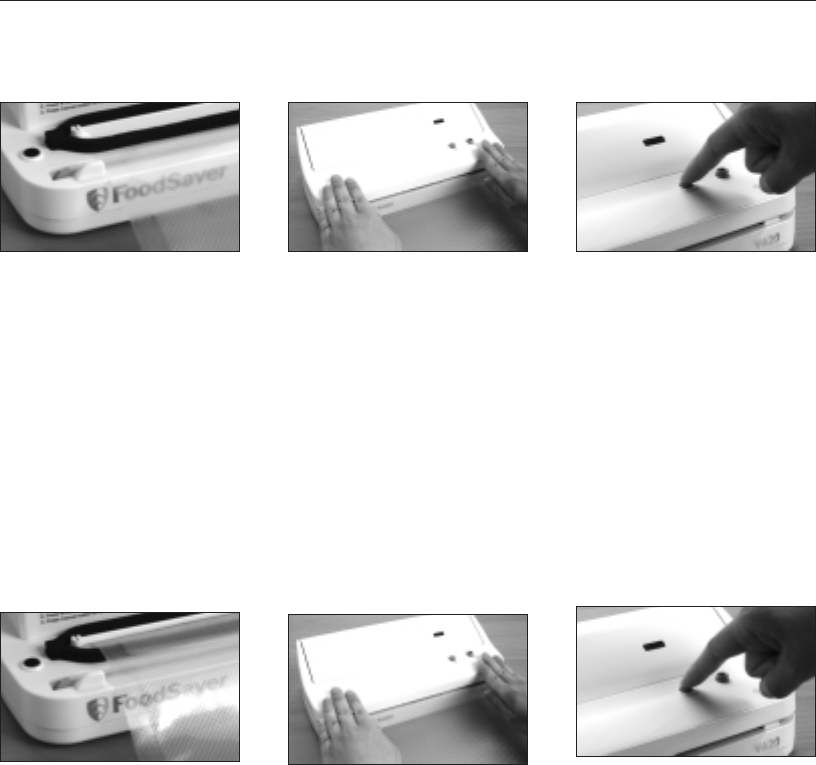
1. Cut enough bag material from roll to hold item
to be vacuum packaged, plus 3 inches. Be sure to
cut straight.
2. Open appliance lid and place one end of bag
material across Sealing Strip
(G), not over
rubber gasket
(F).
3. Close lid.
4. Press down firmly on lid with both hands and
hold. Motor and Indicator Light
(A) will turn on
as bag is being sealed.
5. When motor and light turn off, release lid.
Indicator Light will blink for 5 seconds as a
reminder to press Open/Cancel Button
(B).
6. Press Open/Cancel Button to open lid and
remove bag.
Now you are ready to vacuum package with your
new bag (see below).
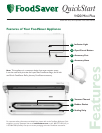
Getting Started
Registering your appliance is quick and easy at www.foodsaver.com.
How to Make a Bag from a FoodSaver Roll
How to Vacuum Package with FoodSaver Bags
Place Bag on Sealing Strip Press and Release Lid
Place Bag in Vacuum Channel
Press and Release Lid
Press Open/Cancel Button
Press Open/Cancel Button