4
FICHE POLARISÉE : Par mesure de sécurité, cet appareil est muni
d’une fiche d’alimentation électrique polarisée (dont l’une des
broches est plus longue que l’autre). Pour prévenir tout risque
d’incendie et de décharge électrique, cette fiche ne peut être
insérée que d’une seule façon dans la prise murale. Si les deux
broches n’entrent pas complètement, renverser la fiche. Si elle
n’entre toujours pas correctement, faire appel à un électricien
professionnel. Ne jamais tenter de modifier ou de contourner ce
dispositif de sécurité.
CONSIGNES RELATIVES AU CORDON COURT : Cet appareil est
muni d’un cordon d’alimentation court visant à prévenir qu’on s’y
prenne les pieds et trébuche, ce qui risque toujours de survenir
lorsqu’un appareil est équipé d’un cordon plus long.
Ainsi, ne jamais utiliser de rallonge avec cet appareil.
ALIMENTATION ÉLECTRIQUE : Si le circuit électrique est
surchargé par d’autres dispositifs, cet appareil pourrait ne pas
fonctionner correctement. Dans la mesure du possible, le brancher
à un circuit indépendant.
ATTENTION: Afin de réduire le risque d’incendie et d’électrocution,
ne pas retirer le boîtier inférieur qui ne contient aucune pièce
pouvant être réparée par l’utilisateur. Toute réparation doit être
effectuée par du personnel agrée uniquement.
PRÉCAUTIONS RELATIVES AUX PLASTIFIANTS
MISE EN GARDE : Afin d’éviter que les plastifiants exsudent de la
finition du plan de travail, de la table ou de tout autre support,
utiliser des dessous de verre ou des napperons NON PLASTIFIÉS
entre l’appareil et la finition du plan de travail ou de la table.
Le non-respect de cette consigne pourrait faire que fonce, se
décolore ou se tache de manière permanente la finition du plan
de travail ou de la table.
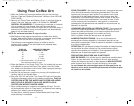
Using Your Coffee Urn
1. Wash the Coffee Urn thoroughly before using for the first time.
(See the “Care and Cleaning Instructions” section in this USE AND
CARE GUIDE.)
2. Remove Lid, Pump Tube, and Basket. Check to see that Spigot is
closed. Use cold, fresh tap water to fill Coffee Urn. DO NOT
OVERFILL OR UNDERFILL. Fill according to markings on inside of
Urn for number of cups desired. Use cold tap water as the
automatic brewing cycle is timed to begin with a cold water start. It
brews hot rich coffee at a cup-a-minute speed, and automatically
keeps it hot and fresh tasting.
NOTE: Do not brew less than 12 cups of coffee.
3. Wet Basket to help keep small particles of coffee from sifting
through. Add desired amount of regular or percolator grind coffee
to Basket. (Do not use drip or finely ground coffee.)
The following chart suggests amount of coffee to use for
medium brew; amounts can be varied to suit personal taste
and particular coffees.
CUPS TO AMOUNT OF GROUND
BE BREWED COFFEE TO USE*
12 1 cup
18 1
1
⁄2 cups
24 2 cups
30 2
1
⁄
2 cups
1 cup brewed coffee = 5 fluid ounces
*Use standard measuring cups
4. Place the Basket on the Pump Tube. Then, by holding the top end
of the Basket to secure the Pump Tube, place it into the Coffee
Urn. Make sure the bottom of the Pump Tube is properly resting in
the percolator well in the center.
5. Add the Lid and secure in position by turning Lid clockwise until
Locking Tabs fit into Handle Slots.
6. Plug into 120V AC wall outlet. The Power ON Light will illuminate.
To avoid unnecessary strain on the heating mechanism, PLUG IN
COFFEE URN AFTER THE WATER AND COFFEE ARE ADDED
AND THE LID IS SECURELY IN PLACE. NEVER PLUG IN
COFFEE URN WITHOUT WATER INSIDE.
7. When coffee brewing is complete, percolating will stop. The Urn
will automatically switch to “keep warm” to preserve fresh-tasting
coffee at hot, ready-to-serve temperature.
For best flavor, carefully remove Coffee Basket and Pump Tube
when brewing is completed.
6
Melitta_MEU30CAN_IB_30-3-06 3/30/06 2:24 PM Page 11


