


5.4.
Hints
◆ Bread will toast better if the outside is buttered, but the butter may
be omitted.
◆ Food needs to be cooked before placing between bread slices.
◆ Avoid using processed cheese as it tends to ‘run’ under high
temperatures.
◆ Use a pizza cutter to cut pockets apart.
◆ Four slices of bread will make 4 snacks. Recipes may be cut in half.
User Maintenance Instructions
This appliance requires little maintenance. It contains no user
serviceable parts. Do not try to repair it yourself. Contact a qualified
appliance repair technician if the product requires servicing.
Care and Cleaning
CAUTION: Unplug from electrical outlet and allow to cool thoroughly
before cleaning. Never immerse appliance in water or other liquids.
1. Brush cooking surfaces with clean, soft pastry brush or cloth.
2. Do not use steel wool or coarse scouring pads. Remove stubborn
stains with a plastic mesh puff or pad. For best results, use only
products with directions stating that it is safe for cleaning non-stick
cooking surfaces.
3. The exterior finish should be cleaned with a non-abrasive cleaner
and a soft, damp cloth; dry thoroughly.
4. When finished cleaning, close latch and wrap cord around the tabs
(models TSM2SAN and TSM2SANCAN) or the Cord Wrap on bottom
of Snack n’ Sandwich Maker (model TSM2032T and TSM2SANT).
Stand on end for storage.
Flavored Butters
Combine ingredients and spread the flavored butter inside or outside
of the bread. Add filling and toast. The butters are perfect for adding
flavor to any roll-up or sandwich. All recipes make
1
⁄
2
cup.
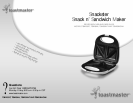
Snackster Snack n’ Sandwich Maker Use and Care Guide
Using Your Snackster
CAUTION: Never place any part of appliance in water or other liquids.
1. Before using your Snackster for the first time, wipe the cooking
surfaces with a damp cloth to remove all dust and dry. Follow
instructions for CONDITIONING COOKING SURFACES.
2. Unwrap cord completely from unit, close lid and plug into a 120 V
60 Hz outlet. The red power on light will come on and stay on during
use. The green light will come on indicating that the unit is heating
(for models TSM2SAN and TSM2SANCAN). Allow to preheat
approximately 5 minutes. For models TSM2032T and TSM2SANT, the
green light will come on when unit is preheated. The green light will
continue to come on and go off during use. Initially, some smoking
may occur. This is normal for newly manufactured appliances and
will not occur after the first few uses. When preheated, the green
light will turn off (for models TSM2SAN and TSM2SANCAN). The
cooking surfaces are ready to use.
CAUTION: Appliance surfaces are hot during use.
3. Follow directions in each section for individual recipe: flavored
butters, roll-ups, sandwiches, or hot snacks.
4. Close the lid and latch ONLY if recipe directions indicate to do so.
Do not force shut. Do not latch if recipe contains uncooked eggs or
will increase in volume when cooked; allow it to expand with lid
unlatched.
5. Refer to recipe for cooking time and special instructions.
6. Cooking time is 2-6 minutes for most recipes. Lift the lid to check
for doneness. Leave in longer to toast darker or cook until done.
7. Remove snack with plastic, nylon, or wooden utensil to protect the
non-stick surface. Never use a sharp, metal object. You may make
1-4 snacks at a time.
CAUTION: Allow sandwiches, hot snacks and roll-ups to cool
before eating as filling becomes very hot.
8. When finished, unplug from the wall outlet and allow to cool
before cleaning. See Care and Cleaning.