


Hot Food Holding Cabinet Operation (continued)
Turning the unit OFF/ON: After the temperature has been set, the customer
can continuously turn the unit OFF and then back ON to the same temperature.
To turn the unit on or off press the ON/OFF button
.
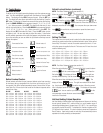
Temperature Adjustment: Press the SET button
SET
and the UP Arrow
button at the same time. The display will flash the current temperature
setting or OFF (if the unit is turned off). Use the UP
or DOWN
Arrow buttons to adjust your desired temperature setting (temperature range
is 140
0
thru 180
0
F, and OFF) then press the SET button
SET
. The display
will go back to reading the cabinet temperature.
Important Alarm Events
Also, some R & A Series models can register alarm events on the control
display such as:
ELE LOS: Indicates that the power supply had been interrupted.
DOR OPN: Indicates that a door has been left open.
HI CAB: Indicates that the cabinet air temperature is too high.
LO CAB: Indicates that the cabinet air temperature is too low.
CLN FIL: Indicates that the condenser coil requires cleaning.
CAB SNR: Indicates cabinet sensor has failed.
COL SNR: Indicates coil sensor has failed.
DIS SNR: Indicates liquid line sensor has failed.
IV. Defrost Cycles:
All Upright Cabinets, defrost cycles will occur every 8 hours for all re-
frigerators and every 4 hours for all freezers. All TE & TU Series defrost
cycles occur every 2 1/2 hours. All TS Series defrost cycles occur every
3 hours and all Compacts, undercounter and prep table refrigerators, will
occur every 6 hours.
Units equipped with an LED temperature display will indicate when a defrost
cycle is in process.
V. GENERAL CARE:
WARNING: DISCONNECT ELECTRICAL POWER SUPPLY BEFORE CLEAN-
ING ANY PARTS OF THE UNIT.
All Traulsen equipment should be cleaned only with warm water, mild soap
and a soft cloth. Apply with a dampened cloth and wipe in the direction of
the metal grain.
Avoid the use of strong detergents and gritty, abrasive cleaners as they
may tend to mar and scratch the surface. Do not use cleansers containing
chlorine, this may promote metal corrosion.
Care should also be taken to avoid splashing the unit with water, containing
chlorinated cleansers, when mopping the floor around the unit.
For stubborn odor spills, use baking soda and water (mixed to a 1 TBSP
baking soda to 1 pint water ratio).
VI. ADJUSTING THE SHELVES:
Shelves Mounted On Pins
First select the desired location and remove the white plastic covers in the
interior back and sides by rotating them counter-clockwise. Remove the
shelf pins by rotating them counter-clockwise. Install the pins in the desired
location by rotating them clockwise. Make sure the pin is securely tightened
down. Do not over tighten. Slide the shelf into its new position, and replace
the white plastic covers into the holes vacated by the shelf pins.
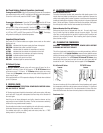
Shelves Mounted On Clips & Pilasters
Shelves and shelf clips are shipped with the unit. For each shelf, insert
four (4) shelf clips into the pilaster slots at the same height. The shelf
clips have a small projection on top which holds the shelf in position and
prevents it from slipping forward. After installing shelf clips on pilasters,
place shelves on clips.
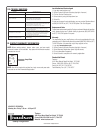
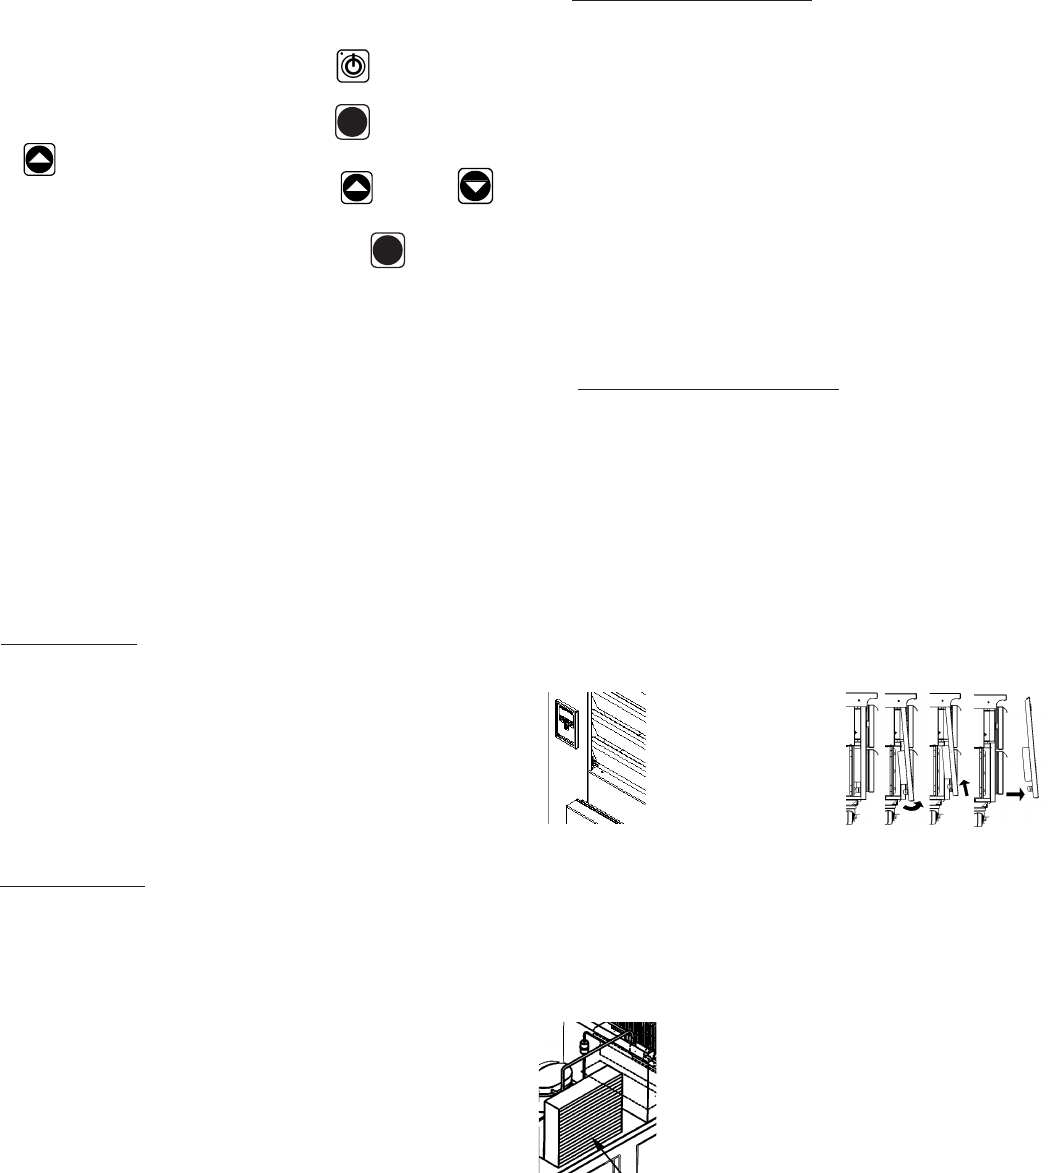
VII. CLEANING THE CONDENSER:
WARNING: DISCONNECT ELECTRICAL POWER SUPPLY BEFORE
CLEANING ANY PARTS OF THE UNIT.
This is the single most important thing you can do to promote long, efficient
equipment life. For All Upright Cabinets, remove the two bottom screws
securing the louver panel, then pivot this upwards allowing full access to the
front facing condenser. For all TE Series, TU Series & TS Series, place
hands under the louver panel and pull out and up to get louver panel off
bracket of the unit. Contact factory service support for all Compacts.
R & A Series/G Series TE/TU/TS Series
Louver Louver
Vacuum or brush any dirt, lint or dust from the finned condenser coil, around
the compressor and other cooling system parts as indicated. If significant
dirt is clogging the condenser fins, use compressed air to blow this clear.
When finished reverse the louver removal process as instructed above.
Condenser Coil
Screw
Location
-3-