


VII. a - CLEANING THE CONDENSER:
Clean the condenser at least monthly (more often if
necessary) to insure long service life. Keeping the
condenser free of lint and dust will allow the
refrigeration system to operate at peak efficiency and
minimize the risk of premature failure.
To clean the condenser, open or remove the front
louver assembly then turn the Power switch OFF. If the
louvered door is not hinged, lift the door out of the lower
cradle and then slide it down and out of the top bracket.
Vacuum and brush any dirt, lint or dust from the finned
condenser coil, taking care not to bend the thin
aluminum fins.
VII. b - LIGHT BULB REPLACEMENT (if equipped):
Turn the power switch OFF, remove the light cover and
unscrew the light bulb. Replace with a bulb of identical
type (115V 40-Watt T-6 1/2 Intermediate Base Clear
Refrigerator Lamp) and reinstall the light cover.
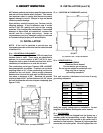
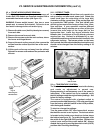
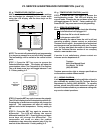
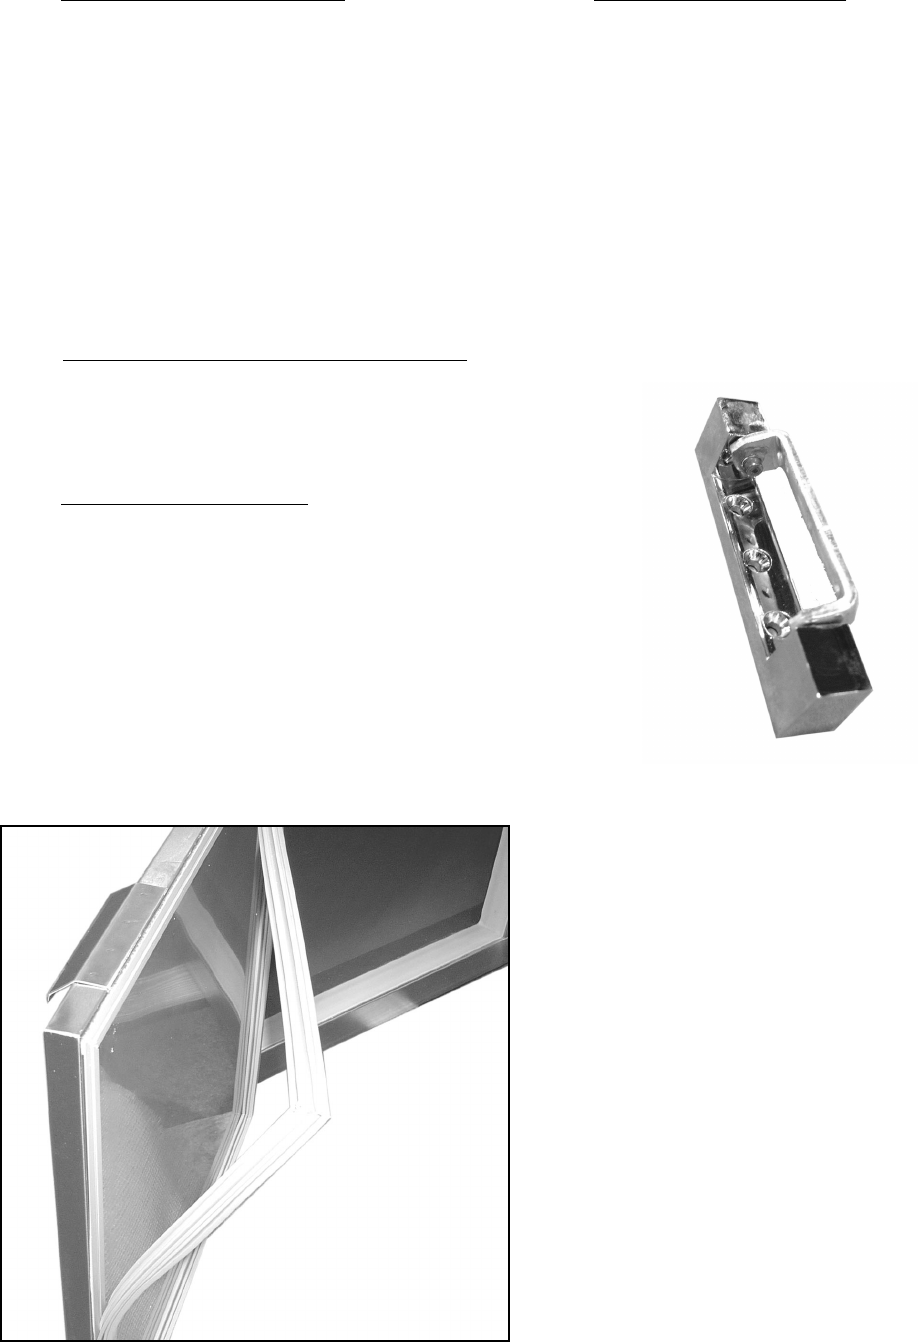
VII. c - GASKET REPLACEMENT :
Allow the new gasket to warm up to room temperature
before unfolding it. Soak the gasket in warm water if
necessary to speed up the warming process. Open (or
remove) the door and carefully pull the old gasket out
of the retainer. Clean the gasket retainer groove and
the area under the gasket. Start in one corner and push
the tongue of the new gasket into the groove for about
3 inches in each direction. Repeat with the other three
corners. The new gasket may appear too large at this
point. Using a rubber mallet, tap on the face of the
gasket to work the remainder of the tongue into the
retainer, starting at the corners and working toward the
middle (see figure 8)
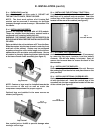
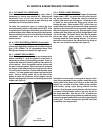
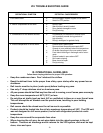
VII. d - DOOR & HINGE REMOVAL:
Remove the hinge cover from both hinges. On the lower
hinge insert a 3/32” pin punch into one of the holes in
the spring retainer. Rotate the retainer clockwise
slightly and remove the locking pin. Allow the punch
to come to rest against the hinge body where the
locking pin was. Insert another 3/32” punch into one
of the holes in the spring retainer and rotate clockwise
slightly so the first punch can be removed. Repeat until
there is no tension on the spring. Grip the upper spring
retainer with Vise-Grips and push it straight down, then
out of the hinge. Be careful not to lose the flat washer
above the upper spring retainer, or the shoulder
bushing below the lower spring retainer. The screws
that secure the hinge to the cabinet and the hinge to
the door are all now accessible (see figure 9).
Reinstall in reverse order, first hinges to the door, then
door & hinge assembly to the cabinet. Install the spring
assist parts in the lower door hinge in order from the
bottom up: shoulder bushing, lower spring retainer
(with holes), spring, upper spring retainer and flat
washer. Grip the upper spring retainer with Vise-Grips
and push it straight down, then in and over the pin in
the hinge assembly. Use the two 3/32” punches and
the holes in the lower spring retainer to rotate the spring
clockwise approximately half a turn before inserting the
locking pin. The door should open past 90
0
and close
completely from any position.
-6-
VII. SERVICE & MAINTENANCE INFORMATION
Fig. 9
Door Hinge
Fig. 8
Gasket Installation