


Filter
Receptacle
6
ASSEMBLY Assemble as shown
STEP 2:
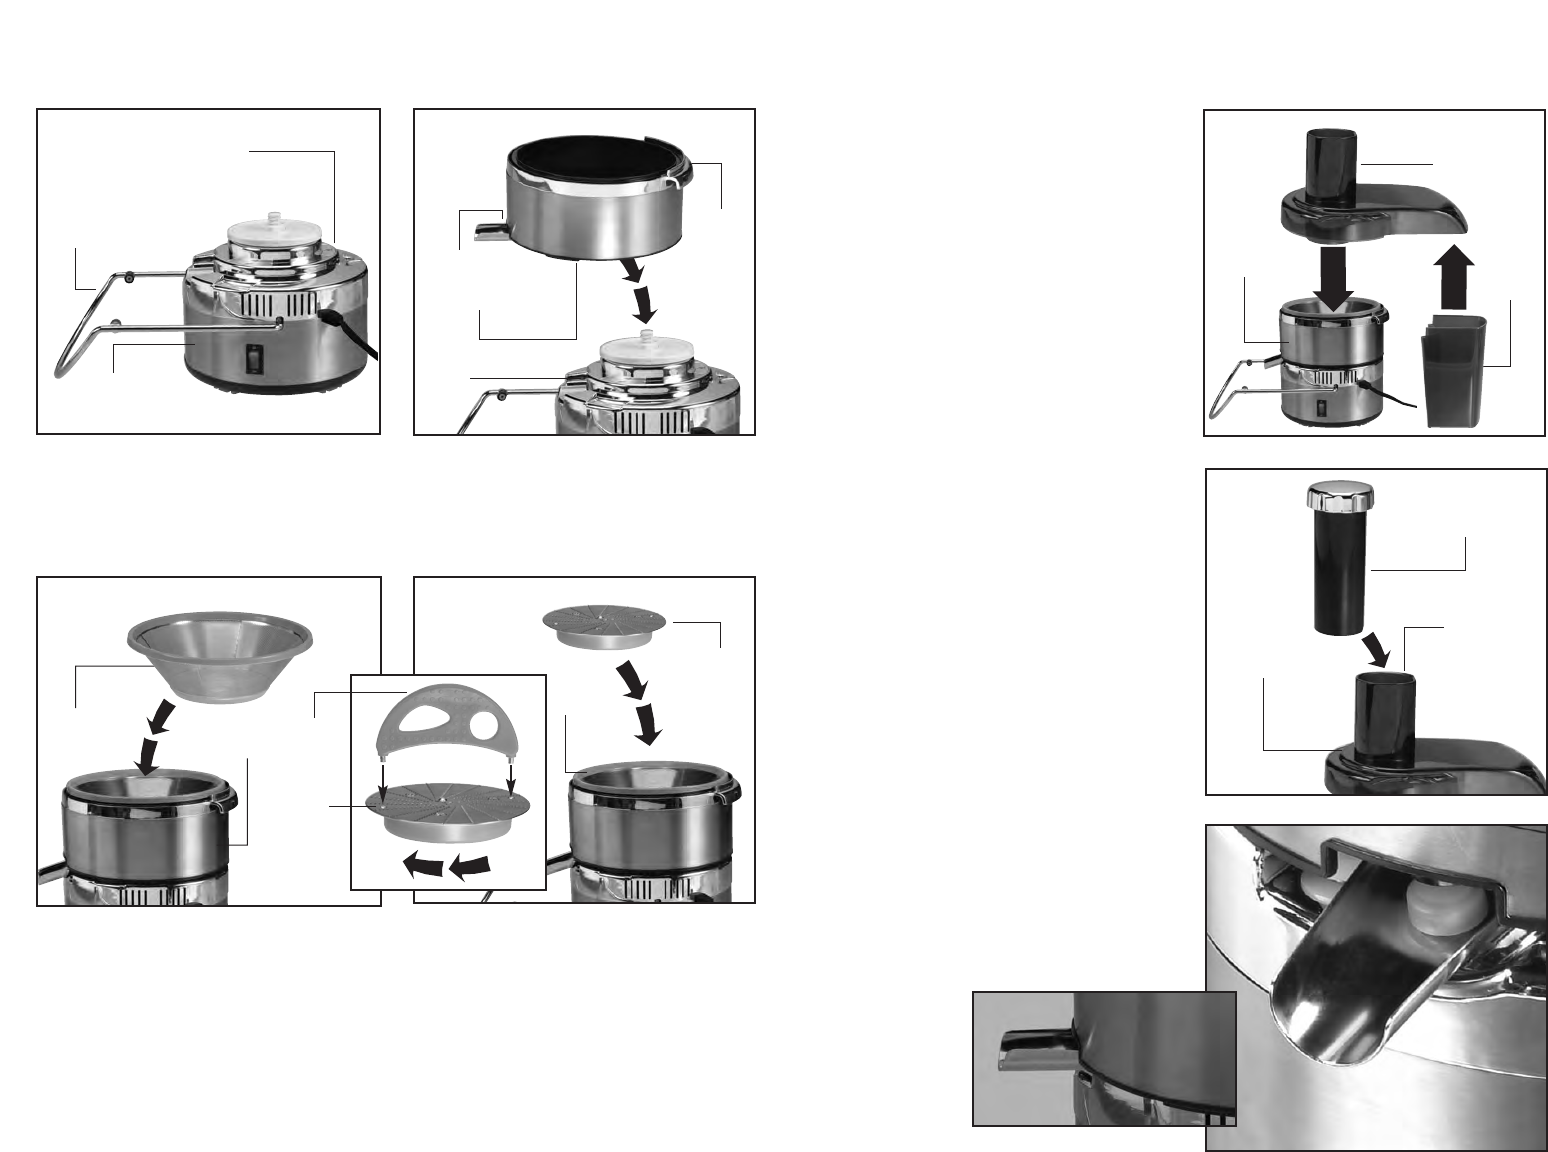
Place receptacle on the base, with
juicer spout facing direction of locking
bar. Settle receptacle into alignment.
STEP 3:
Place filter inside receptacle, matching
the opening on its bottom to the
screw peg connected to the base.
2
3
STEP 1:
Place base on a dry flat surface with
locking bar in down position as shown.
In front of the machine (spout side).
1
Front of
Machine
(Spout side)
Locking
Bar
Base
Lip
Receptacle
Juice Spout
Base
7
ASSEMBLY(CONT.)
STEP 5:
Place lid with pulp guard attached on top
of receptacle, making certain it is snugly
aligned with the pulp guard facing in the
opposite direction of the juice spout.
Lock lid into place by lifting locking bar
up until it clicks into grooves located
on both sides of the lid. Make sure
locking bar is in the full upright,
locked position.
IMPORTANT: The unit will not start
until this bar is properly locked in place.
STEP 6:
Insert pusher into chute.
Always use pusher to feed fruits
and vegetables into unit. Push gently,
never for
ce. The blade will do the work.
4
6
Blade
Filter
Receptacle
Pusher
Chute
Lid with
Pulp Guard
Crescent
Tool
Blade
Holes
5
Lid with
Pulp Guard
Pulp
Collector
STEP 4:
Place blade inside filter, centered over
screw peg. Using orange crescent tool,
place its pegs into the holes in the
blade and turn clockwise until
tightened.
IMPORTANT: Do not over tighten as
the screw peg will break. Remove
crescent tool and set aside.
CAUTION: Do not leave tool inside
juicer.
7
STEP 7:
Make sure juice spout is in the
downward position. If the juice spout is
left in the upright position the juice will
not flow. It will stay in the receptacle
and may overflow from the sides.
DOWNWARD POSITION
UPRIGHT POSITION