


8 ADA24
ADA SERIES
Defrosting
Automatic (Cycle) Defrost Models
Automatic defrost models do not produce frost in normal
operating conditions. However, a frost pattern may be
noticed on the interior walls if the unit is repeatedly
opened in a high heat or high humidity location. If this
frost pattern does not clear within 24 hours, your unit will
require manual defrosting.
WARNING
DO NOT use any type of electrical heating device,
ice pick, knife or other sharp instrument to
defrost; this could damage the inner lining or
refrigeration system and void the warranty.
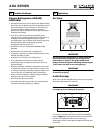
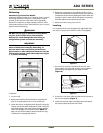
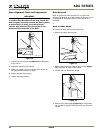
IMPORTANTIMPORTANT
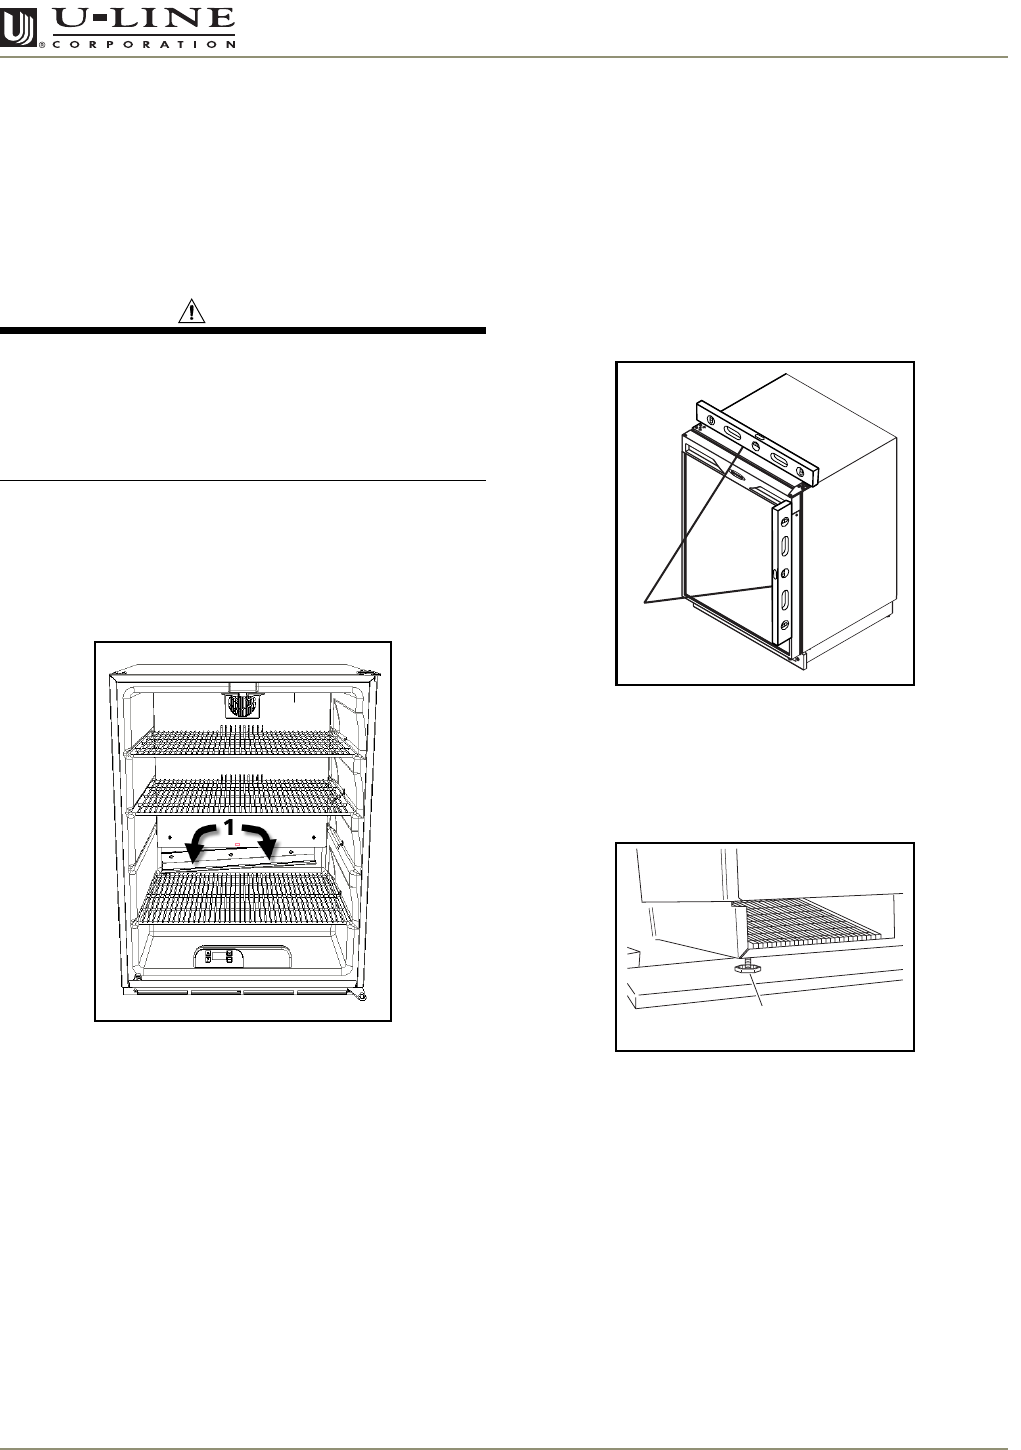
The drain pan was not designed to capture the
water created when manually defrosting. To
prevent water from overflowing the drain pan,
place towels or other absorbent materials over the
interior drain trough, under the evaporator (Figure
7, 1), before defrosting.
Figure 7
To defrost:
1. Turn unit off.
2. Remove all products from the interior and prop the
door in an open position (2 in. (5 cm) minimum).
3. Allow the frost to completely melt naturally. Clean the
interior and all removed components using a mild non-
abrasive detergent and warm water solution applied
with a soft sponge or non-abrasive cloth.
NOTE:
DO
NOT use any solvent-based or abrasive cleaners. They
will discolor or damage the interior.
4. Dampen a soft sponge or non-abrasive cloth in clean
water and wipe down the cabinet interior and removed
components to remove any detergent residue. Rinse the
sponge or cloth in clean water and repeat as necessary
until the cabinet and components are clean.
5. When the interior is dry, turn unit on.
Leveling
It is important that units equipped with adjustable feet
are level, for proper door and ice maker (if equipped)
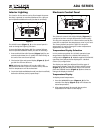
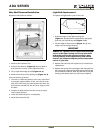
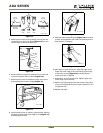
Figure 8
1. Use a level to check the levelness of the unit from
front to back and from side to side. Level should be
placed along top edge and side edge as shown
(Figure 8).
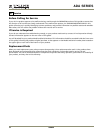
Figure 9
2. If the unit is not level, adjust the feet on the corners of
the unit as necessary
(Figure 9)
.
3. Check the levelness after each adjustment and repeat
the previous steps until the unit is level.
ULIN_0041_A
1
1
ULIN_0042_A