


BI2015 — Ice Maker
02/2005 15 www.U-LineService.com
™
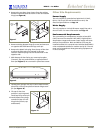
Installation of the BI2015
1. Open the water supply valve in the main water source.
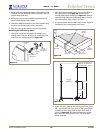
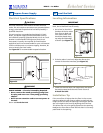
2. Make sure the ON/OFF switch is in the OFF position (see
Figure 36
).
3. Plug in the power cord.
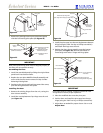
4. Gently push the unit into position. Be careful not to
kink the water supply line or entangle the electrical
cord.
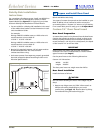
5. Re-check the leveling, from front to back and side to
side. Make any necessary adjustments. The unit’s top
surface should be approximately 1/8" below the
countertop.
Installation Troubleshooting
Problem
Q:
Water is leaking under the unit.
Solution
A:
A water leak under the unit is most likely caused by a bad
connection in the water supply line. Make sure the water
line’s brass fitting is screwed tight to its valve and
threaded correctly.
Problem
Q:
The door remains open unless it is pushed closed.
Solution
A:
The hinges should be self-closing when the door is open
approximately 8
"
. If this is not the case, make sure the
closers (at the bottom of the hinge pin) are clean, greased
and installed correctly. Also, re-check leveling from front
to back of the unit and readjust if necessary. Make sure
that pivot plate is installed correctly.
Problem
Q:
The custom overlay door was designed to align with the
rest of the cabinet doors, but the unit has crept forward.
Solution
A:
Make sure that the electrical cord and water supply line
are not obstructing the installation.
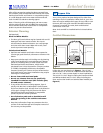
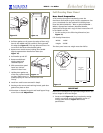
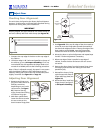
Initial Start-Up
Once installation and leveling is complete, the unit is
ready for initial start-up and operation. The ON/OFF
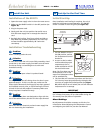
switch is located in the front grille (see Figure 36).
1. Put the ON/OFF switch in
the ON position, and set
the Temperature Control
Knob at 4.
2. As soon as the ice maker
mold reaches the proper
temperature, the ice
maker mechanism will fill
the mold with water.
Note: The first cubes may be
small because of air in the
water line. Subsequent cubes
will be standard size.
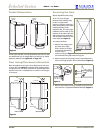
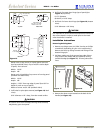
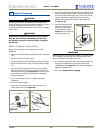
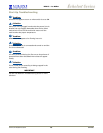
3. The ice maker will continue to produce until the bin is
full. You may interrupt production by raising the bin
arm into an upright and locked position (see
Figure
37
). While the bin arm is locked, the unit will maintain
temperature for ice storage.
IMPORTANT
It is possible that dirt or scale will dislodge in the water
line. Always throw away all ice cubes made during the
first twenty-four (24) hours of operation.
About Settings
No adjustments should be necessary at this time. For
information about Adjusting the Temperature Control
and Adjusting Ice Cube Size, see the User Manual.
9 Install the Unit 10 Start-Up for the First Time
O
N
OF
F
ON/OFF
Switch
Temperature
Control Knob
WARMER
17
3
4
5
26
COLDER
O
N
OFF
Figure 36
Figure 37