


12 u-line.com
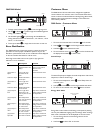
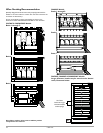
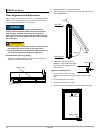
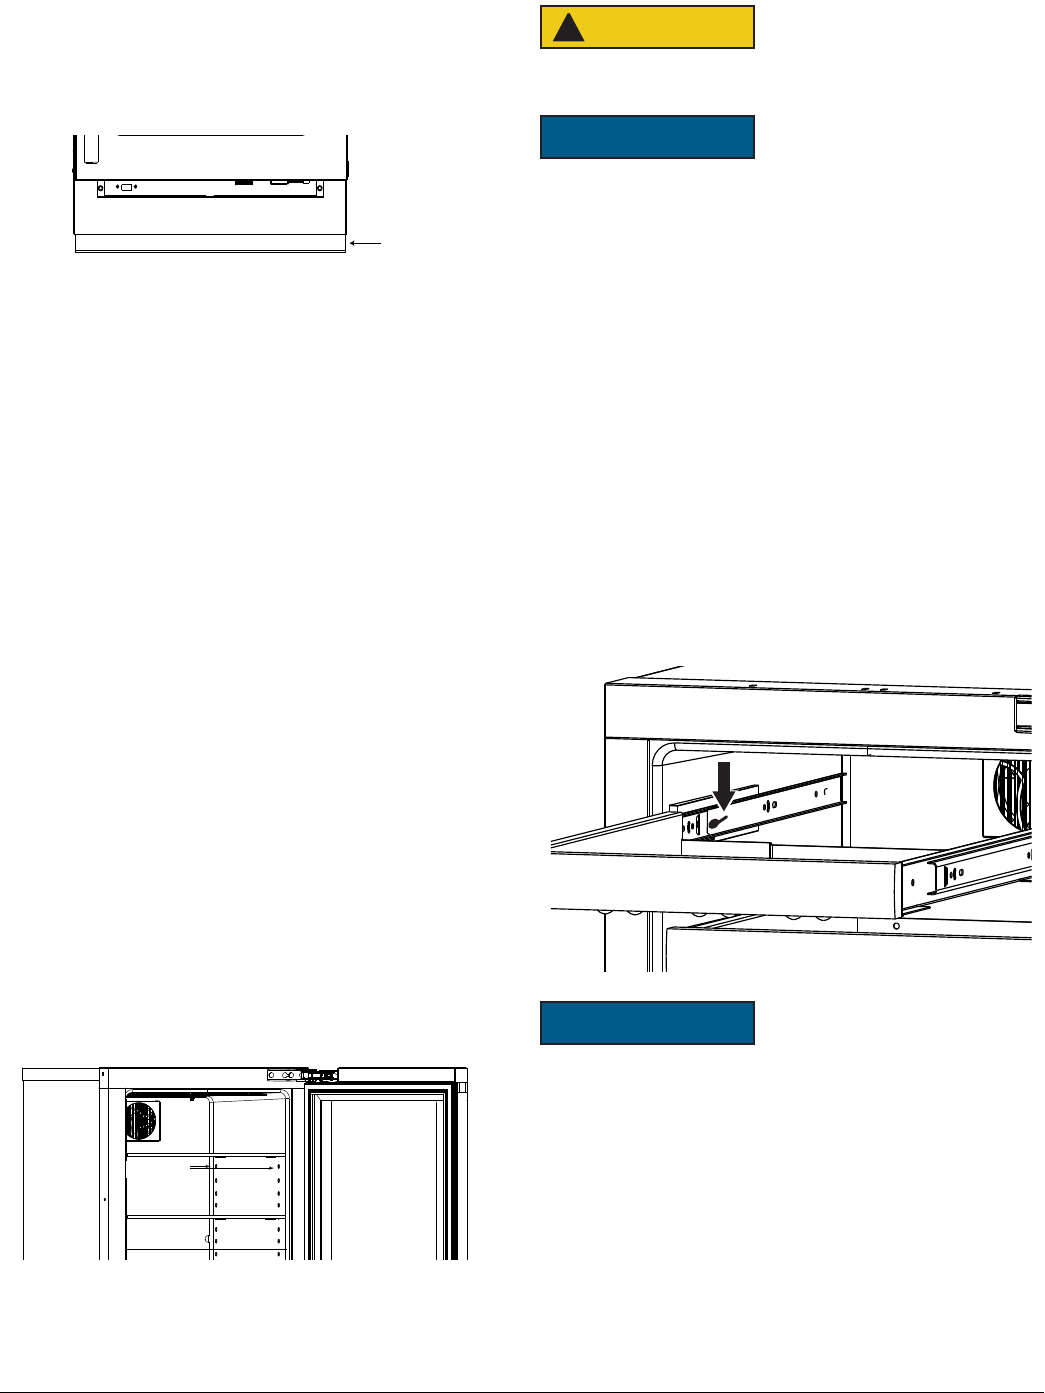
Adjusting Grille (Plinth Strip/Base Fascia)
The
grille (plinth strip/base fascia
) has an automatic vertical plane
adjustment and can also be adjusted on its horizontal plane as well.
To adjust your
grille (plinth strip/base fascia
) to match your
surrounding furniture follow the instructions below.
1. Loosen, but do not remove, the lock screws on the inside of the
grille (plinth strip/base fascia)
rails. Lock screws are located on the
inside of each
grille (plinth strip/base fascia)
rail.
2. Pull grille (plinth strip/base fascia) out to desired position and
secure lock screws.
3. The grille (plinth strip/base fascia) skirt may be manually adjusted
to the height of your floor. Simply raise or lower the skirt as
needed.
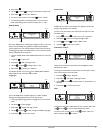
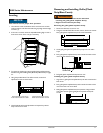
Adjusting Interior Shelves
Models equipped with glass shelves have an adjustable mounting
system. To adjust or simply remove shelves for cleaning, follow the
instructions below.
Removing / Installing Glass Shelves.
1. Remove all product from shelf.
2. Coming from underneath the shelf, lift both the front and rear of
the glass.
3. Carefully slide shelf out of unit being careful not to scratch the
interior liner.
4. Installation is the reverse of removal.
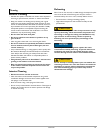
Adjusting shelf height.
Shelf height may be adjusted to accommodate a broad range of
product. To alter your shelf spacing follow the instructions below.
1. Remove the 4 Shelf clips from the shelf clip holes.
2. Move shelf clips as a group to the desired shelf height.
3. Insert shelf clips into the holes of the desired shelf height. Be
certain shelf clip is fully seated into shelf clip hole.
CAUTION
!
Clips MUST be installed with the ribbed side down. Failure
to do so may result in shelf or unit damage.
NOTICE
All 4 shelf clips for each shelf must be installed at the same
height for shelf stability.
4. Reinstall shelf.
Cleaning Shelves
Shelves may be cleaned in a soapy warm water solution. A general
household disinfectant may be used if necessary. Be sure to
completely dry your shelf before reinstalling.
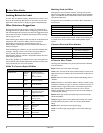
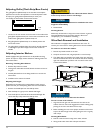
Wine Rack Removal and Installation
Wine cabinets are equipped with full extension wine racks. To
remove your wine racks for cleaning follow the instructions below.
To remove a rack from the cabinet:
1. Remove any bottles stored on the rack.
2. Grasp the end of the rack, and gently slide it out until it stops.
3. The release lever are located on the inside of the rack rails. Press
the left rack release lever down. At the same time, lift the matching
right rack release lever up. Pull the rack out until it is free of the
tracks and the cabinet.
NOTICE
Do not remove the track rails from the cabinet.
To insert a rack in the cabinet:
1. Align the left and right rack channels with the tracks in the
cabinet. Ensure an even track engagement on both sides by gently
pushing the rack into the cabinet until it stops.
2. Before reloading the rack, ensure proper movement of the travel
stops in the left and right track rails by pulling the rack out gently
until it stops.
Cleaning Wine Racks.
3. Saturate a soft cloth with a soapy, warm water, solution.
4. Wring excess water from cloth and wipe racks down.
Grille
Skirt
Clip Holes