


10
888-994-7636
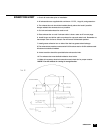
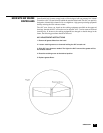
PIECES PROVIDED
Insulated wall panel comes in two pieces.
A. Top panel will have a 1” flange full length top and bottom and, interlocking slots
located on the bottom.
B. Bottom panel will have interlocking tabs on top and full length 1” flange on bottom.
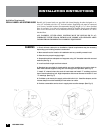
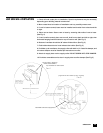
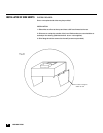
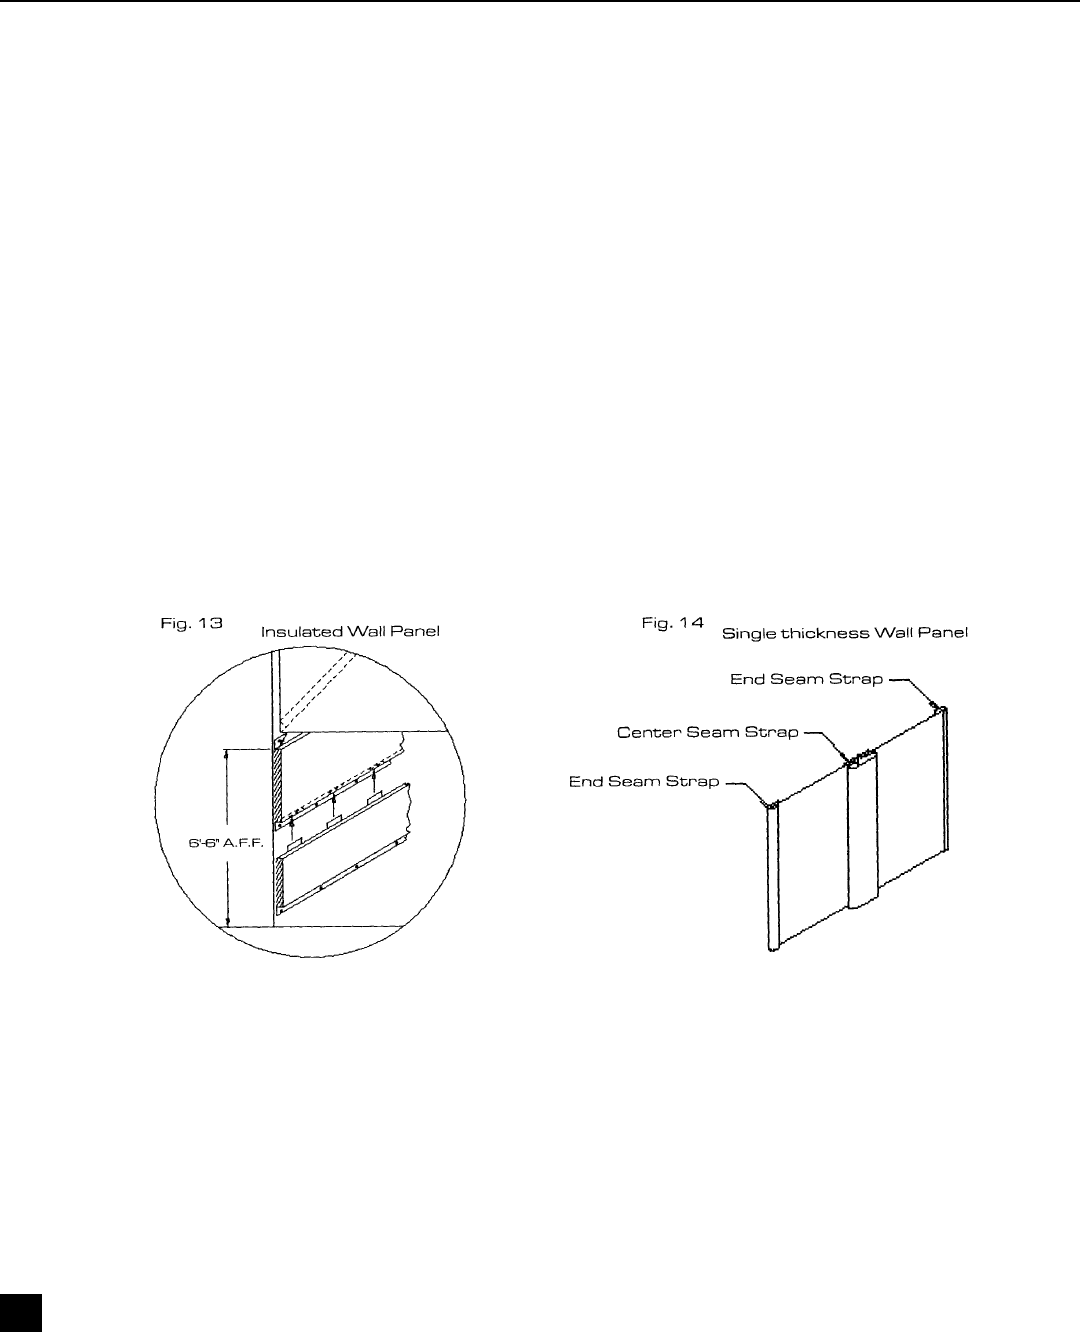
INSTALLATION INSTRUCTIONS FOR INSULATED WALL PANEL (See Fig. 13)
1. Install wall panels prior to hanging hoods(s).
2. Install top panel first. Top of panel should be installed 6’-6” A.F.F. and level. Screw
panel to wall making sure slotted holes are facing floor.
3. Install lower panel by sliding tabs into slotted holes in upper panel, screw bottom
flange to wall.
4. Chaulk horizontal seam with NSF approved silicone sealant.
5. When hood is hung it will rest on top panel
NOTE: Be careful not to damage wall panel face when installing hood.
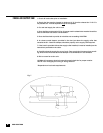
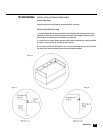
INSTALLATION INSTRUCTIONS FOR SINGLE THICKNESS WALL PANEL (See Fig. 14)
!. Install wall panels prior to hanging hood(s).
2. Install seam strips at proper locations and screw to wall.
3. Apply glue to wall between seems trips.
4. Slip one end of wall panel into seam strip, pull out middle of panel and slip other
end of panel into other seam strip. Gently apply pressure over entire wall panel to
secure to wall. Wall bands for side walls are provided with 1” return bend, which is
to be located behind rear wall panels.
INSTALLATION OF INSULATED
STAINLESS STEEL WALL PANELS