


7
WWW.WEBER.COM
®
7
a.
1.
2.
3.
4.
2.
3.
a.
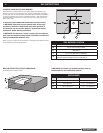
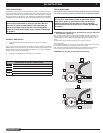
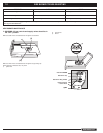
CONNECT GAS SUPPLY
1) Uncap the flare fitting from the optional side burner connection located at
regulator.
Note: You must connect your side burner to a Weber
®
approved regulator (part number
#62434) located at main gas supply. If you do not use a Weber
®
approved regulator the
Warranty on the Summit
®
Built-In Side Burner will be voided. If you have any questions,
contact Customer Service at 1-800-446-1071.
2) Connect the corrugated gas line to the side burner Connection.
GAS INSTRUCTIONS
TEST CONNECTIONS
All connections and joints must be thoroughly tested for leaks in accordance with
local codes and all listed procedures in the latest edition of ANSI Z223.1/NFPA54.
TEST CONNECTIONS
All connections and joints must be thoroughly tested for leaks in accordance with local
codes and all listed procedures in the latest edition of the National Fuel Gas Code ANSI
Z223.1/NFPA 54, Natural Gas and Propane Installation Code, CSA B149.1, or Propane
Storage and Handling Code, B149.2, or the Standard for Recreational Vehicles, ANSI A
119.2/NFPA 1192, and CSA Z240 RV Series, Recreational Vehicle Code, as applicable.
ƽ DANGER
Do not use an open flame to check for gas leaks. Be sure
there are no sparks or open flames in the area while you
check for gas leaks. This will result in a fire or explosion
which can cause serious bodily injury or death, and damage
to property.
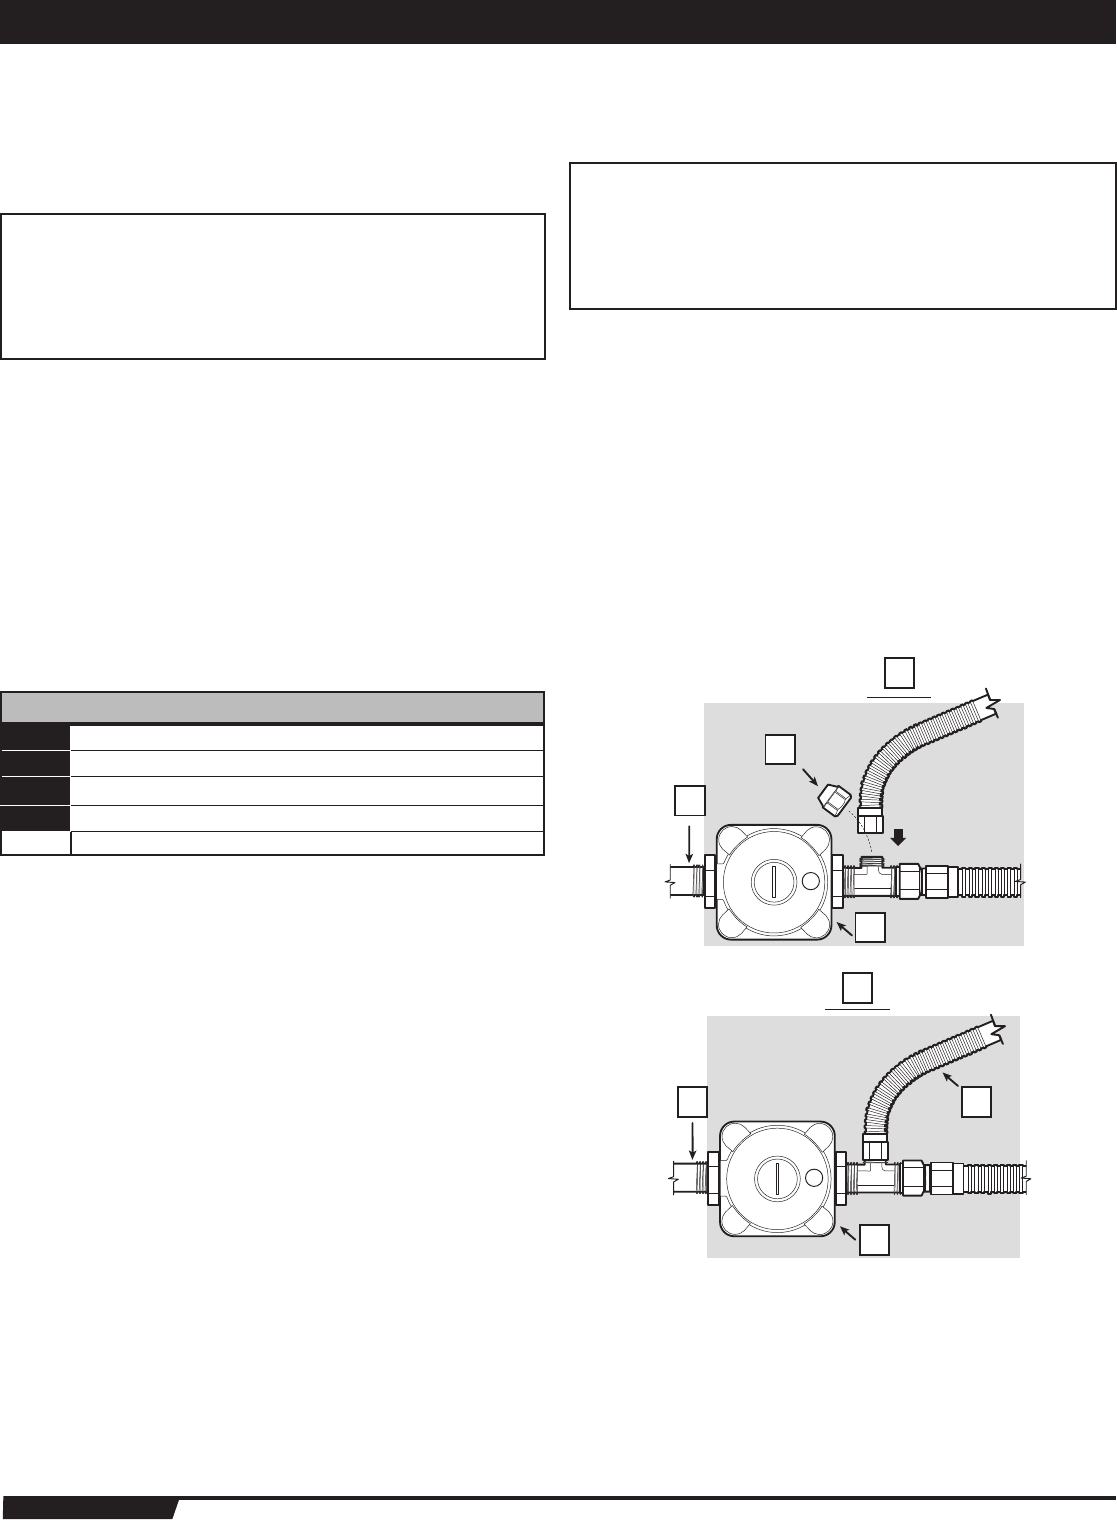
SIDE BURNER NG SUPPLY CONNECTIONS
1
Cap (Optional Side Burner)
2
Hard Piped Gas Supply
3
Regulator
4
To SIde Burner
a Top View
ƽ DANGER
Do not use an open flame to check for gas leaks. Be sure
there are no sparks or open flames in the area while you
check for gas leaks. This will result in a fire or explosion
which can cause serious bodily injury or death, and damage
to property.
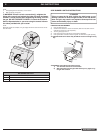
ƽ WARNING: You should check for gas leaks every time you disconnect
and reconnect a gas fitting.
Note - All factory-made connections have been thoroughly checked for gas leaks. As
a safety precaution however, you should recheck all fittings for leaks before using your
Summit
®
Built-In side burner. Shipping and handling may loosen or damage a gas
fitting.
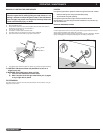
You will need: a soap and water solution, and a rag or brush to apply it.
Turn on gas supply.
Check for leaks by wetting the connections with the soap and water solution and watch-
ing for bubbles. If bubbles form or if a bubble grows, there is a leak.
Note - Since some leak test solutions, including soap and water, may be slightly cor-
rosive, all connections should be rinsed with water after checking for leaks.
ƽWARNING: Do not ignite burners when leak checking.