3
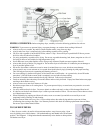
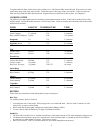
2. With basket removed, fill fryer base with vegetable oil to the MAX fill line, about 11
cups. See Diagram 2. Do not fill fryer with oil beyond the MAX oil level line to prevent
boil-over when food is added. Do not operate fryer without oil, as damage to fryer will
occur.
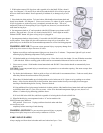
3. Place basket in drain position. To lower basket, slide handle release button back and
slowly lower handle. See Diagram 3. Close cover to secure. To reduce oil spills, especially
if fryer is tipped over, make sure cover is completely secured onto fryer. The cover
temporarily reduces oil from spilling if fryer is tipped over; however, care should still be
used when moving fryer.
4. Set temperature knob at “0” and on models with ON/OFF button, press button to OFF
position. Plug cord into a 120 volt AC electrical outlet ONLY. Power light on models
without ON/OFF button will glow as long as fryer is plugged in.
5. Set temperature knob to desired setting. For models with ON/OFF button press button
to ON position. Power light will glow and remain on as long as fryer is turned on. See
guide on fryer or in this book for recommended temperature to use for food being prepared.
WARNING: HOT OIL! To prevent serious personal injury or property damage from
spills, keep cover secure on fryer whenever oil is hot.
1. Preheat covered fryer until temperature light goes out, about 10 to 12 minutes. Temperature light will cycle on and
off during frying indicating temperature is being maintained.
2. Lift basket handle up to locked position and open cover. Place food evenly into basket. Do not fill basket more than
⅔ full with food. Refer to cooking guide in this book for recommended amounts of food to cook at one time.
3. Close cover to secure. Slide handle release button back and SLOWLY lower basket handle to automatically lower
basket into oil.
CAUTION: To prevent personal injury or stream burns, use protective oven mitt when opening. Hot steam escapes from
cover causing burns.
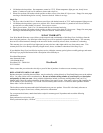
4. Fry food to desired doneness. Refer to guide on fryer or in this book for recommenced times. Foods are usually done
when they float to the surface and are nicely browned.
5. When done, lift basket handle up to locked position to raise basket out of oil. Open cover by pushing cover release
button. Allow food to drain briefly in drain position, then remove basket from fryer and empty food onto paper
toweling to finish draining before serving. Season as desired.
If frying additional food, place empty basket back in drain position, slide handle release button back and lower handle
to put basket back into oil. Close cover to secure. Allow oil to heat until temperature light goes out, about 3 to 5
minutes. Continue frying following guidelines above.
If oil level falls below MIN line, add fresh vegetable oil to bring the level back to MAX line.
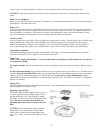
11. When finished frying, set temperature knob to “0” and on models with
ON/OFF button press button to
OFF position. Close cover. Unplug cord from electrical outlet and allow
covered fryer to cool
completely before removing oil and cleaning.
WARNING: HOT OIL! To prevent serious personal injury or property
damage from spills, keep cover secure on fryer whenever oil is hot.
CARE AND CLEANING
Always unplug cord from electrical outlet and lower basket into fryer. Close


