8
8
OPERATING INSTRUCTIONS (Cont.)
COOKING RICE (Cont.)
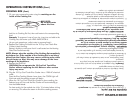
7. Or, you may measure the water using the markings on the
inside of the Cooking Pot.
Add rice to Cooking Pot first, then add water to the corresponding
level.
Example: To prepare 6 cups of raw rice, rinse rice and add to the
Cooking Pot; add water up to LEVEL INDICATOR 6.
(As you gain experience, adjust water to personal taste.)
8. Replace the Cooking Pot back into the 10 Cup Cool Touch Rice
Cooker’s Main Housing.
Rotate it slightly to make sure that it is well seated on the Heating
Plate/Thermostat Assembly.
NOTE: Always wipe the outside of the Cooking Pot completely
dry before use. If the outside of the Cooking Pot is wet when
placed into the Cooker, this may cause a cracking noise while
the unit heats up. Also, this may cause damage to the inner
workings of the appliance.
9. Replace the Glass Lid.
CAUTION: Do not operate the 10 Cup Cool Touch Rice
Cooker without replacing the Lid. Burns or other serious
injury may occur.
10. Plug the 10 Cup Cool Touch Rice Cooker into a 120V AC electrical
outlet.
Press the Rice Cooking Selector Lever down, the COOK Light will
illuminate and the cooking process will begin.
11. When the 10 Cup Cool Touch Rice Cooker is done cooking, the
Selector Lever will rise and the Rice Cooker will automatically go
into the WARM Mode.
For best results, let the cooked rice sit for 15 minutes before stirring
or removing. This allows the steam to finish the cooking process.
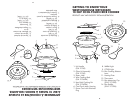
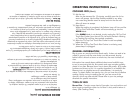
MAX LEVEL
Do not add water
above this Line.
MODE D’EMPLOI (SUITE)
CUISSON DU RIZ (SUITE)
7. On peut aussi mesurer l’eau en se servant des marques à
l’intérieur du récipient de cuisson.
Verser d’abord le riz dans le récipient de cuisson, puis ajouter de
l’eau jusqu’au niveau approprié.
Exemple : Pour préparer six tasses de riz non cuit, rincer le riz et
le verser dans le récipient, puis ajouter de l’eau jusqu’à la
marque 6.
(Avec l’expérience, on en vient à connaître le niveau d’eau qui
convient le mieux.)
8. Remettre le récipient dans la coque chauffante du cuiseur à riz.
Le tourner légèrement pour s’assurer qu’il repose bien sur la
plaque chauffante/le thermostat.
REMARQUE : Toujours essuyer complètement l’extérieur du
récipient avant l’utilisation. Si l’extérieur du récipient est
mouillé lorsqu’on le dépose dans le cuiseur à riz, un
craquement pourrait se produire au moment où l’appareil
chauffe. De plus, l’intérieur de l’appareil pourrait être
endommagé.
9. Remettre le couvercle de verre en place.
MISE EN GARDE : Ne pas faire fonctionner le cuiseur à riz
sans couvercle, ce qui pourrait causer des brûlures ou
autres blessures graves.
10. Brancher le cuiseur à riz sur une prise c.a. 120 V.
Appuyer sur le sélecteur de cuisson du riz. Le voyant de cuisson
s’allume et le processus de cuisson commence.
11. Lorsque la cuisson est terminée, le sélecteur se soulève et le cuiseur
à riz se met automatiquement en mode réchaud.
Pour de meilleurs résultats, laisser le riz cuit reposer 15 minutes
avant de le mélanger ou de le retirer. Cela permet d’achever le
processus de cuisson à la vapeur.
NIVEAU MAXIMAL
L’eau ne doit pas
dépasser cette
marque.


