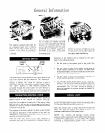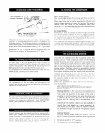
Turn Clockwise To
Increase Thickness
IN. THICKNESS 3/8”
MAX. THICKNESS 1”
Thickness of the Ice can be varied by rotation of the
inverted “L” shaped adjusting screw which IS located on the
thickness control. The thickness control IS mounted on the
lower freezing plate. One complete rotation of the adjusting
screw varies the thickness approximately 1,‘16”. To increase
thickness turn the screw In a clockwtse dlrection. Maximum
production of Ice In pounds will be obtained with the
control set to produce Ice approximately 1./2” thick.
In some areas it may be beneficial to filter or treat the
water being supplied to the ice machlne to reduce water
system maintenance (see Cleaning & Sanltlzlng the Ice
Making System) and to produce the best type of tee
For information on fllterlng and treating the water see your
WHI R LPOOL commercial ice maker dealer
All components of the Ice maker are lubricated at the
factory and should not require any addItIonal oiling for the
normal life of the machine
Periodic inspection and cleaning is necessary to keep your
Ice cube maker operating at peak efficiency and to assure a
samtary Ice producing mechanism. Your WHIRLPOOL
dealer IS well qualified to perform this service for you
Enamel finishes may be cleaned simply by wiping with a
damp cloth. Regular use of a good household appliance
cleaner and wax IS recommended for protecting the finish
StaInless steel cabinets require the use of a stalriless steel
cleaner Carbonated water may be
used
as a cleaner If <i
regular stainless steel cleaner is not available
Water Cooled Models
Over a prolonged period of time scale will form on the in-
side walls of the water condenser which must be removed.
When scale forms the ice maker becomes less efficient and
requires larger amounts of water for cooling. The scale is
cleaned from the inside of the condenser walls with
chemicals, It is recommended that the scale removal should
be performed by your WHIRLPOOL ice maker dealer.
Air Cooled Models
Adequate air must be allowed to flow through the flnned
coils of the remote condenser A dirty or clogged condenser
prevents proper air flow resulting In reduced capacity of the
ice machine and subjects the components of the unit to
higher than normal operatlng temperatures.
The condenser co11 should be Inspected approximately once
J month and cleaned when necessary. Use a vacuum cleaner
and stiff brush to remove the accumulation of tint and dirt.
Impurities are rejected from the circulating water that
freezes into ice. These impurities collect on the freezing
mechanism and in the water system and form a hard scaly
deposit. Generally this scale prevents a rapid release of the
ice slab during the harvest cycle and may cause the warning
light to start blinking and glow brighter. The water and ice
making system, therefore, should be periodically cleaned
and sanitized. The frequency of cleaning will depend on
local water conditions and how rapidly scale accumulates.
Cleaning and sanltlzlng IS not too dlfflcult Having :I
quaIlfled service representative clean the system the first
time should make subsequent cteanlng easier to perforrn If
the operator wishes to take over this portlon of the ICC:
machlne maintenance.
Follow this procedure to assule that the ICP rnachlne IS
clean and sanitary.
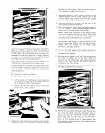
I. Cleaning and sanitizing solutions:
Both cleaning and sanitizing solutions are required.
Prepare as follows:
Cleaning Solution - Mix a solution of powdered citric
acid and hot water (see cleaning label on inside of top
front panel for quantity to be used). Citric acid is
available in most drug stores. Hot water should be used
if possible as the citric acid will go into solution
quicker and the cleaning itself is accomplished in less
time.
Commercial ice machine cleaners are also available in
liquid form and should be mixed according to
instructions on the label. These ice machine cleaners
are available through commercial refrigeration supply
houses.
Sanitizer Solution -
Common laundry bleach mixed at a ratio of 1 oz. to a
gallon of water will make an excellent sanitizing solution.
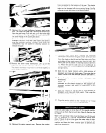
2. Set service switch to “off” position,
3. Remove all ice from the storage bin.


