


5
INSTALLATION INSTRUCTIONS
Prepare Drop-In Range
1. Decide on the final location for the range. Locate existing
wiring to avoid drilling into or severing wiring during
installation.
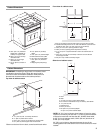
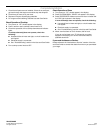
2. To avoid floor damage, set the range onto cardboard prior to
installation. Do not use oven door handle or any portion of the
front frame or trim for lifting.
To avoid damage to the lower oven trim, do not remove the
shipping feet at the front lower corners of the range until the
range is inserted into cabinet.
3. Remove the shipping materials and tape from the range.
4. Remove the hardware package from inside the bag
containing literature.
5. Remove and set aside racks and other parts from inside the
oven.
6. Move range and cardboard close to the range’s final location.
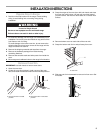
Remove Oven Trim
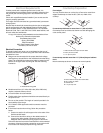
IMPORTANT: Use both hands to remove oven doors.
1. Open the oven door.
2. Locate the oven door latches in both corners of the oven
door, and rotate the latches forward to the unlocked position.
3. Grasp the edges of the oven door with both hands and close
the oven door until it stops. Lift and pull oven door toward
you and remove. Set the oven door aside on a covered work
surface.
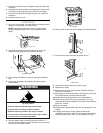
4. Remove bottom screw on each side of the oven trim.
5. Grasp the bottom end of trim and pull away from oven.
6. Slide top end of trim downward to remove trim from oven. Set
trim aside.
A.Oven door latch in locked
position
B. Oven door latch in unlocked
position
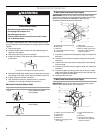
WARNING
Excessive Weight Hazard
Use two or more people to move and install range.
Failure to do so can result in back or other injury.
A
B
A. Oven trim
A