6
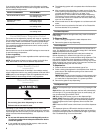
If you need to adjust temperatures in the refrigerator or freezer,
use the settings listed in the chart below as a guide. Wait at least
24 hours between adjustments.
Convertible Drawer Temperature Control
The control can be adjusted to properly chill meats or vegetables.
The air inside the pan is cooled to prevent “spot” freezing and can
be set to keep meats at the National Livestock and Meat Board
recommended storage temperatures of 28° to 32°F (-2° to 0°C).
The convertible vegetable/meat drawer control comes preset at
the lowest meat setting.
To store meat:
Set the control to one of the three MEAT settings to store meat at
its optimal storage temperature.
To store vegetables:
Set the control to VEG to store vegetables at their optimal storage
temperatures.
NOTE: If food starts to freeze, move the control to the left (less
cold). Remember to wait 24 hours between adjustments.
Crisper Humidity Control
(on some models)
You can control the amount of humidity in the moisture-sealed
crisper. Adjust the control to any setting between LOW and HIGH.
LOW (open) for best storage of fruits and vegetables with skins.
HIGH (closed) for best storage of fresh, leafy vegetables.
Water and Ice Dispensers
(on some models)
Depending on your model, you may have one or more of the
following options: the ability to select either crushed or cubed ice,
a special light that turns on when you use the dispenser, or a lock
option to avoid unintentional dispensing.
NOTE:
■ Do not use with water that is microbiologically unsafe or
of unknown quality without adequate disinfection before
or after the system.
■ If your model has a base grille filter system, make sure the
base grille filter is properly installed.
■ The dispensing system will not operate when the freezer door
is open.
■ After connecting the refrigerator to a water source, flush the
water system by dispensing water into a sturdy container until
you draw and discard 1.5 gal. (5.4 L) of water, or for
approximately 3 minutes after the water begins dispensing.
The flushing process cleans the water system and clears air
from the lines. As the air is cleared from the lines, water may
spurt out of the dispenser.
■ Allow several hours for the refrigerator to cool down and chill
water.
■ Allow 24 hours to produce the first batch of ice. Discard the
first three batches of ice produced.
The Water Dispenser
IMPORTANT: Dispense enough water every week to maintain a
fresh supply.
To Dispense Water:
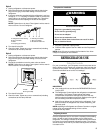
1. Press a sturdy glass against the water dispenser lever.
2. Remove the glass to stop dispensing.
The Ice Dispenser
The dispensing system will not operate when the freezer door is
open. Ice dispenses from the ice maker storage bin in the freezer
when the dispenser lever is pressed.
NOTE: Some models dispense both cubed and crushed ice.
Before dispensing ice, select which type of ice you prefer.
For crushed ice, cubes are crushed before being dispensed. This
may cause a slight delay when dispensing crushed ice. Noise
from the ice crusher is normal, and pieces of ice may vary in size.
When changing from crush to cube, a few ounces of crushed ice
will be dispensed along with the first cubes.
To Dispense Ice:
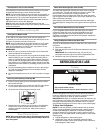
1. Press the button to select the desired type of ice.
2. Press a sturdy glass against the ice dispenser lever. Hold the
glass close to the dispenser opening so ice does not fall
outside of the glass.
IMPORTANT: You do not need to apply a lot of pressure to the
lever in order to activate the ice dispenser. Pressing hard will
not make the ice dispense faster or in greater quantities.
3. Remove the glass to stop dispensing.
The Dispenser Light
Style 1: The dispenser light can be turned on by pressing the ON
button.
Style 2: When you use the dispenser, the lever will automatically
turn the light on. If you want the light to be on continuously, you
may choose either ON or NIGHT LIGHT.
ON: Press the LIGHT button to turn on the dispenser light.
NIGHT LIGHT: Press the LIGHT button a second time to select
the Night Light. The dispenser light will automatically adjust to
become brighter as the room brightens, dimmer as the room
darkens.
OFF: Press the LIGHT button a third time to turn off the dispenser
light.
The dispenser lights are LEDs which should not need to be
changed. If it appears that your dispenser lights are not working,
be sure that the light sensor is not blocked (in Night Light mode).
See “Troubleshooting” for more information.
CONDITION/REASON: ADJUSTMENT:
REFRIGERATOR too warm REFRIGERATOR Control
one setting higher
FREEZER too warm/
too little ice
FREEZER Control
one setting higher
REFRIGERATOR too cold REFRIGERATOR Control
one setting lower
FREEZER too cold FREEZER Control
one setting lower
Cut Hazard
Use a sturdy glass when dispensing ice or water.
Failure to do so can result in cuts.
WARNING


