


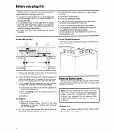


Before you plug it in
Before using your freezer, you ore personally
responsible for making sure that it...
l
is installed and leveled on a floor that will
hold the weight, and in on orea suitable for
its size and use.
l
is connected only to the right kind of outlet,
with the right electrical supply and ground-
ing. (Refer to your “Electrical Requirements
and Grounding Instructions:‘)
l
is used only for jobs expected of home
freezers.
l
is not near on oven, radiator or other heat
source.
l
is properly maintained.
l
is in a dry sheltered area.
l
is used in on area where the room tempera
ture will not exceed 110°F (43.3”C).
l
is not run where there ore explosive fumes.
l
is not used by children or others who may not
understand how it should be used.
l
is not loaded with food before it has time to
get properly cold.
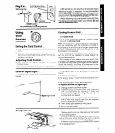
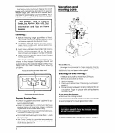
level Chest Freezer...
from end to end and front to bock so that the lid
WIII seal properly.
Check with level
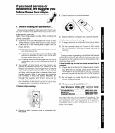
1. Check the strength of the floor. It should hold
weight of fully loaded freezer
2. Allow at least 3 inches (7.5 cm) air space on
sides of freezer and 2 inches (5 cm) at bock.
Leave room at top for lid to open all the way.
3. If lid needs to be removed to get freezer
through the doorway, follow these steps:
l
Check the way the lid sits on the cabinet to
help when replacing.
l
With Ird closed, remove hinge screws from
the co binet.
l
Lift off lid.
Remove Sales label...
Remove the Consumer Buy Guide label before
using the freezer. Remove any left over glue with
rubbing alcohol.
To replace:
l
Place lid on cabinet.
l
Replace hinge screws. Check to be sure
lid gasket is making contact with cabinet
on all four sides.
Note: DO NOT REMOVE the Core and Ser-
vice label on the inside lid. This permanent
label provides immediate information
should it be needed. Do not remove Tech
Sheet permanently attached to bock of
cabinet.
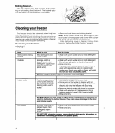
Clean It...
4. Do not cover the freezer with items such as
Clean your freezer before using it. See clean-
blankets, sheets, tablecloths,
etc.
ing instructions on page 4.