


Contents
Important Safety Instructions .........
Before Using Your Refrigerator .......
Using Your Refrigerator. ..............
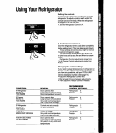
Setting the controls ...................
Changing the control settings ..........
Exterior moisture control ..............
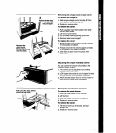
Adjusting the refrigerator shelves .......
Adjusting the door bins ................
Adjusting the shelf glides ..............
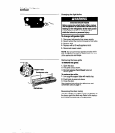
Removing the crispers and crisper cover.
Adjusting the crisper humidity control ...
Moving the meat drawer and cover ......
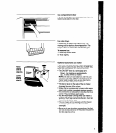
Changing the light bulbs ...............
Removing the base grille ..............
Reversing the door swing ..............
Ice compartment door. ................
Ice cube trays ........................
Optional automatic ice maker ..........
Sounds you may hear .................
Energy saving tips ....................
Cleaning Your Refrigerator ...........
Food Storage Guide ..................
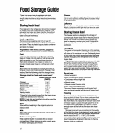
Storing fresh food ....................
Storing frozen food ...................
Caring For Your Refrigerator. .........
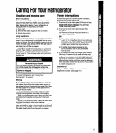
Vacation and moving care .............
Power interruptions ...................
If You Need Service Or Assistance ....
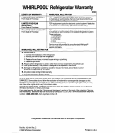
Whirlpool Refrigerator Warranty ......
01990 Whirlpool Corporation
-3
4
5
5
5
6
6
6
6
7
7
7
8
8
8
9
9
9
10
10
11
12
12
12
13
13
13
14
16
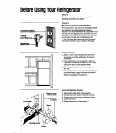
Remove the Consumer Buy Guide Label, tape
and any inside labels before using the refrigerator.
To remove any remaining glue:
l
Rub briskly with thumb to make a ball, then
remove.
OR
l
Soak area with liquid hand dishwashing
detergent before removing glue as described
above. Do not use sharp instruments, rubbing
alcohol, flammable fluids or abrasive cleaners.
These can damage the material. See “Important
Safety Instructions” on page 3.
NOTE: Do not remove any permanent instruction
labels inside your refrigerator. Do not remove the
Tech Sheet fastened under the refrigerator at
the front.
Thank you for buying a Whirlpool appliance.
Please complete and mail the Owner Regis-
tration Card provided with this product.
Then complete the form below. Have this informa-
tion ready if you need service or call with a
question.
l
Copy model and serial numbers from plate
(see diagram on front cover) and purchase date
from sales slip.
l
Keep this book and sales slip together in a
handy place.
Model Number
Serial Number
Purchase Date
Service Company
Phone Number
2