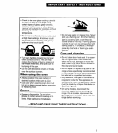
l Pans should be easy to clean. Check to be
sure there are no crevices, rough edges or
areas where food might collect.
l Be sure pans do not tip, whether they are
full or empty.
l Use cookware only as it was intended to
be used. Follow pan instructions. This is
very important for glass cookware because
some should be used only in the oven.
Other pans are marked as flameware and
may be used on the surface burners.
Home canning information
The larger diameter of most water-bath or
pressure canners combined with high heat
settings for long periods of time can cause
damage to the cooktop.
To protect your range:
l For best results, use a canner which can
be centered over the surface burner.
l Do not place canner on two surface
burners at the same time. Too much heat
will build up and will damage the cooktop.
l Start with hot water. This reduces the
time the control is set on high. Reduce
heat setting to lowest position needed to
keep water boiling.
l Refer to your canner manual for specific
instructions.
Positioning racks and pans
For baking/roasting with one rack, place
the rack so the top of the food will be
centered in the oven.
Rack placement for specific foods:
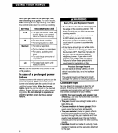
FOOD
RACK POSITION
Frozen pies, large 1st or 2nd rack
roasts, turkeys guide from bottom
Angel and bundt cakes, 2nd rack guide
most quick breads,
from bottom
yeast breads, casse-
roles, meats
Cookies, biscuits,
muffins, cakes,
nonfrozen pies
2nd or 3rd rack
guide from bottom
When baking on two racks, arrange racks
Failure to follow the above precautions
on first and third rack guides from bottom.
could result in personal injury.
Personal Injury Hazard
always position oven rack(s) in
desired location before turning oven
on. Be sure the rack(s) is level.
l If rack(s) must be moved while oven
is hot, use potholders or oven mitts
to protect hands.
l Do not place items on the open oven
door.
l Be careful when installing and
removing large food items from extra
roasting rack position. Food will be
close to hot surfaces, including oven
bottom and sides.
continued on next page
9


