


12
To Custom Broil:
1.
Press CUSTOM BROIL.
2.
Press TEMP “up” or “down” arrow pad to change the
temperature in 5° amounts. The broil range can be set
between 300°F (150°C) and HI (525°F [275°C]).
3.
Press START/ENTER.
4.
Press CANCEL when finished.
BROILING CHART
For best results, place food 3 in. (7 cm) or more from the broil
burner. Times are guidelines only and may need to be adjusted
for individual tastes. Recommended rack positions are numbered
from the bottom (1) to the top (5). For diagram, see the
“Positioning Racks and Bakeware” section.
Warm Hold Feature
IMPORTANT:
Food must be at serving temperature before
placing it in the warmed oven. Food may be held up to 1 hour,
however breads and casseroles may become too dry if left in the
oven during Warm Hold.
Warm Hold Feature allows hot cooked foods to stay serving
temperature. It can also be used at the end of a timed cook.
To Use Automatic Warm Hold Feature:
At the end of a timed cook, either with or without a delayed start,
or at the end of a sequence program in which the last step is not
the Warm Hold mode, the oven will automatically default to a
1-hour Warm Hold mode at 170°F (77°C).
When using the Automatic Warm Hold Feature, cook times may
need to be adjusted accordingly so that foods do not become
over cooked and dry.
When the cook time ends or the last step of the sequence is
complete, the display will show a warming countdown time.
When warming ends, the oven will automatically shut off and
“End” will appear on the display. Four tones will sound and then
four 1-second reminder tones will sound every minute thereafter.
To Disable Automatic Warm Hold:
Press and hold WARM for 5
seconds. “Off” will appear in the 4-digit display. Repeat to turn
back on.
To Use Manual Warm Hold Feature:
1.
Press WARM.
2.
Set the temperature (optional).
Press the TEMP “up” or “down” arrow pad to raise or lower
the temperature in 5°F (3°C) amounts to set a temperature
other than 150°F (66°C). The warm range is 100°F-200°F
(38°C-93°C).
3.
Press START.
4.
Press CANCEL when finished.
Timed Cooking
Timed Cooking allows the oven to be set to turn on at a certain
time of day, cook for a set length of time, and/or shut off
automatically. Delay start should not be used for foods such as
breads and cakes which use ingredients such as yeast or baking
powder to leaven the food.
To Set a Timed Cook:
1.
Press BAKE (optional).
Press the TEMP “up” or “down” arrow pads to enter a
temperature other than the one displayed.
2.
Press STOP TIME.
3.
Press the HR and MIN “up” or “down” arrow pads to enter
the desired time to end cooking.
4.
Press START.
The display will count down the time.
When the time ends, the oven will shut off automatically and
“End” will appear on the display.
End-of-cycle tones will sound; then, if enabled, reminder
tones will sound every minute.
5.
Open and close the oven door to clear the display and/or
stop reminder tones.
FOOD
RACK
POSITION
Approximate Time
(minutes)
SIDE 1 SIDE 2
Steak
1 in. (2.5 cm) thick
medium rare
medium
well done
4
4
4
14-15
15-16
18-19
7-8
8-9
9-10
*Ground meat patties
³⁄₄
in. (2 cm) thick
well done 4 13-14 6-7
Pork chops
1 in. (2.5 cm) thick 4 21-22 10-11
Ham slice, precooked
¹₂
in. (1.25 cm) thick 4 8-10 4-5
Frankfurters
46-73-4
Lamb chops
1 in. (2.5 cm) thick 4 15-17 8-9
Chicken
bone-in pieces
boneless breasts
3
4
18-20
12-16
18-20
11-16
Fish
Fillets
¹₄
-
¹₂
in.
(.6-1.25 cm) thick
Steaks
³₄
- 1 in.
(2-2.5 cm) thick
4
4
8-10
15-18
4-5
7-9
* Place up to 9 patties, equally spaced, on broiler grid.
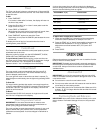
WARNING
Food Poisoning Hazard
Do not let food sit in oven more than one hour
before or after cooking.
Doing so can result in food poisoning or
sickness.
WARNING
Food Poisoning Hazard
Do not let food sit in oven more than one hour
before or after cooking.
Doing so can result in food poisoning or
sickness.