15
MICROWAVE OVEN USE
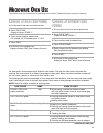
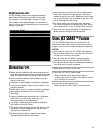
DEFROSTING TIPS
•
Before starting, make sure you have removed any of
the metal twist-ties which often come with frozen food
bags, and replace them with strings or elastic bands.
•
Open containers such as cartons before they are
placed in the oven.
•
Always slit or pierce plastic pouches or packaging.
•
If food is foil wrapped, remove foil and place it in a
suitable container.
•
Slit the skins, if any, of frozen food such as sausage.
•
Bend plastic pouches of food to ensure even
defrosting.
•
Always underestimate defrosting time. If defrosted
food is still icy in the center, return it to the
microwave oven for more defrosting.
•
The length of defrosting time varies according to
how solidly the food is frozen.
•
The shape of the package affects how quickly food
will defrost. Shallow packages will defrost more
quickly than a deep block.
•
As food begins to defrost, separate the pieces.
Separated pieces defrost more evenly.
OUNCES GRAMS
1.6 45.4
3.2 90.7
4.0 113.4
4.8 136.1
6.4 181.4
8.0 226.8
9.6 272.2
11.2 317.5
12.0 340.2
12.8 362.9
14.4 408.2
16.0 453.6
Equivalent Weight
DECIMAL WEIGHT
.10
.20
.25 One-Quarter Pound
.30
.40
.50 One-Half Pound
.60
.70
.75 Three-Quarters Pound
.80
.90
1.00 One Pound
Weight conversion chart
You are probably used to food weights as being in
pounds and ounces that are fractions of a pound
(for example, 4 ounces equals
1
⁄4 pound [113.4 g]).
If the weight on the food package is in fractions of a
pound, you can use the following chart to convert the
weight to decimals.
•
Use small pieces of aluminum foil to shield parts of
food such as chicken wings, leg tips, fish tails, or
areas that start to get warm. Make sure the foil does
not touch the sides, top, or bottom of the oven. The
foil can damage the oven lining.
•
For better results, let food stand after defrosting.
(For more information on standing time, see “Micro-
wave cooking tips” in the “Cooking Guide” section.)
•
Turn food over during defrosting or standing time.
Break apart and remove food as required.
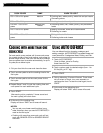
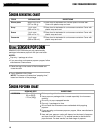
USING JET START™ FEATURE
The JET START Feature lets you cook food for 30
seconds at 100% cook power or, during any manual
program you can use it to add 30-second increments.
NOTES:
•
Each time you touch the JET START feature pad, it
will add 30 seconds up to 3 minutes, then will add 1
minute up to a total of 10 minutes.
•
You can enter the JET START feature only after
closing the door or after touching OFF/CANCEL.
•
You can also use the pad to increase the remaining
cook time during manual programs.
1. Make sure your food is in the oven.
2. Touch the JET START Feature pad.
(Each additional touch adds 30 seconds of
cooking time, up to 3 minutes, then adds 1 minute
up to a total of 10 minutes.)
3. At the end of the cooking time:
Display will show “END” and 3 tones will sound.


