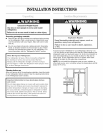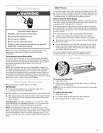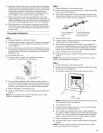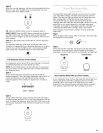
4. Alignandreplacethetoplefthingeasshown(seeGraphic4).
Tightenscrews.
ElectricaJShockHazard
Reconnectbothgroundwires.
Failureto dosocan resultindeathor
etectricaJshock.
Style1
• Reconnectbothgroundwires.
• Reconnectwiringplug.
Yourrefrigeratorhastwofrontadjustablerollers-- oneonthe
rightandoneontheleft.Ifyourrefrigeratorseemsunsteadyorif
youwantthedoorstoclosemoreeasily,adjusttherefrigerator's
tiltusingtheinstructionsbelow:
1. Movetherefrigeratorintoitsfinalposition.
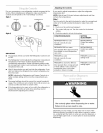
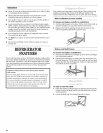
2. Thetwolevelingscrewsarepartofthefrontrollerassemblies,
whichareatthebaseoftherefrigeratoroneitherside(see
Graphic8).
3. Useahex-headsocketwrenchtoadjustthelevelingscrews.
Turnthelevelingscrewtotherighttoraisethatsideofthe
refrigeratororturnthelevelingscrewtothelefttolowerthat
side.Itmaytakeseveralturnsofthelevelingscrewstoadjust
thetiltoftherefrigerator(seeGraphic8).
NOTE:Havingsomeonepushagainstthetopofthe
refrigeratortakessomeweightoffthelevelingscrewsand
rollers.Thismakesiteasiertoadjustthescrews.
4. Openbothdoorsagainandchecktomakesurethatthey
closeaseasilyasyoulike.Ifnot,tilttherefrigeratorslightly
moretotherearbyturningbothlevelingscrewstotheright.It
maytakeseveralmoreturns,andyoushouldturnboth
levelingscrewsthesameamount.
5. Replacethebasegrille.
NOTE:BesuretorefastentheTechSheetbehindthebasegrille.
Style 2
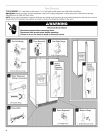
5.
6.
7.
8.
9.
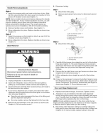
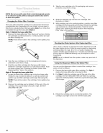
!, Do not remove screw 1
2. Ground wires
3. Green ground wire screw
4. Wiring plug
Read all directions before you begin.
IMPORTANT: If you turn the refrigerator on before the water line
is connected, turn the ice maker OFE
Connecting to Water Line
1.
2.
• Reconnect wiring plug.
1 _ 2 3.
1.Do not remove screw 1 4.
2. Wiringplug
Replace left hinge cover and screws.
Replace the refrigerator door by carefully lifting the door onto
the bottom right hinge. 5.
Align and replace the top right hinge as shown (see
Graphic 6). Tighten screws.
Replace hinge cover and screws. Tighten screws.
Plug into a grounded 3 prong outlet.
Unplug refrigerator or disconnect power.
Turn OFF main water supply. Turn ON nearest faucet long
enough to clear line of water.
Locate a 1/2in. to 11/4in. (1.25 cm to 3.18 cm) vertical COLD
water pipe near the refrigerator.
NOTE: Horizontal pipe will work, but drill on the top side of
the pipe, not the bottom. This will help keep water away from
the drill and normal sediment from collecting in the valve.
Determine the length of copper tubing you need. Measure
from the connection on the lower left rear of refrigerator to the
water pipe. Add 7 ft. (2.1 m) to allow for cleaning. Use 1/4in.
(6.35 mm) O.D. (outside diameter) copper tubing. Be sure
both ends of copper tubing are cut square.
Using a grounded drill, drill a 1/4in. hole in the cold water pipe
you have selected.
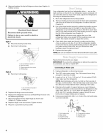
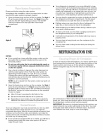
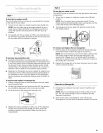
................ 1
7 ...................2
1.Cold waterpipe 5. Compression sleeve
2. Pipe clamp 6. Shutoff valve
3. Copper tubing 7.Packingnut
4. Compression nut


